
Snowflake is a cloud computing–based data cloud company based in Bozeman, Montana founded in July 2012. Snowflake offers a cloud-based data storage and analytics service, generally termed “data-as-a-service”. Its key features include options for Security, Governance, and Data Protection, Standard and Extended SQL Support, Various built-in Tools and Interfaces, easy Connectivity, Data Import and Export, Data Sharing and Database Replication and Failover. Snowflake competes directly with products such as Redshift, MS SQL Server and Postgres.
In this article, I want to show just how easy it is to create a simple database, build a table, load some data, and then use that data. So, let’s get started!
Log In
You use your web browser to log in to Snowflake (if you do not already have access to a Snowflake account, you can create a temporary account here).
Once you have logged in to Snowflake, you will find a Worksheet page where you can write and run SQL commands (if you are familiar with the SQL language, good because the Snowflake query syntax used is pretty-close to standard SQL). Snowflake Worksheets also provide a powerful and versatile method for performing other Snowflake tasks such as data loading, definition, and manipulation.
Create a Database
As part of Snowflake, Snowflake provides a system-defined, read-only shared database named “SNOWFLAKE” that contains metadata, as well as historical usage data, about the objects in your organization and accounts. Snowflake also gives you a “sample” database to explore and experiment, named “SNOWFLAKE_SAMPLE_DATA”.
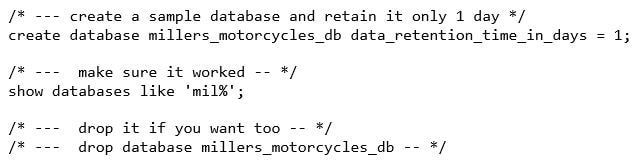
Rather than use the provided sample database, below are the SQL statements I used to create a new database using the standard SQL create command (with a data retention period of 1 day) and then list the databases starting with ‘mil'(just a note – I always include a drop command with any create and it is commented-out here):
To run the commands, find the query space on the worksheet, and enter the SQL commands and then click the Run button:

Once you run the commands, the results will be displayed below in the Query results space:

Adding a Table
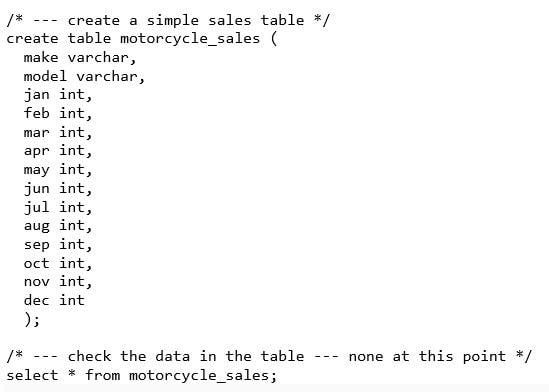
Now that I have my own database (millers_motorcycles_db), we can build a table (in that database), again entering and running the following standard SQL statements:
Worksheet Navigation Pane
To verify that the new table was created, I always run a select command against it, but you can also use the left-hand worksheet navigation pane. In that pane, you should see all of the databases you have access to, including our millers_motorcycles_db database. If you click the database name and expand Tables, you should see the newly created table listed there.
No-Programming Data Load
Okay, now its data-load time. Like most tasks, Snowflake offers a “no-programming” approach to loading data into a table. To load data from a comma separated values or “CSV” file into our motorcycle_sales table I performed the following steps:
First, find and click the Databases icon on the Snowflake worksheet:

Next, click Load Table:

On the Load Data dialog, select what Snowflake refers to as a virtual warehouse (the default COMPUTE_WH):
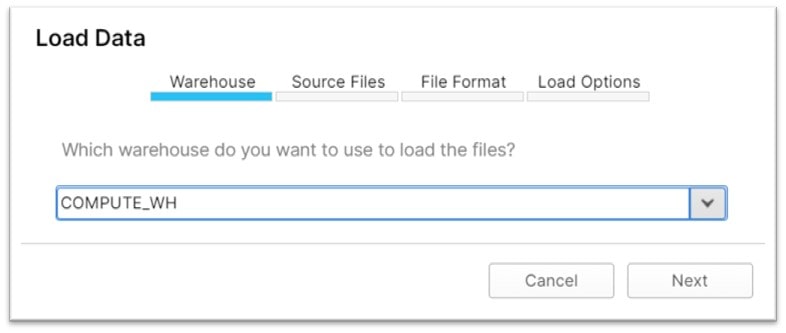
Snowflake utilizes virtual warehouses which are clusters of computing resources (including memory, temporary storage and CPUs) to perform tasks such as data manipulation and SQL execution.
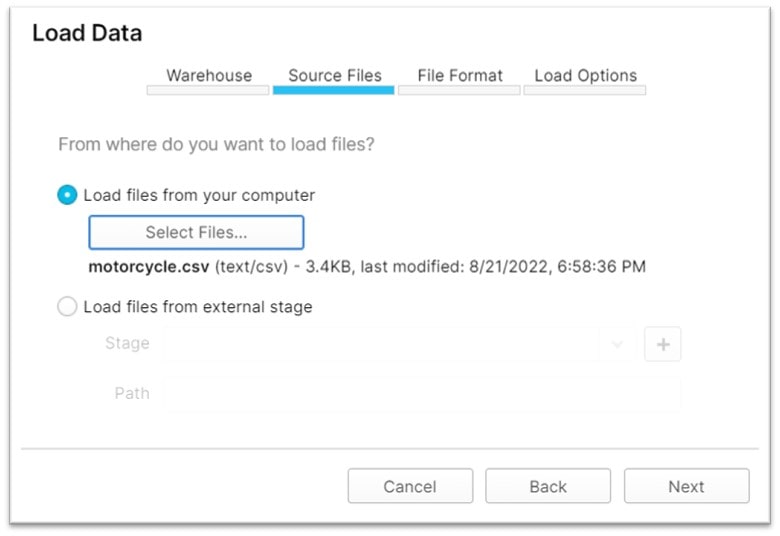
Once you have designated a virtual warehouse, you can employ the Load Data dialog and click on the Select Files… button and navigate to a source file (of data) to load:
Once you click Next, on the File Format tab, you can click the + button to define the format of your file.
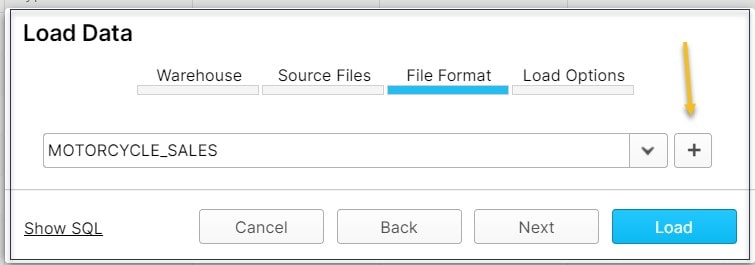
File formats you define can be saved and re-used so you want to be sure to provide an explicit Name and correctly set or select each of the following attributes:

After you click Finish, Snowflake will load the data from the file and show the completion status of the load. Snowflake works on the concept of “END-TO-END ENCRYPTION” where only end-users can view the data, as all data is encrypted during transit (loading).

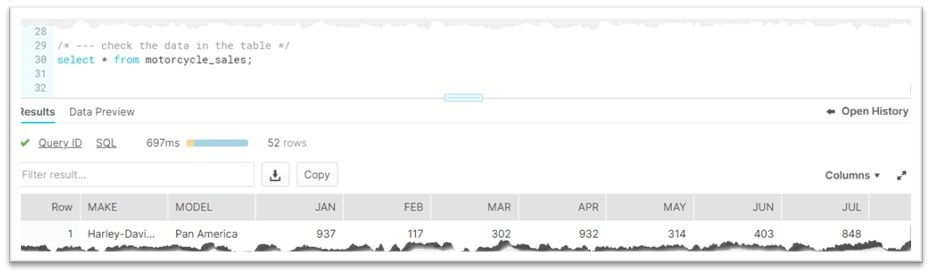
After the load task completes, if you run a select against the motorcycle_sales table, the results space (in the worksheet) now shows some data:
Snowsight
Now that we have a database and a table with data in it, I want to use that data to create a chart. Snowflake provides an effective tool to extend the functionality found in Snowflake worksheets, called Snowsight and Snowsight supports the creation of the following types of charts: Bar charts, Line charts and Scatterplots.
To access Snowsight from the Snowflake worksheet, you click on the far right Snowsight icon:

Use Snowsight Charting
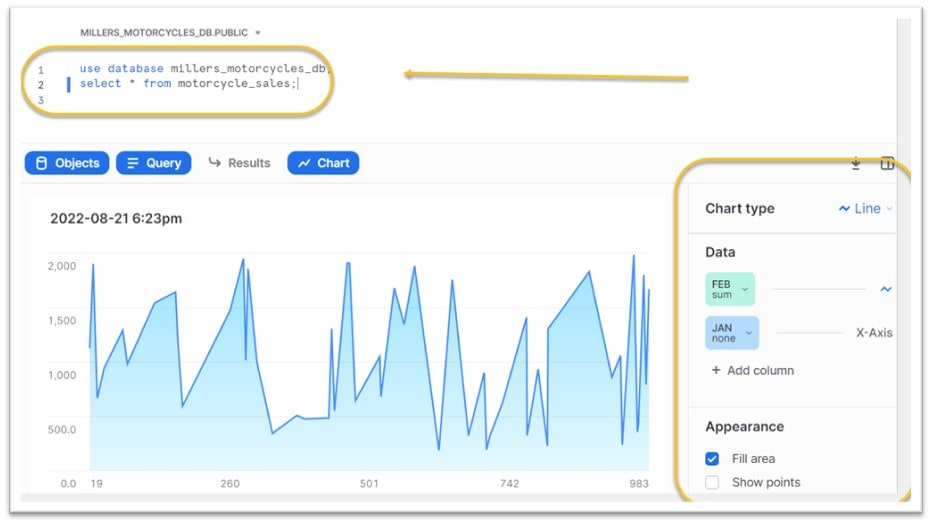
Once you have accessed Snowsight, you will notice that the layout is similar to a Snowflake worksheet: a left navigation pane, a task or query area and a results pane. Here, in the query area, I enter and run the following SQL commands:

Once the output of the select statement is displayed in the results pane, you can click on the Chart button to have Snowsight automatically convert the rows of data output to a chart. In the lower right area of Snowsight you can view and edit the chart properties:
Going Dark
Dark mode is a display setting for user interfaces that presents light-colored text, icons or other UI elements on black or dark grey backgrounds or dark surfaces (the opposite of the commonly used light theme design). Dark mode is a popular option offered in most of today’s mainstream interfaces (and my personal preference). Unfortunately, Snowflake hasn’t implemented this option just yet, but if you are using Chrome, you can achieve the same look and feel by downloading an enabling a 3rd party extension named Dark Reader. Below is a view of Snowflake after Dark Reader has been enabled:

Interested in Learning More?
Are you interested in learning more about using Snowflake? Then Contact QueBIT today and a technical expert we’ll be happy to help. Like this post? Feel free to connect with me on: LinkedIn.