There is a very helpful article describing how to encrypt a column of data in a relational database by using symmetric encryption (sometimes known as column-level encryption, or cell-level encryption) using Transact-SQL found here: https://docs.microsoft.com/en-us/sql/relational-databases/security/encryption/encrypt-a-column-of-data?view=sql-server-ver15. After reading the article, I felt like working-through the provided examples myself in order to dig a bit deeper into the topic.
For some background, cryptography is “the study of concepts like encryption and decryption to provide secure communication”, whereas encryption is “the process of encoding information by converting the original representation of the information, known as “plaintext”, into an alternative form known as “ciphertext” so only authorized parties can decipher a ciphertext back to plaintext and access the original information:
Symmetric encryption is one example of an encryption process where a single, secret key is used to both encrypt and decrypt information. This is the approach I focused on with this exercise.
Step 1 Creating a Database Master Key
Before creating any certificates or other keys, a Database Master Key must be created. A database “master key” is a symmetric key used to protect asymmetric keys in a database. When it is created, the master key is encrypted by using the AES_256 algorithm and a user-supplied password. Not all databases have a master key defined and the sample database I used didn’t (have one defined), so I needed to create one.
To create one, you need to be sure that you have the following permissions:
- CONTROLpermission on the database.
- CREATE CERTIFICATEpermission on the database (only Windows logins, SQL Server logins, and application roles can own certificates. Groups and roles cannot own certificates).
Assuming that you have the required permissions, you can use the following script to create a master key:

When creating a master key, make sure you use a “complex” password (according to Microsoft, complex passwords consist of at least seven characters, including three of the following four-character types: uppercase letters, lowercase letters, numeric digits, and non-alphanumeric characters such as & $ * and !). Read more about database master keys here.
Step 2 Creating a Certificate and Key
The CREATE CERTIFICATE sql command can be used to create a self-signed certificate in SQL Server. The private key of such a certificate can be protected either by a password or by the database master key. In the example given, a certificate named HumanResources037 was created intending to encrypt employee social security numbers:

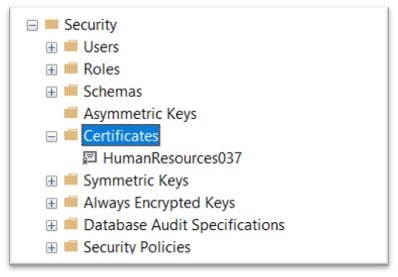
Once I ran the above command statements, the certificate is listed in the database, under Security then Certificates:
A Symmetric Key
Symmetric keys are a database-level “securable” contained by the database that is its parent. Once one is created, there are a number of specific and limiting permissions that can be granted on a symmetric key (more on this later). Using the certificate that I just created (HumanResources037), I can now create a new symmetric key named SSN_Key_01 by using the following sql commands:

Step 3 Encrypting with Simple Symmetric Encryption
In the original article, the [AdventureWorks2012].[HumanResources].[Employee] table was utilized. That table includes a column named NationalIDNumber which contains, of course, employee Social Security Account numbers (SSAN) in plaintext. To see Symmetric encryption in action, the example added a new column to the table which will contain those SSANs encrypted as ciphertext using sql ALTER TABLE:

To “load” the new column with encrypted information, the symmetric key we created is used by performing an open sql command:

An open symmetric key will continue to be “open” and “usable” until it is either explicitly closed or the query session is terminated. If you open a symmetric key and then switch context, the key will still remain open and be available for use in the impersonated context. A side note: you can always display information about all open (symmetric) keys by running the following SQL query:

Since we now have our symmetric key in an open state, we can encrypt the values in the NationalIDNumber column and load them into the new column EncryptedNationalIDNumber using the following SQL commands:

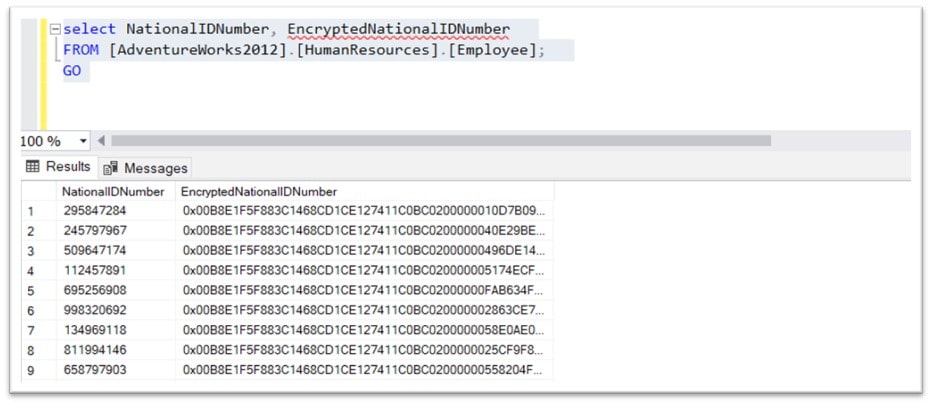
To see the results of the above commands, you can query the 2 columns and see that the SSANs have all been encrypted:
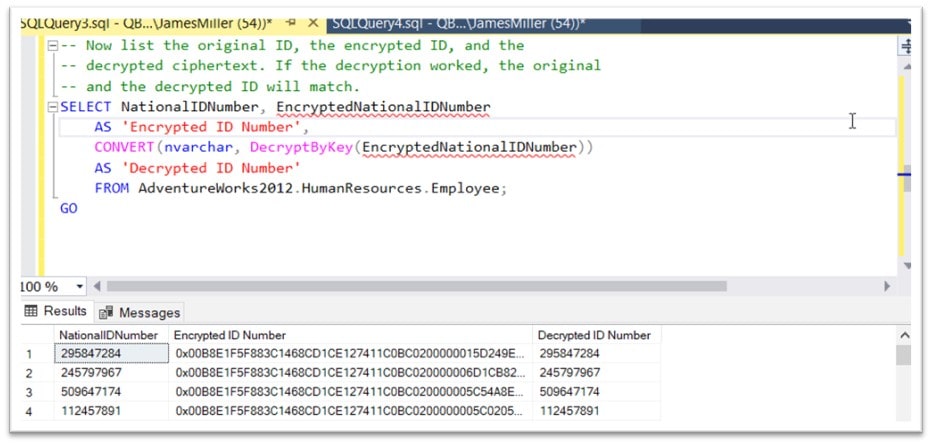
In the article examples, the following commands were used to perform an “on the fly” decryption of the information:

Below are the results -seemed like it worked!
Step 4 Denying Users
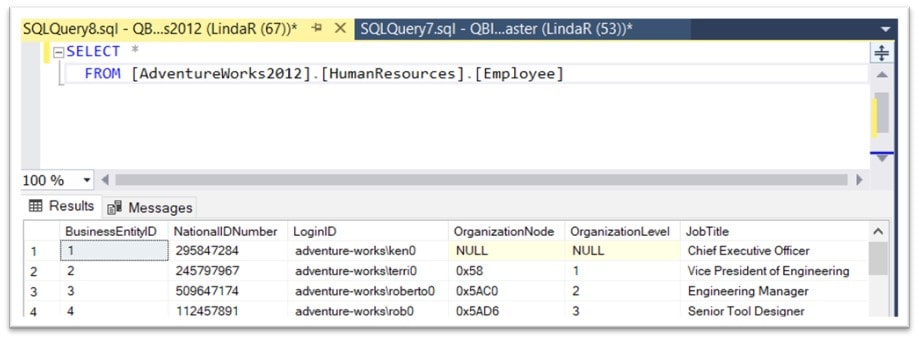
One thing the original article didn’t necessarily show is how would we use this approach to make sure the selected information is never available in plaintext to non-privileged users. To test that only specific users can see the encrypted data, I created a new user “LindaR” and logged in as her. “She” executed the following query and was able to see all of the data in the column (NationalIDNumber):
Given the above, I as the DBA executed the following query to deny LindaR access to that specific column:
DENY SELECT ON HumanResources.Employee (NationalIDNumber) TO LindaR;
GO
If LindaR then reruns the above query, she receives the following error message:

Not Done Yet
Given that LindaR is pretty clever, suppose she then tries to modify the query using the SYSMMETRIC KEY that we created to encrypt/decrypt the data? Sure enough, she still has access to the data by decrypting the added column using the key:
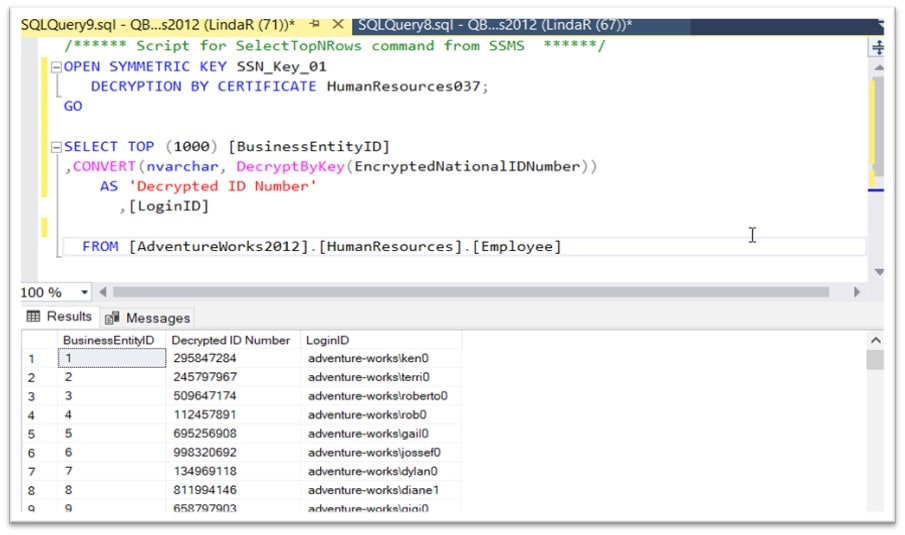
That’s not what we want! So, the final step is to edit the properties of the LindaR user to explicitly Deny permissions to “Select All User Securables”:
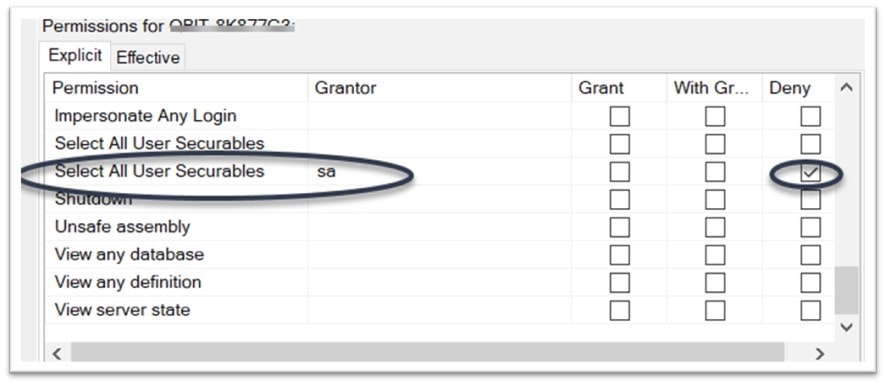
Use can also use SQL commands to update these permissions, as long as you run the query from the Master database:

Now, if LindaR tries to use the SYMMETRIC KEY, she’ll receive the following message:
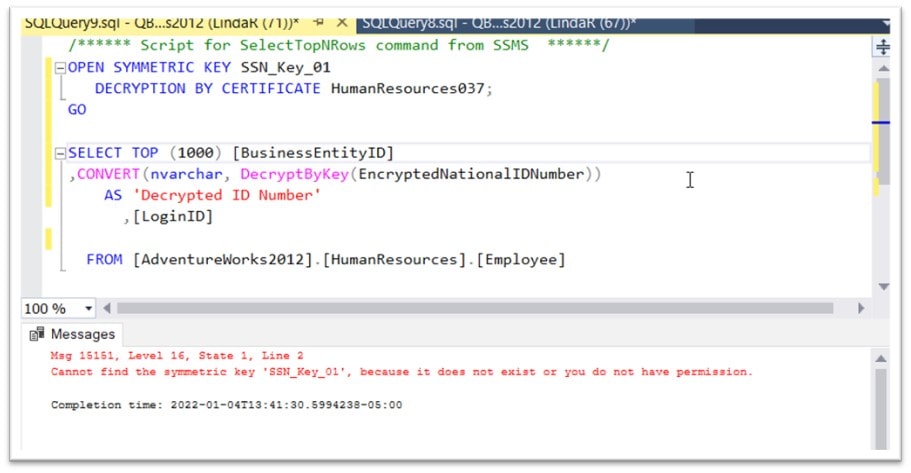
Perfect!
