
Custom Code Snippets for Planning Analytics Workspace
With the release of Planning Analytics Workspace version 2.0.88, the ability to upload and use custom code snippets was added to the Workbench in Planning Analytics Workspace. In previous releases, there was only a select amount of code snippets to choose from. After creating and uploading a custom code snippet as a JSON file, that portion of code can be used in any process available on the database. This functionality is accessible via the “Add snippet” dropdown available while editing a TI Process.

Creating a Custom Code Snippet
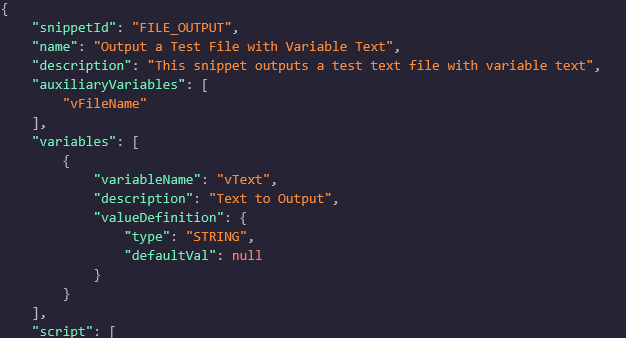
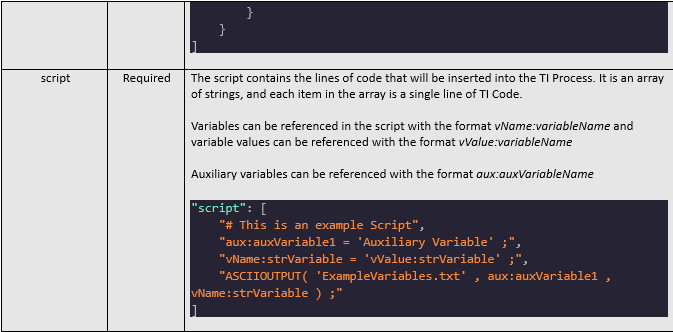
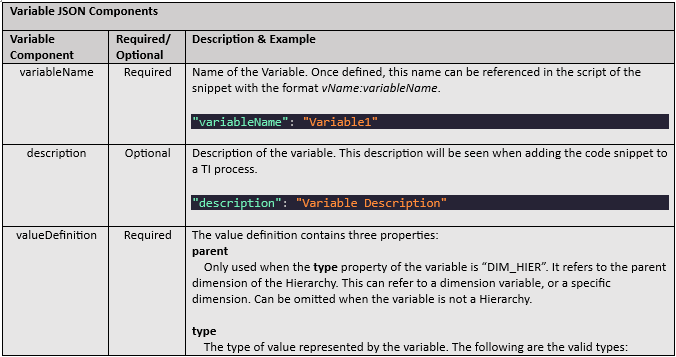
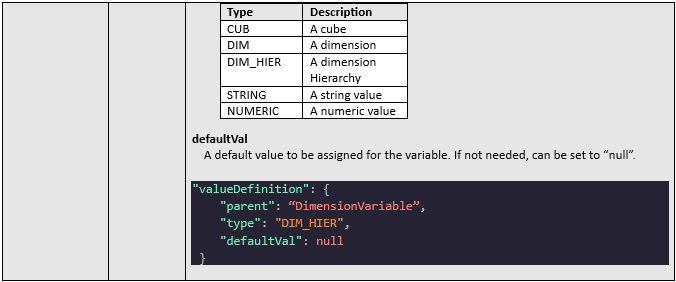
To create a custom code snippet, start by creating a JSON file using a text editor. The file must be populated with several objects and properties, not all of which are required. Here are the contents of a sample code snippet JSON file that will be referenced throughout this article:


Uploading a Custom Code Snippet
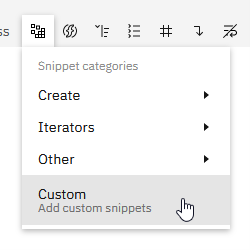
After creating a JSON file with all of the required components, the snippet can be uploaded into PAW for use. To do so, open any process in a workbench, preferably one you want to add the new snippet to. In the top right of the process click the “Add snippet” button and then select “Custom”.

In the Snippet manager screen that appears, select a folder to upload the snippet to (optional). Then on the top right of the screen click the “Upload snippets” button.
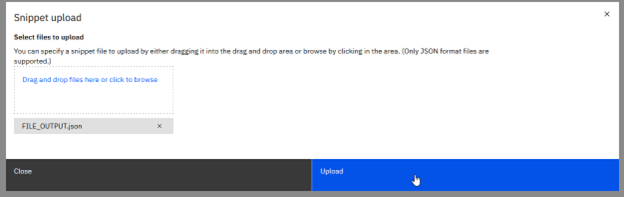
Drag and drop or browse and select from the file manager the snippet(s) that are to be uploaded. Then click the “Upload” button to confirm and upload.
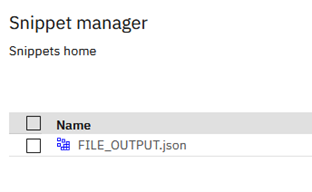
A checkmark will appear next to the snippets that upload correctly. If an error appears, it is likely that there is a syntax error, or a required component was not included within the JSON file for the snippet. Once uploaded, the snippet will now be present and available to use in the snippet manager window.

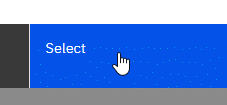
To add the snippet to a process, simply open the custom snippet manager window from the process that the snippet should be added to, with the cursor on the line the snippet is to be added. Then select the box next to the desired snippet and click the “Select” button.

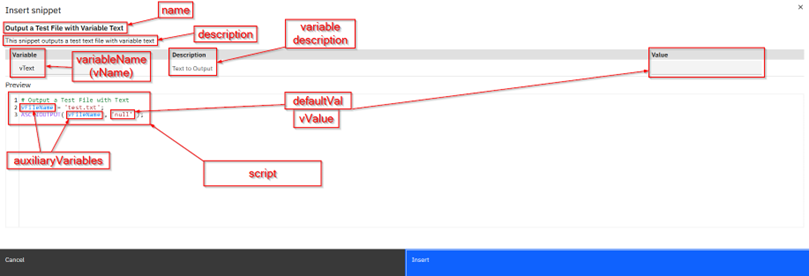
This will open the “Insert snippet” window. Below is an image describing the components of this window that were defined in the sample code snippet above. If required, the values for each variable can be updated to alter the code snippet. In the case below, “null” would be replaced with any string value entered in the “Value” box for the vText variable. The preview portion of the window will update with any changes to the variables as they are made.
After confirming any variables are updated accordingly, click the “Insert” button on the bottom right of the window to insert the snippet into the code.

Note that if an auxiliary variable already exists in the process with the same name, the Insert snippet window will automatically change the variable to be unique. It does this by appending “_exists_#####” to the end of the variable name, where # is a random alphanumerical character.
![]()
After adding snippets to the code, be sure to save the process to commit any changes.