
Pretty Good Privacy (PGP) is an encryption program that provides cryptographic privacy and authentication for data communications. PGP is used for signing, encrypting, and decrypting texts, e-mails, files, directories, and whole disk partitions and to increase the security of e-mail communications.
When you send a message using PGP, the message is converted into unreadable ciphertext on your device before it passes over the Internet. Only the recipient has the key to convert the text back into the readable message on their device.
When you use IBM Planning Analytics (PA) in the IBM Cloud, you have the option of enabling PGP in your environment. This article explains how to make it work.
Alternatives to PGP?
GnuPG is another free encryption standard that companies may use that is based off of OpenPGP. GnuPG serves as a replacement for Symantec’s PGP. The main difference is the supported algorithms. However, GnuPG plays nice with PGP by design. Because GnuPG is open, some businesses would prefer the technical support and the user interface that comes with Symantec’s PGP.
WinGPG is a tray-based classical Windows application, Windows NT Explorer shell extension, and a classic GPGv2 distribution. Secure your data with thissimple encryption tool. Processing documents and other files without encryption could endanger your company’s and even your personal security.
Before You Start
Before you start, you need to send a service request to IBM Support and ask that PGP encryption be enabled and configured in the IBM Cloud environment you are using:
Note: Once you receive notification that PGP is enabled, you’ll need to make sure you have administrator access to the IBM Cloud based Planning Analytics server as well as access to the shared folder to be able to complete the PGP implementation. Also, later in the setup process you will need to submit a second IBM request ticket (more on this in a bit).
The Step-by-step
First, establish a connection to the Planning Analytics Desktop using a remote desktop client (RDC). RDC clients must be configured to successfully connect to PA, so save yourself some work and use the provided preconfigured Windows Remote Desktop Connection client, MAC client or Linux (rhel) client that are included in the welcome kit zip file for your convenience (remember, a second copy of these RC clients are available on the folder share under installRemote Desktop Services).
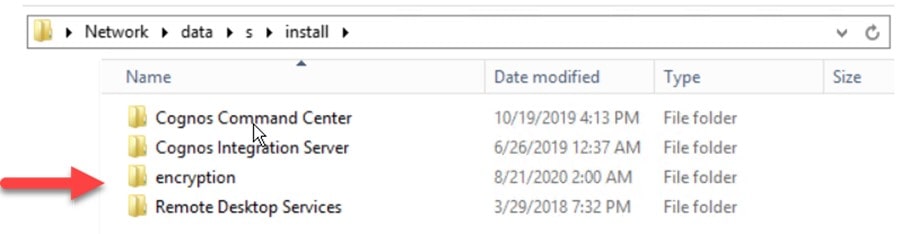
Next, navigate to your shared folder and locate a folder named “install/encryption” (you’ll need to use the username and password provided in the Welcome kit):
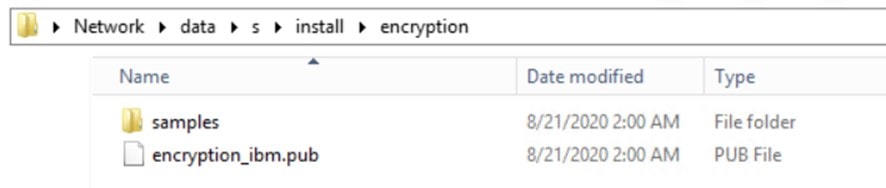
Then, in the shared folder, (if PGP has been enabled), you’ll be able to navigate to a new folder named: \datasinstallencryptionsamples:
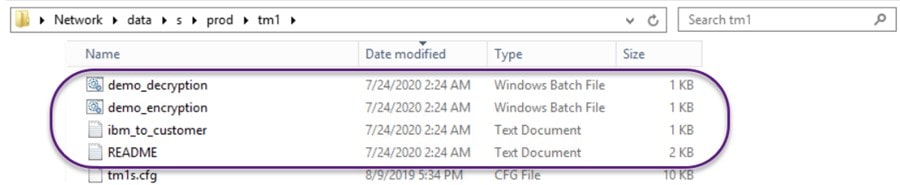
Finally, you’ll need to manually (using File Explorer) copy all *.pro files (there are two) to your TM1 Server data directory (for example, S:prodtm1Data) and copy all of the *.txt and *.bat files (there are four) to the server directory (for example, S:prodtm1):

What are these Files?
The files include 2 TurboIntegrator “demo” processes; I’ll explain these in a bit. The other files are MS Windows .bat (batch) files that will initiate an encryption or decryption of a file. Lastly there is a “sample” text file you can use to test the encryption/decryption process as well as a standard README file with some minimal notes.
Complete the Setup
After the files are copied, you’ll need to restart your TM1 Server for the .pro files (processes) to appear within the TM1 server.
Another IBM Request Ticket
Now you are ready for the next and final IBM request required to make PGP work. What you need to do (as explained in the README.txt file), is “Create a ticket, attach your public key, and ask for your public key to be imported”. Before you can do this, you need to create your own public key (Note: In the Welcome kit provided after PGP is enabled, IBM provides an IBM public key, but you will need your own). Let’s create a Public PGP key:
- On your own computer, download and install GoAnywhere OpenPGP Studio (its free: http://www.goanywhere.com).
- Open GoAnywhere OpenPGP Studio and click on Create.
- Enter your Name, E-Mail Address (this email address will be used in the encryption/decryption processing) and Passphrase. Make sure you select “RSA” as the Key Type. You can leave the “Expires On” field blank.
- GoAnywhere OpenPGP Studio will create a key for you, and it should appear in the OpenPGP Keys list. Right-click on the key and select Export Public Key(s).
- The software will create a public key with an .asc extension. This is the public file you will attach to the IBM request, that they will “import” into the IBM Cloud environment for you.
Let’s Encrypt
In this example, we will assume we have extracted data to a file from a specific planning analytics view and the file has been saved to S:prodtm1 (where you previously saved the .txt and .bat files).
In MS Windows, a batch file (.bat) is a file that stores commands in sequential order. A command line interpreter then reads the file and executes the commands in that order. A batch file is simply a text file saved with the . bat file extension.
To make this exercise work, you need to edit the provided “demo” batch file. Since a batch file is a text file, you can use notepad or any text editor to do this.
Open the demo_encryption.bat file in your text editor, find and replace firstname.lastname@mycompany.com with the name (the email address you entered when creating your public key earlier) in your public key. Next, find and replace the two instances of the string customer_to_ibm.txt with filename.extension (the file that you want to encrypt) or, for this simple exercise, you can leave the name of the test file provided.
Below is the sample batch file sent in the welcome kit:
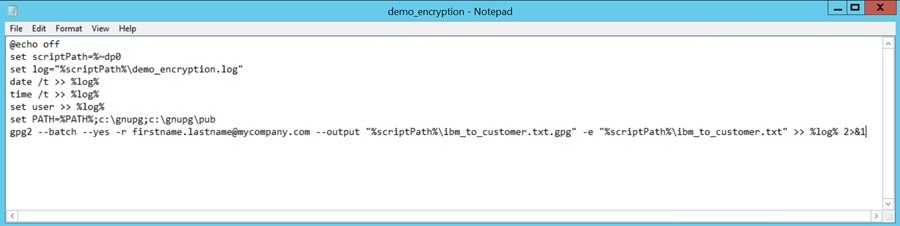
The important line in the script file is:
Testing
Now, to test the encryption process we just set up, what do we need to do?
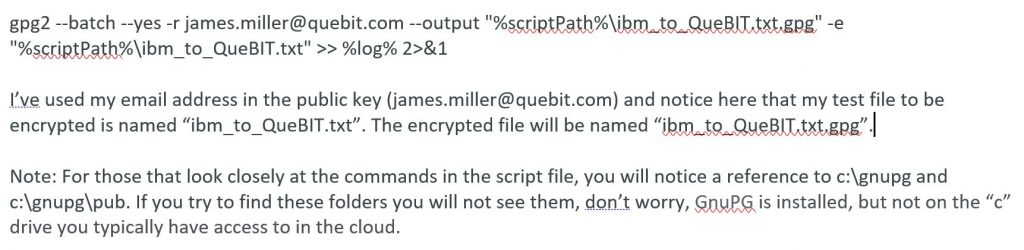
Again, on the remote desktop, start Architect, and run the process demo_encryption.pro. The encrypted file, named filename.extension.gpg, should appear next to filename.extension. This process can’t be any simpler. That is, there is one single line of code that simply executes the Windows batch script:

Notice the encrypted file is named “ibm_to_QueBIT.txt.gpg”. The .gpg file extension is used for an encrypted file format created by Free Software Foundation, Inc. These GPG files are also known as “GNU Privacy Guard public keyring” files. Only the GNU Privacy Guard software can be used to open and access the data stored in these .gpg files.
By the way, it is recommended you execute the batch file via the TurboIntegrator process; right-clicking and running the script (even as Administrator) yields inconsistent results.
Testing the Encryption
If you go ahead and try to open the encrypted file, here is what you will see:

Final Thoughts
Well, now having jumped through a few hoops to “prove out” (yes it does work) the setup and use of PGP for encryption with IBM Planning Analytics, I should mention there are inherent problems with the use of it. Mostly, it is meant for smaller files and where solutions don’t require the highest level of security. You can read up on the OpenPGP standards online at: https://tools.ietf.org/html/rfc4880.
I should also mention the obvious – this was an exercise, and in a “production environment” you would never hard code file names, use processes or scripts named with “demo” and you would be a bit more organized and not drop all of these files under the tm1 folder, etc. but again, this was just an exercise. Perhaps in a future post I will demonstrate the decryption process as well as provide some recommendations for automating the processing.
Ask QueBIT
Need help setting up PGP? Want to explore other encryption options? The experts at QueBIT are happy to discuss your needs. We’re here to help!