
Creating Picklists in Planning Analytics
Picklists in Planning Analytics are the best way to help control the inputs users can put into a cell. When users are doing inputs into a cell, the possibility for error can be high. Imagine a rule that takes a value from an input cube and puts it into a month as defined by a user’s inputs. A user may type into the month cell ‘Fev’, a typo, when they meant ‘Feb’. The user may not notice they incorrectly typed the name of the month, close the input page, and not realize that the rule behind the scenes failed and their data never got in. A situation like this can easily be avoided with a picklist!
A picklist creates a dropdown of valid inputs for a cell. When a picklist is active on a cell, a user doing an input can either select a valid input from the dropdown or they can type in a valid value. If the user tries to type in a value that is not defined in the picklist, that value is rejected. This removes any possibility of typos and makes sure all data is entered in properly. In this article, you will learn the two different ways a picklist can be created and the three different types of picklists that can be created in a cell.
Creating an Element Attribute Picklist
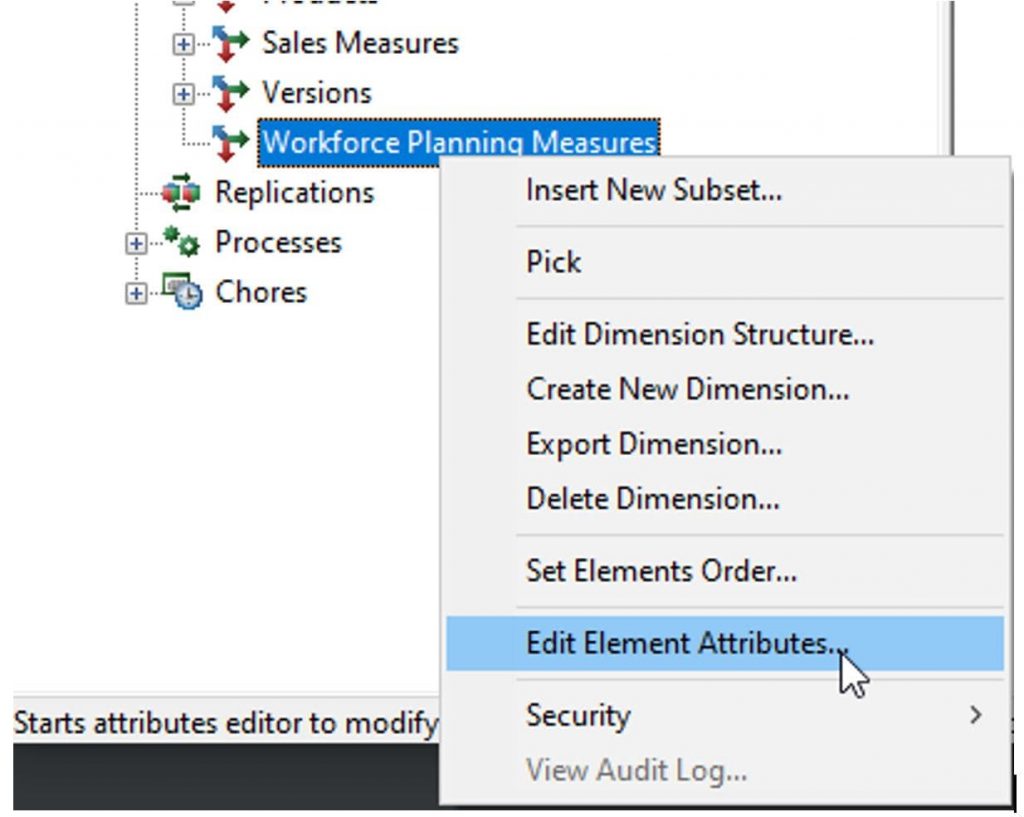
The simplest way to create a picklist is to create a Picklist attribute on a dimension. This should be used in cases when you want every cell of a specific element to contain a picklist dropdown. For example, imagine you have a Workforce Planning input cube, and in the Workforce Planning Measures dimension there is a Start Month string measure for the planners to input the month in which an employee starts. An element attribute picklist could be created on the Workforce Planning Measures dimension, and a picklist can be created on the Start Month element so that every Start Month cell in the Workforce Planning cube contains a dropdown of months. Note that creating a picklist on an element using this attribute method will activate the picklist on this element across all cubes that contain this dimension.
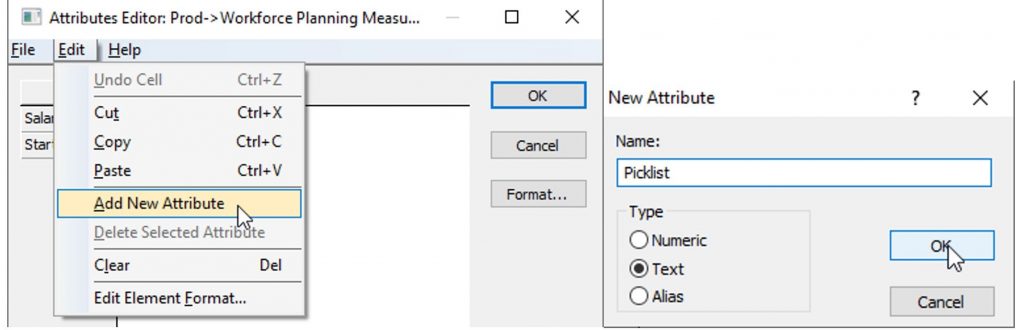
To create this picklist attribute, simply create a dimension attribute on the desired dimension as you would create any other attribute. This attribute must be a Text attribute on the dimension, and it must be called Picklist. If the name of the attribute is not Picklist, Planning Analytics will not recognize the attribute as defining a picklist. Once this attribute is created, it can be filled in to define picklists on the elements. The three different types of picklist that can be entered here are defined below in the Picklist Types section.
Creating a Picklist Control Cube
Another option for creating picklists is to create a Picklist Control Cube. Creating a picklist control cube and defining picklists in it is slightly more complex than the attribute route, but it allows for the creation of picklists on a specific cube and specific intersections of that cube. This is in contrast to an attribute picklist, where the picklist applies to all cubes and cells where the element resides.
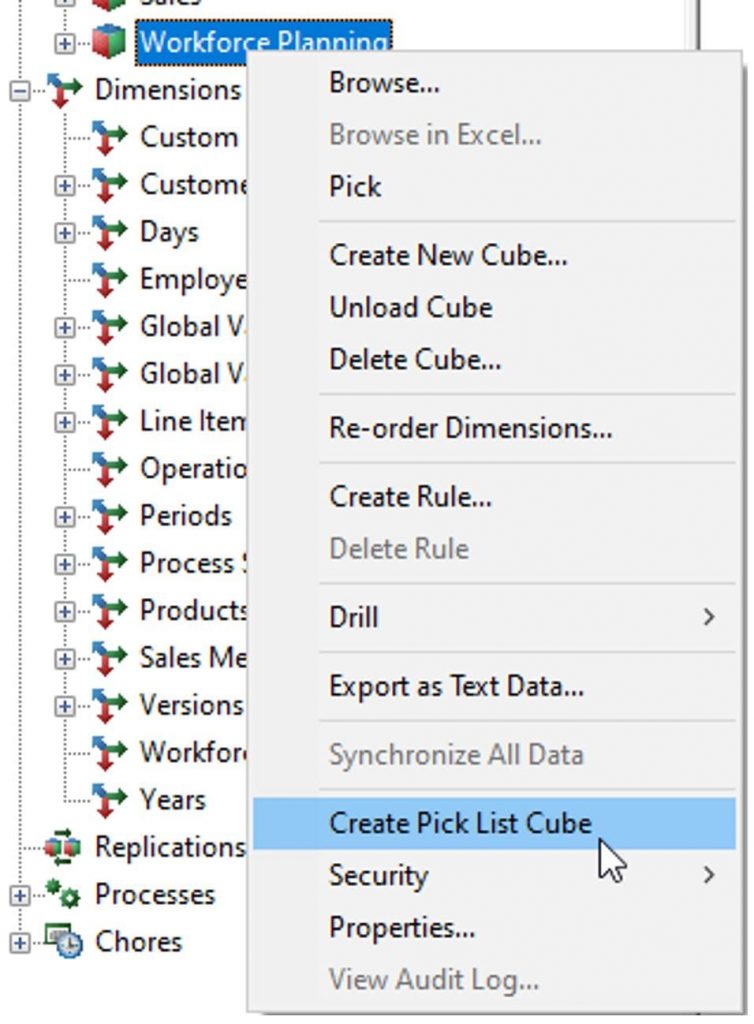
First, pick the cube you would like to create a picklist cube for. Then, right click on the cube and select Create Picklist Cube.
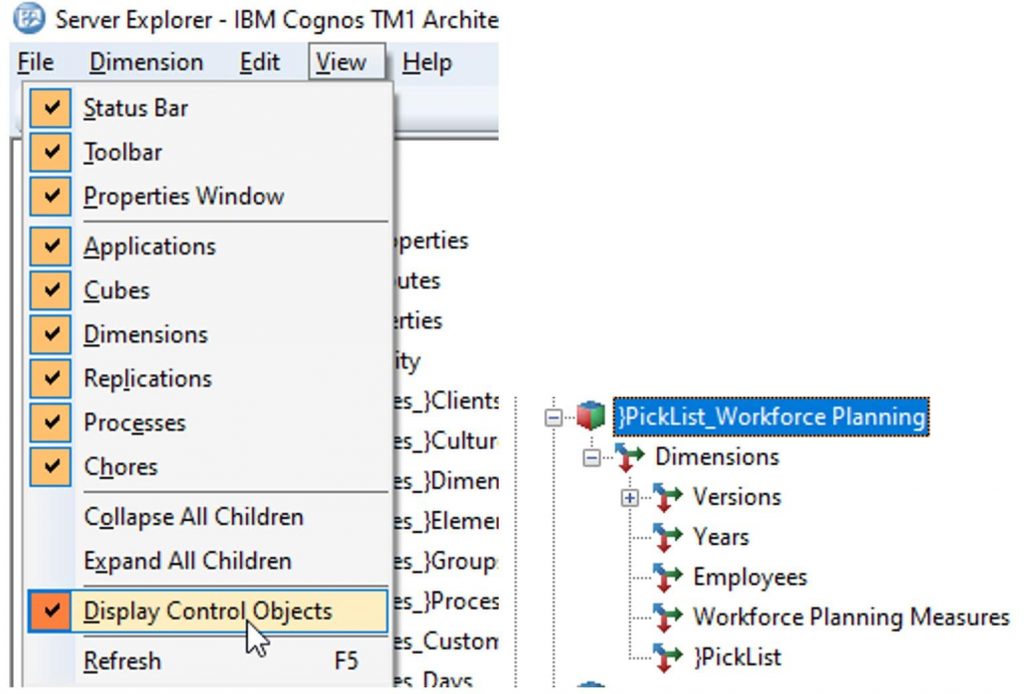
Once this has been done, a picklist cube will be created. It will have the name }Picklist_<Cube Name>. To view this cube, you must make sure Display Control Objects is turned on. This cube has all the same dimensions as the cube in question but has an extra }PickList dimension.
Now that the picklist cube is available, picklists can be defined in the intersections of the cube. The intersections in the picklist cube where picklists are defined will define which intersections and which picklists are applied to the corresponding cube. These picklists can either be defined by manually inputting the definitions into the picklist cube or by creating a rule on the picklist cube. The rule is preferable, as it is easier to maintain and tweak as needed. A rule allows you to apply a picklist definition to many cells very quickly, and it allows you to define very precise conditions on where the picklists will be applied. For example, instead of applying to all Start Month cells as the attribute-style picklist would, you can define the picklist rule on Start Month to only apply to certain live Versions and not to archived, read-only versions.
Note that a picklist as defined in a Picklist Control Cube overrides picklists defined in a Picklist attribute.
Picklist Types
Now that you’ve created your method of picklist, either an attribute or cube, it is time to define what will make up the dropdowns in the cells. There are three types of picklists that can be defined in a picklist attribute or in a cell of a picklist cube: a Static picklist, which is a set list of items to choose from, a Subset picklist, which uses a dimension subset to drive the items in the dropdown, or a Dimension picklist, which creates a dropdown in a cell containing every element of a given dimension.
Static Picklist
A Static Picklist defines a set list of items that will appear in the dropdown of a cell. This list is manually defined and will not change unless the picklist definition is changed. This picklist requires the following syntax:
static:value1:value2:value3: … :valueN
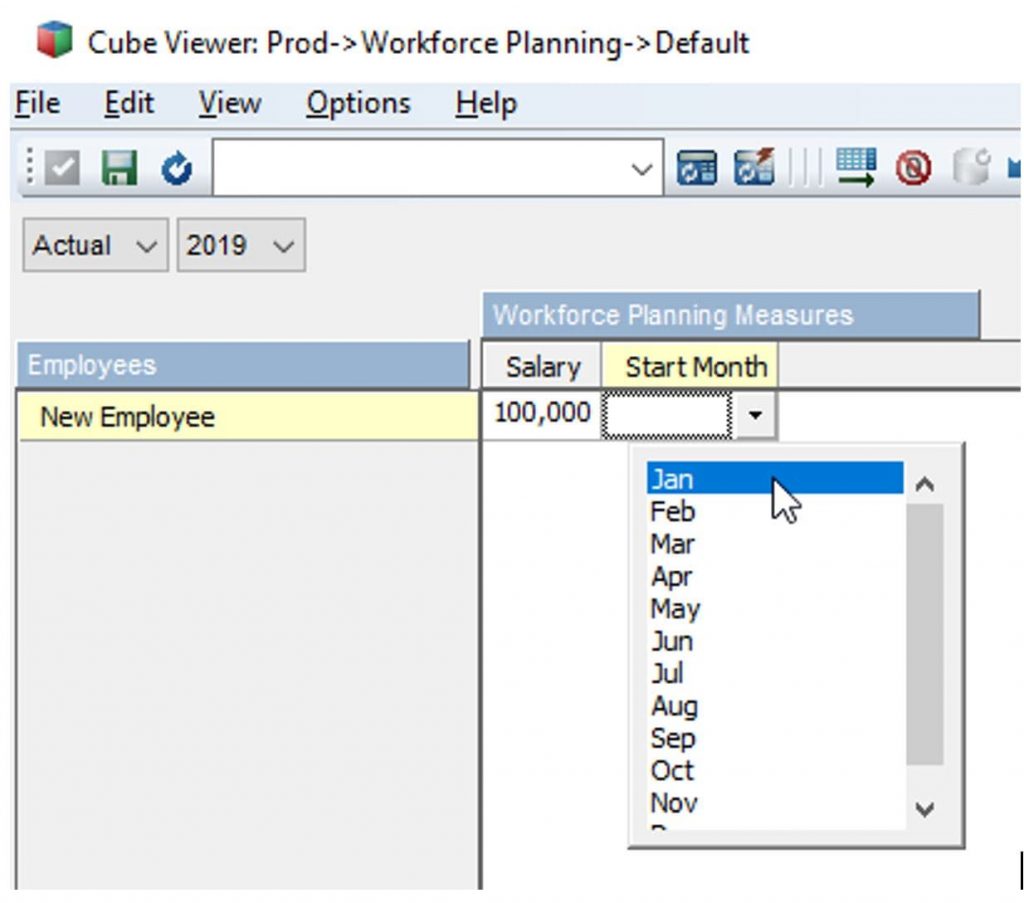
A static picklist is great when defining a dropdown for a cell that will likely never change. Months are a great use case of a static picklist. Imagine I wanted to add a month dropdown to my Start Month Workforce Planning Measure. In my Picklist Attribute for Start Month, I would put the following:
static:Jan:Feb:Mar:Apr:May:Jun:Jul:Aug:Sep:Oct:Nov:Dec
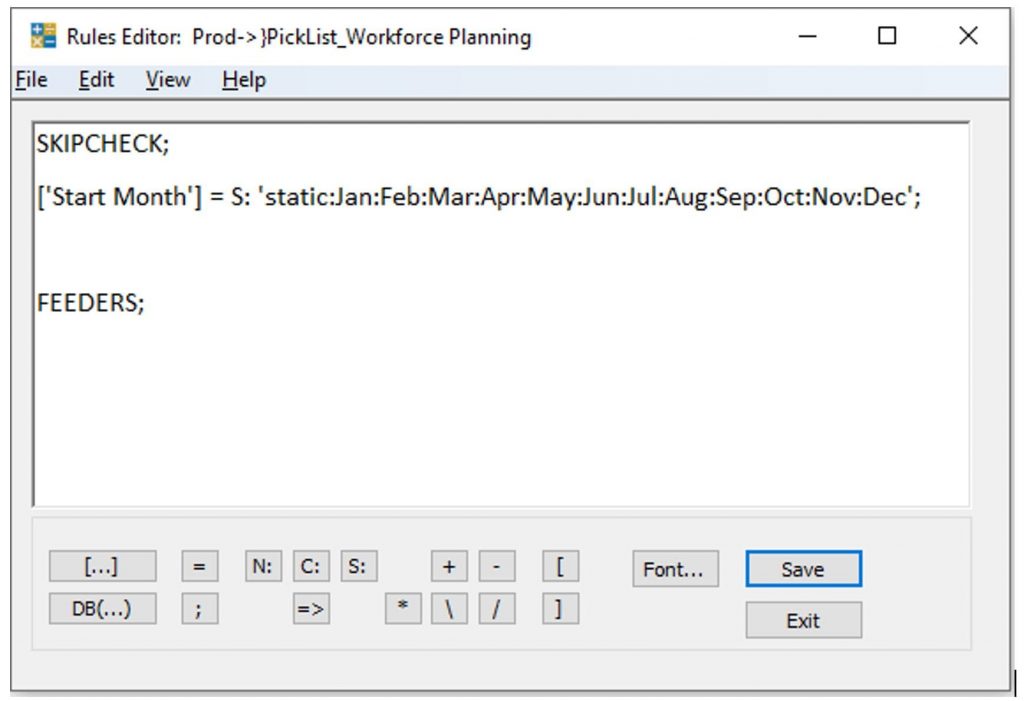
This will create a dropdown of months wherever the Start Month element appears. I could also do this as a rule in the picklist cube by doing the following:
[‘Start Month’] = S: ‘static:Jan:Feb:Mar:Apr:May:Jun:Jul:Aug:Sep:Oct:Nov:Dec’;
Blank values can also be added as a possible value in static dropdowns. This is needed if a user puts a value in a cell and then wants to clear it by replacing it with a blank. TM1 Web and Planning Analytics Workspace will automatically add a blank option to picklists, but for Architect and Perspectives, this blank value needs to be explicitly added to the picklist definition. To do this, just add in an extra colon at the beginning, end, or between two values in the picklist definition.
Blank at beginning:
static::Jan:Feb:Mar:Apr:May:Jun:Jul:Aug:Sep:Oct:Nov:Dec
Blank between Apr and May:
static:Jan:Feb:Mar:Apr::May:Jun:Jul:Aug:Sep:Oct:Nov:Dec
Blank at end:
static:Jan:Feb:Mar:Apr:May:Jun:Jul:Aug:Sep:Oct:Nov:Dec:
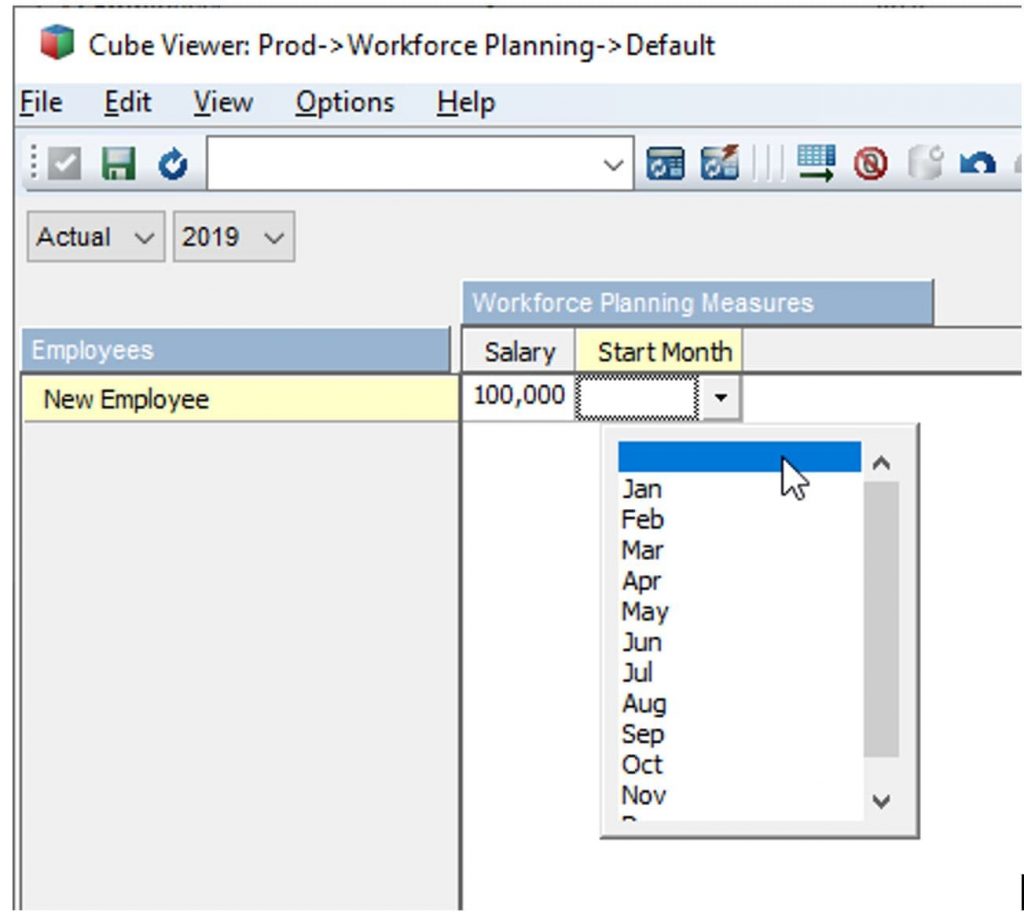
In the below image, I added a blank at the beginning of the dropdown:
Subset Picklist
A subset picklist creates a dropdown of elements in a cell that correspond to the elements in a named dimension subset. The perk of this kind of picklist is that as the named subset changes, elements are added or removed, the dropdown automatically updates as well instantly. MDX subsets that automatically update based on certain conditions can drive a dropdown that will update in tandem. A subset picklist requires the following syntax:
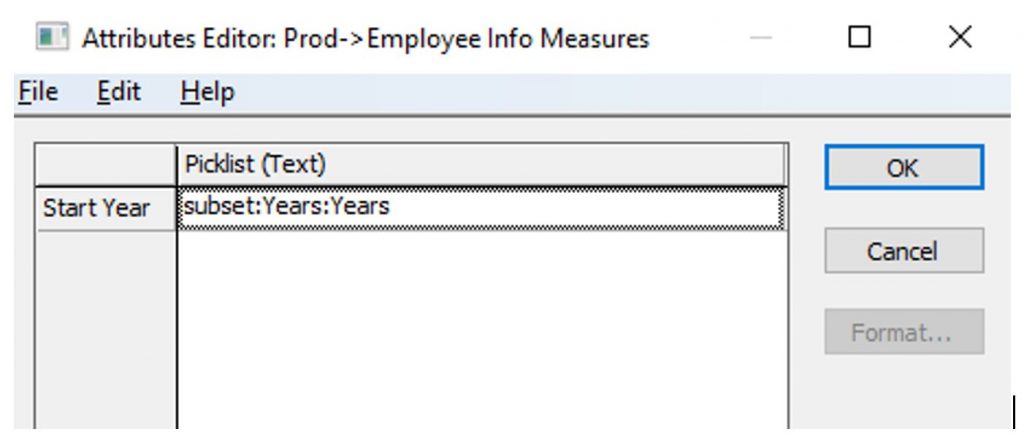
subset:<dimension name>:<subset name>
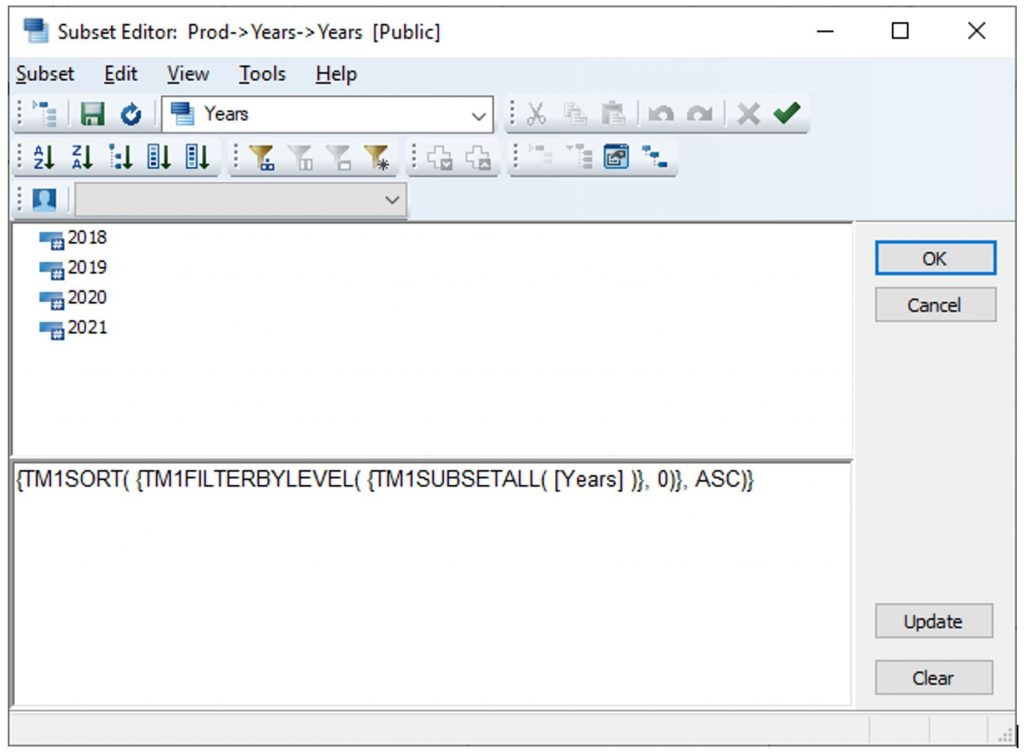
Imagine I have a subset on Years called “Years” that contains all the leaf-level years in the dimension. Then, I have a Start Year measure in an Employee Info Measures dimension. For rule purposes, I may want to make sure the year that is input for Start Year is a valid year in my Years dimension. To do this, I could create a picklist on the Employee Start Year measure that always aligns to my Years subset.
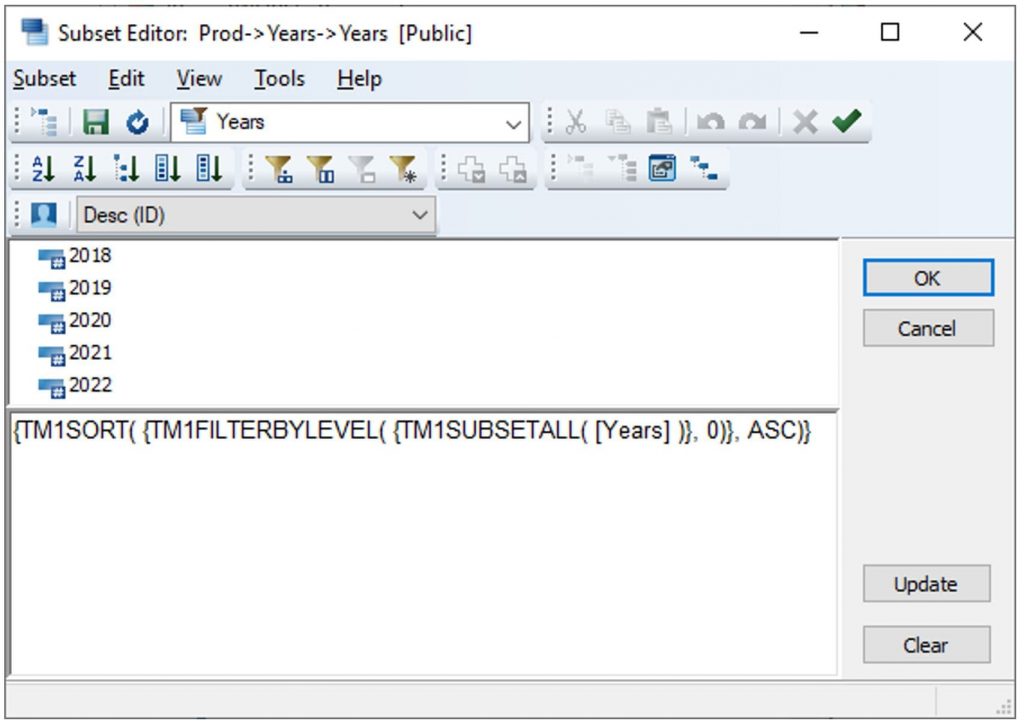
Dynamic Years Subset:
Attribute picklist definition:
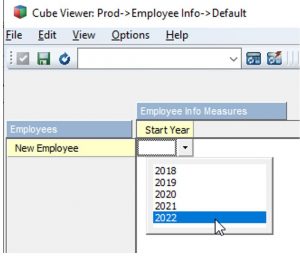
Dropdown contains all elements of my subset:

Now, notice as I add an element, 2022, to my years dimension. It is automatically added to my leaf-level MDX Years subset and to my dropdown.
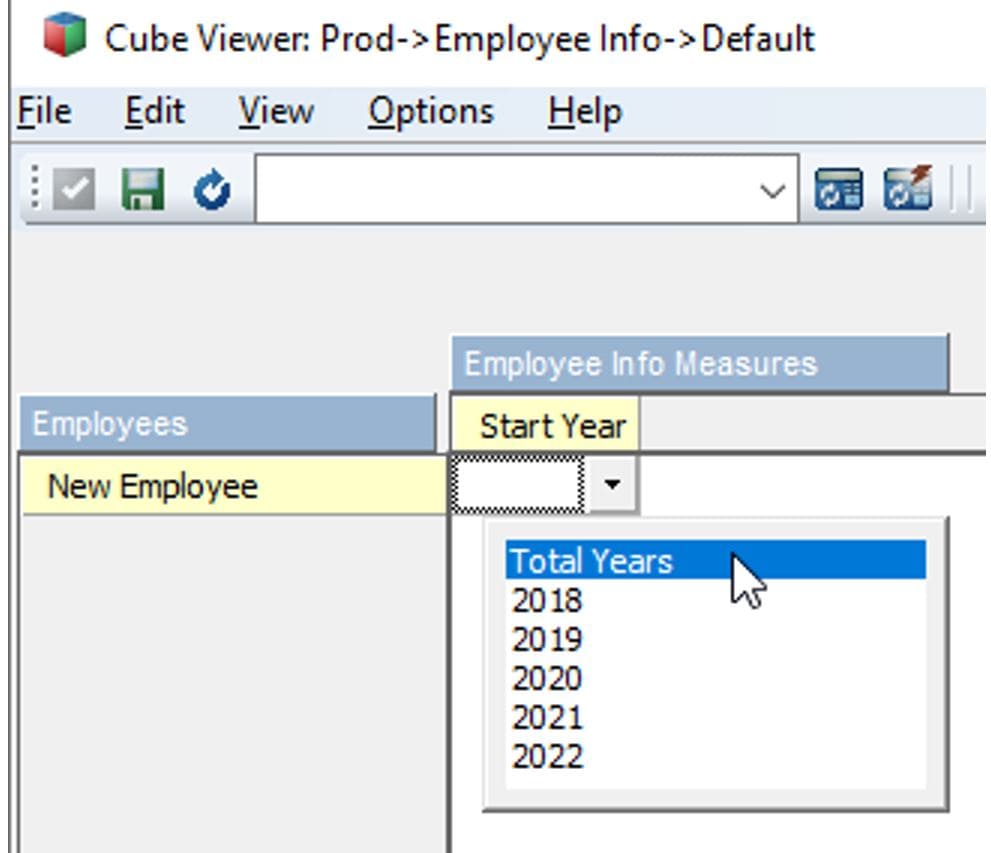
Dimension Picklist
A Dimension Picklist is like a Subset Picklist in that it pulls values directly from a dimension. But instead of creating a dropdown of elements from a specific subset, the dimension picklist creates a dropdown containing every element in the dimension. Just like the subset picklist, the dimension picklist dropdown will update automatically as new elements are added to the dimension. The dimension picklist requires the following syntax:
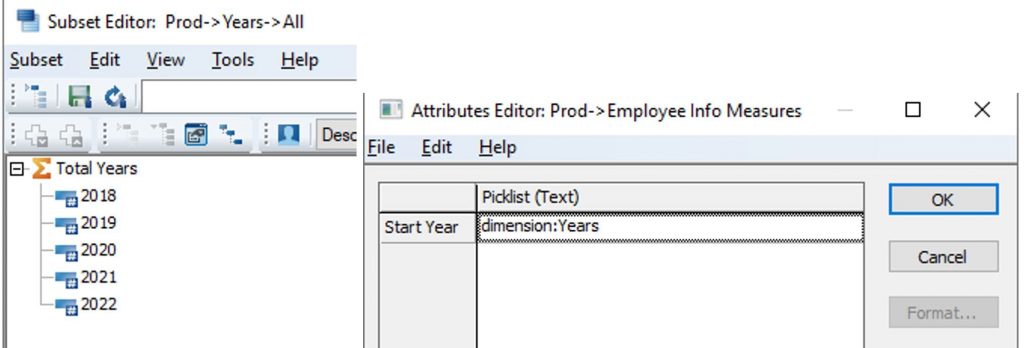
dimension:<dimension name>
My Years dimension contains a Total Years rollup. When I define a dimension picklist on my Start Year element, this rollup is now included. While this doesn’t make much sense in this context, it illustrates the difference between a subset picklist and a simple dimension picklist.
While it often makes more sense to define a subset of elements from a dimension that you want to appear in the dropdown, a dimension picklist is a very quick and easy way to always include all elements from a dimension in a picklist dropdown.
Conclusion
Picklists are a simple but powerful way to drive user experience and prevent input errors. Whenever users need to do inputs that require specific formatting or spelling, always create a picklist to control acceptable inputs. In this blog, you have learned how to create picklists either by a picklist attribute or control cube. You also learned about the three different kinds of picklists that can be placed on a cell: static, subset, or dimension. Knowing the different types of picklists and when to use them will give you the power to create a simpler and cleaner user experience.