
PostgreSQL is a powerful, open-source object-relational database system with 30+ years of active development that has earned it a formidable reputation for reliability, feature robustness, and performance. In this post I want to show how you can get started quickly with PostgreSQL by creating a sample database and running some simple queries against it using pgAdmin.
PostgreSQL Sample Database
Like many database offerings, PostgreSQL provides a sample database named “dvdrental” which can be downloaded for free here. Once you have downloaded the file, you’ll need to unpack it into its .tar format:
PostgreSQL Administration
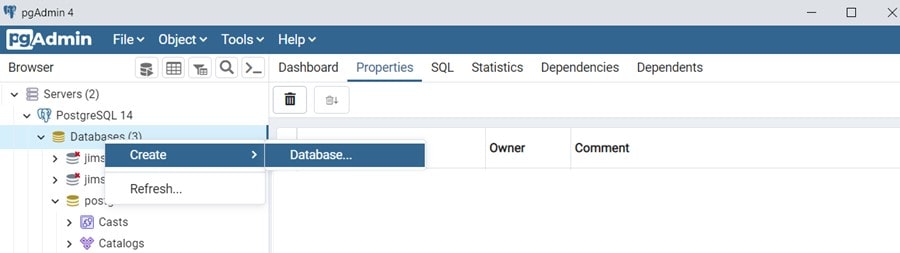
Since pgAdmin is one of the most popular and feature rich open-source administration and development platforms for PostgreSQL, I’ll use it to create and load the PostgreSQL sample database into the PostgreSQL database server (and then run some queries). Assuming you have pgAdmin installed and have logged in, you can right-click on Databases and then select Create and Database…
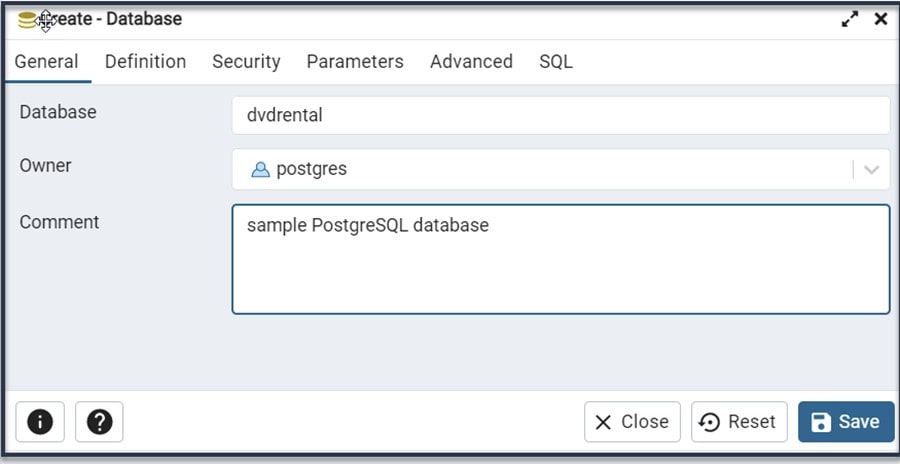
If this is your first time using pgAdmin you may need to configure your binary paths. Binary paths specify the path to the folder that contains the utility programs (pg_dump, pg_dumpall, pg_restore and psql) for monitored databases (it should be something like this: C:Program FilesPostgreSQL9.6bin). pg_restore is a utility for restoring a PostgreSQL database from an archive created by pg_dump and is required to setup the sample database. To review or edit the binary paths information you can select File and then Preferences from the pgAdmin main menu. Once you’ve set your binary paths correctly, the next step is to provide the database name (“dvdrental”), its owner and a comment:
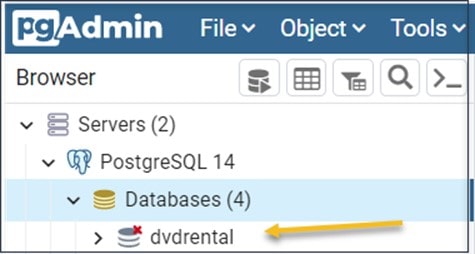
When you click Save on the Create Database dialog, you should see the new database name referenced in the pgAdmin Object Browser Panel:
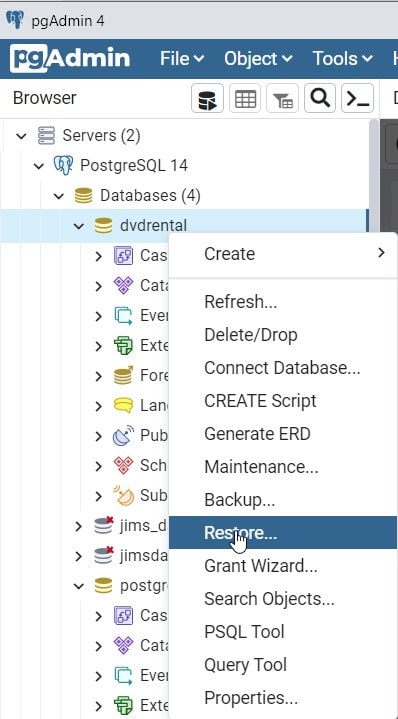
The next step is to restore the new database from the downloaded database file by right-clicking on the (dvdrental) database and then choosing Restore…
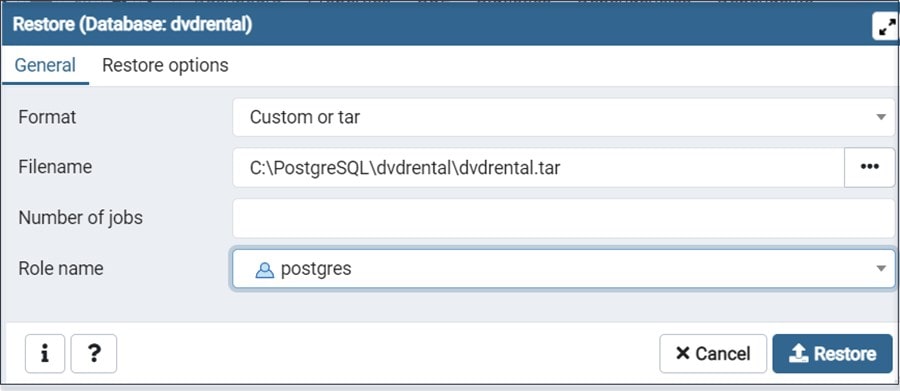
Now on the Restore dialog select “customer or tar” for the Format and enter the path to the sample database file (for example, mine is here: c:PostgreSQLdvdrentaldvdrental.tar). You can enter “postgres” as the Role. PostgreSQL – similar to most applications – manages database access permissions using the concept of “roles” and the default role (unless altered) is the postgres role. Once you are ready, click the Restore button:
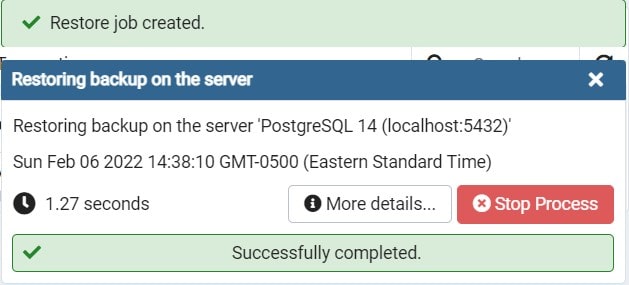
After clicking on Restore, the database restoration process will run and will show the following dialog once it completes:
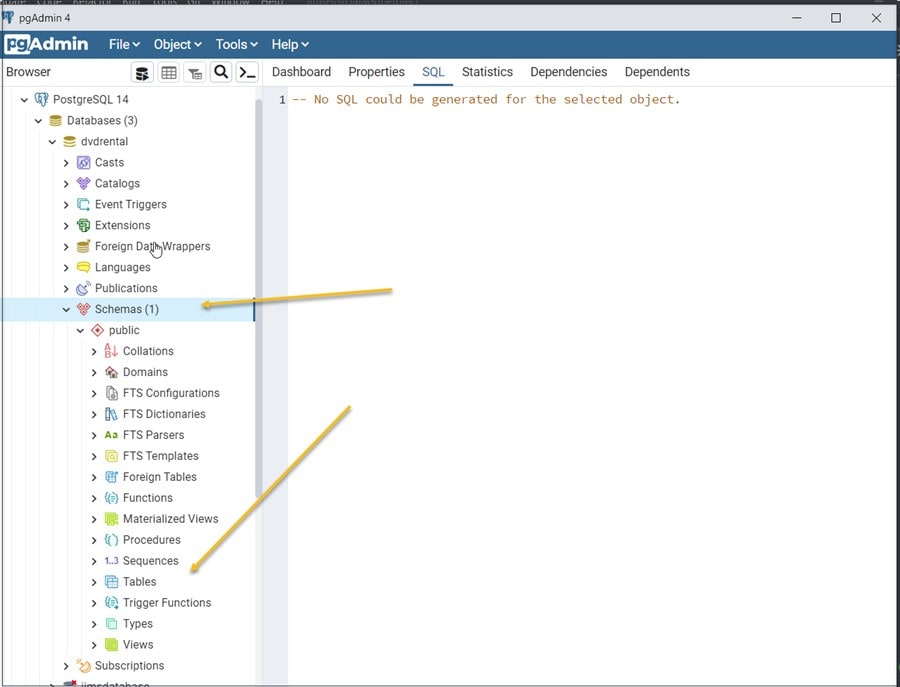
When the process completes (and you close the message dialog) you can open the dvdrental database from Object Browser Panel. Notice that the database Tables are listed under Schemaspublic:
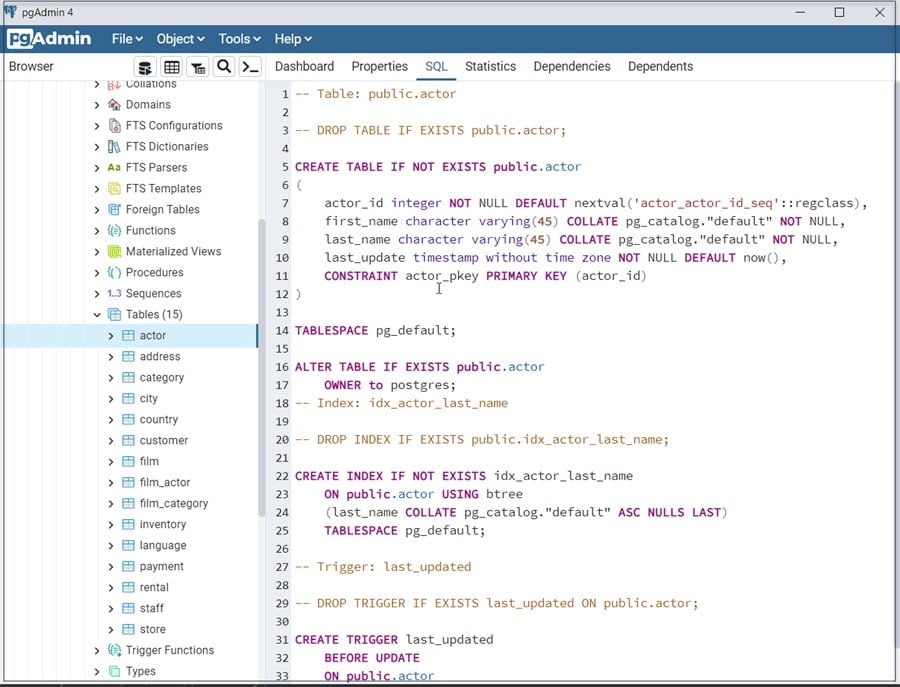
A neat feature of pgAdmin is when you click on a table name (for example the “actor” table) pgAdmin automatically generates the table ddl for the table:
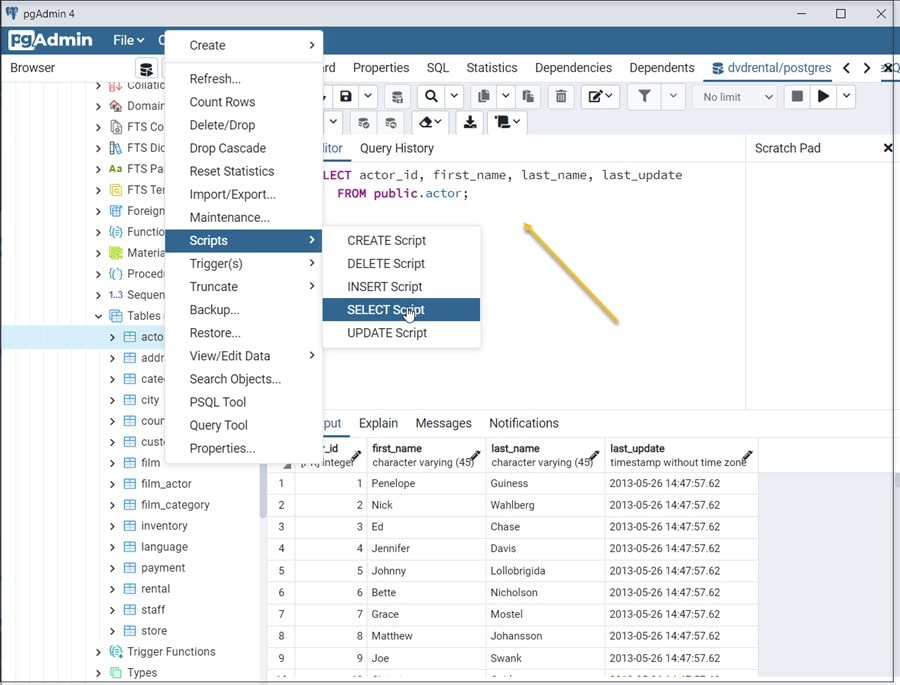
One of the most common database tasks is querying data from tables by using the SELECT statement. In addition to automatically generating table SQL, pgAdmin can also generate a basic select statement. For example, if you right-click on a table name, you can select Scripts, then SELECT script and pgAdmin will generate the full (listing all of the column names) table select statement. Pushing the “Play” button runs the query:
Another Exercise
Rather than stopping with a simple select query, I want to do a little more. In an older post I wrote about using the OFFSET-FETCH filter SQL combination. An interesting “twist” on FETCH is the WITH TIES clause. WITH TIES allows you to return more rows with values that match the last row in a limited result set.
Let’s look at an example.
WITH TIES
Since we have plenty of sample data to work with in our PostgreSQL server, we can again use the pgAdmin query editor to run the following query on the city table:
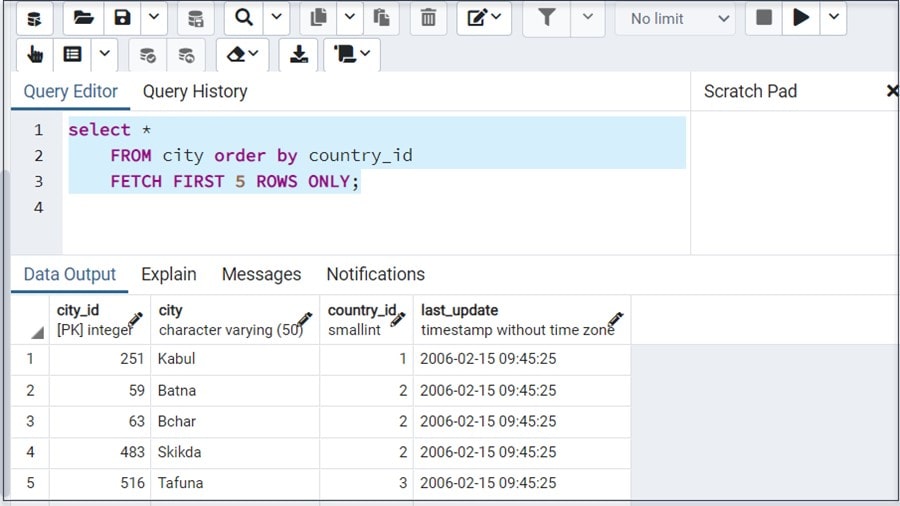
Notice that within the first 5 records returned from the table there are multiple records with the country_id of 2.
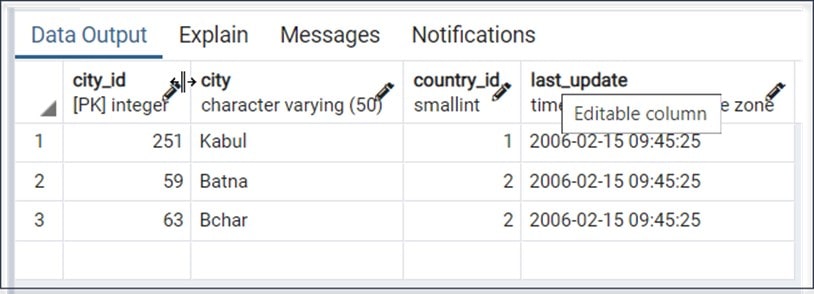
Before moving on, its worth pointing out that the pgAdmin Query Tool is a great, feature-rich “environment” “built-in” to pgAdmin and allows you to execute SQL commands, review and even edit the generated result set. In this post I barely touched the surface on what you can do with the tool (so expect more posts soon!).
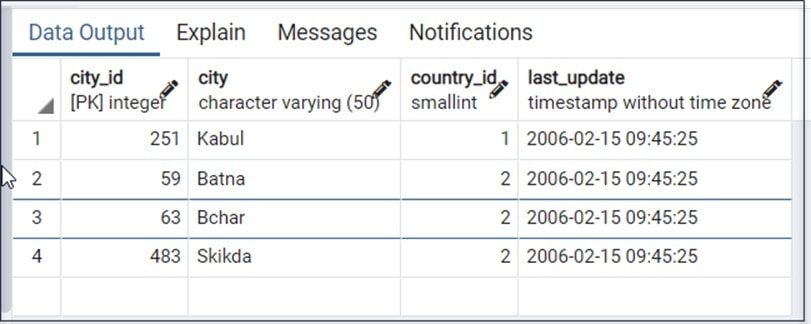
Now back to the example, if you change the number of rows to FETCH to 3, you will get the following result:
But if you add the WITH TIES clause, the query will look like this:

Running this version of the query we will see a different result – in that it “includes the ties” (we actually get a 4th record):
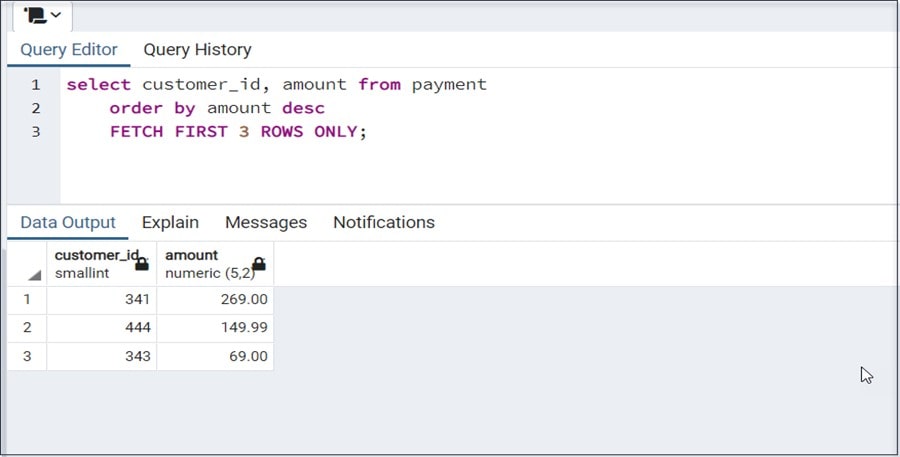
In this example (using the city table) the WITH TIES might not make a lot of sense, however, suppose you wanted to reward your top three customers based upon the highest payment amount? If you run a similar query, this time on the payment table you would see the following result:
But if you again add the WITH TIES to this query, we’ll see a better result:
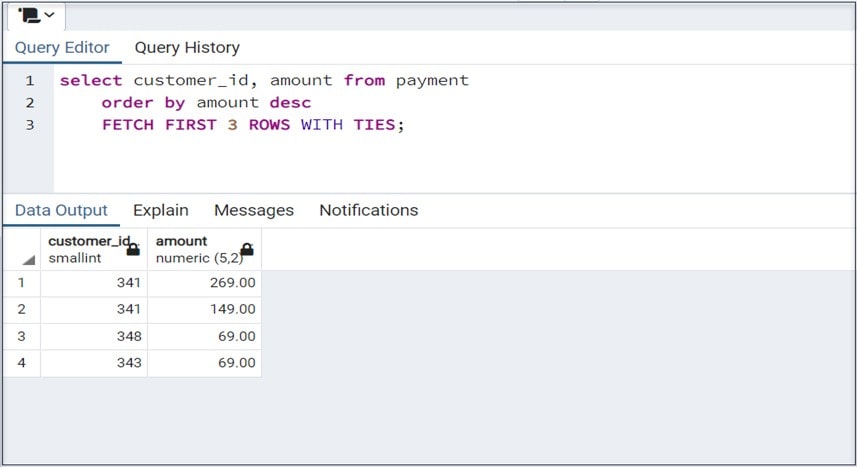
Now customer 343 “makes the cut” and will receive a reward!
Wrap up
pgAdmin supports all PostgreSQL features, from writing SQL queries to developing databases and is designed to query an active database (in real-time), allowing you to stay current with modifications and implementations. It’s a tool that is well worth spending the time to become familiar with and I’m sure it will be in some future posts!