
In this article a MariaDB server image is created and run in a Docker container. A DBeaver connection to the container is established. Next, bash commands are used to execute MySQL statements to perform various database tasks such as create a new MariaDB database, create a table, create a CSV data file and load the data from the file to the table. Finally, DBeaver is used to verify all of the MySQL work and then create a new table and view the database as an ER diagram.
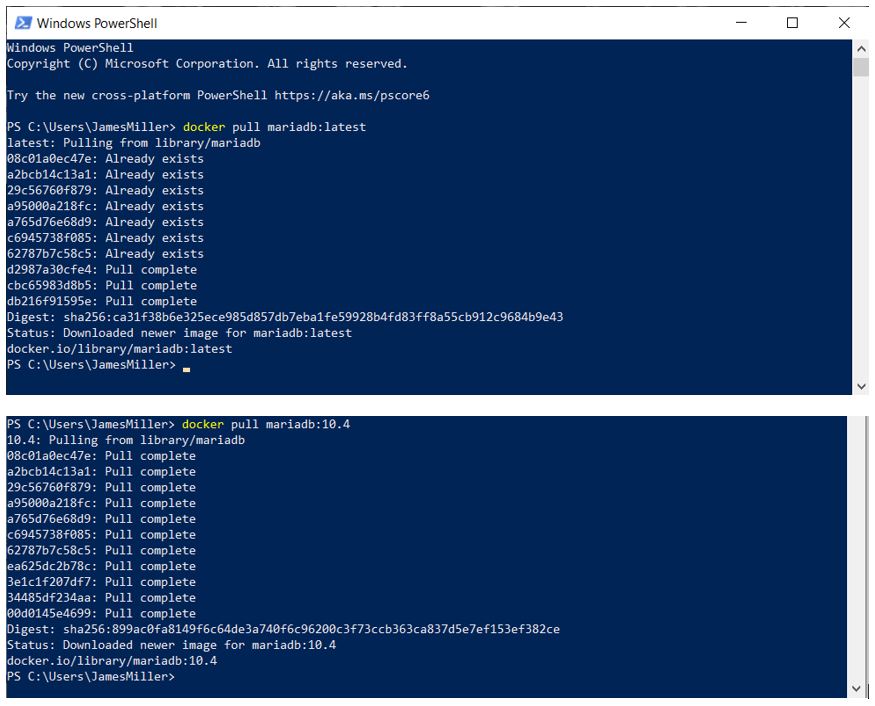
Pull the mariadb image locally
Since I already have docker installed and running, I can use Windows PowerShell, to can execute the docker command to “pull” the a version of MariaDB locally. I entered mariadb:latest but you can also specify a particular version by saying mariadb:10.4 (for example):
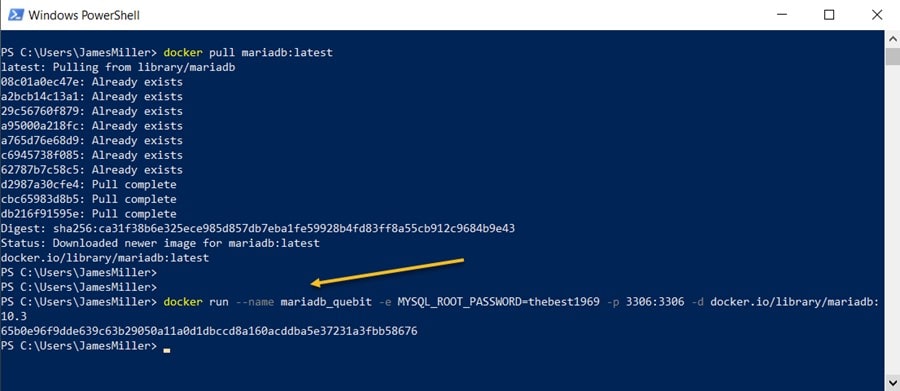
Create a Container and Run it
Now that we have a MariaDB image available, we can use the following docker command to create a container from that image and start it. I want to name my container (mariadb_quebit), provide a password (thebest1969) and set a port ID (3306:3306).
docker run –name mariadb_quebit -e MYSQL_ROOT_PASSWORD=thebest1969 -p 3306:3306 -d docker.io/library/mariadb:10.3
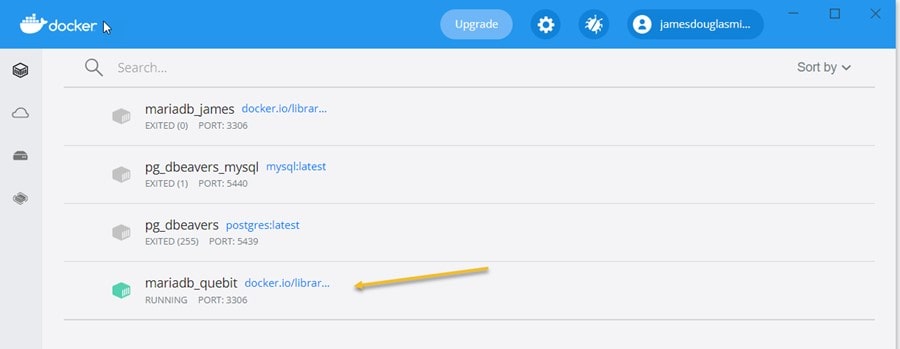
I am using Docker Desktop, so if I peek at the desktop, I see my new container up and running:
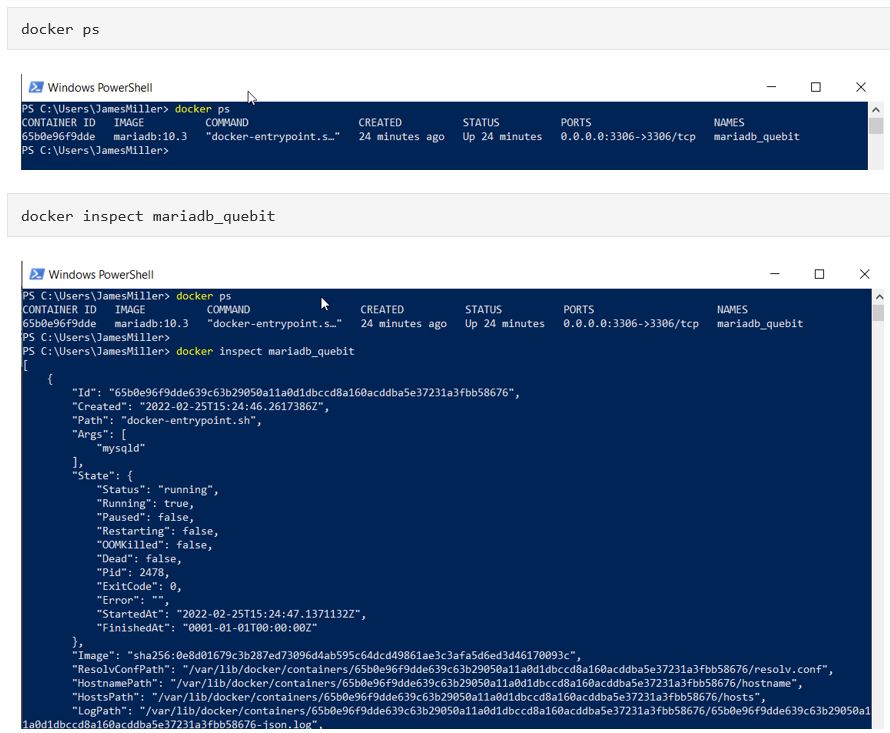
Two handy docker commands are docker ps and docker inspect and are shown below. You can use the first to see what docker containers you have running and, once your container is running you can always use this command to see various details about the container.
Connecting to the Container
Once the container is running, it is available to connect to. To do that I will use DBeaver. To create a new connection in DBeaver (assuming that you have already installed the MariaDB drivers) you need the Port and the password. Earlier I set the password as “thebest1969” and left the port as the default (3306) in the docker run command:

So, we can use that when we create a new DBeaver connection (leave the database name blank):

You can click the Test Connection button to make sure you can connect and then click Finish to save the connection to DBeaver.
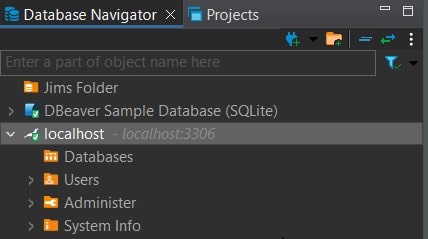
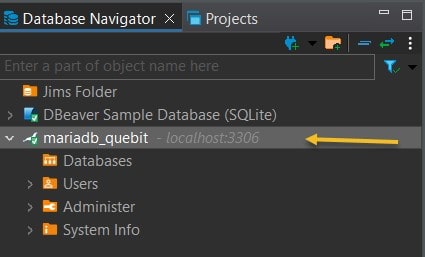
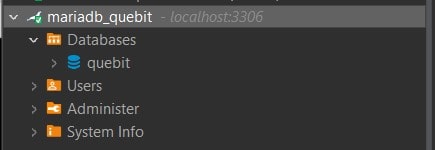
You can see the connection showing up in the Database Navigator pane. It defaulted to “localhost” since I didn’t give it a name yet and there are no Databases since it is simply an “empty” MariaDB server. Let’s right click on the connection, select rename and type the name of our container “mariadb_quebit”:
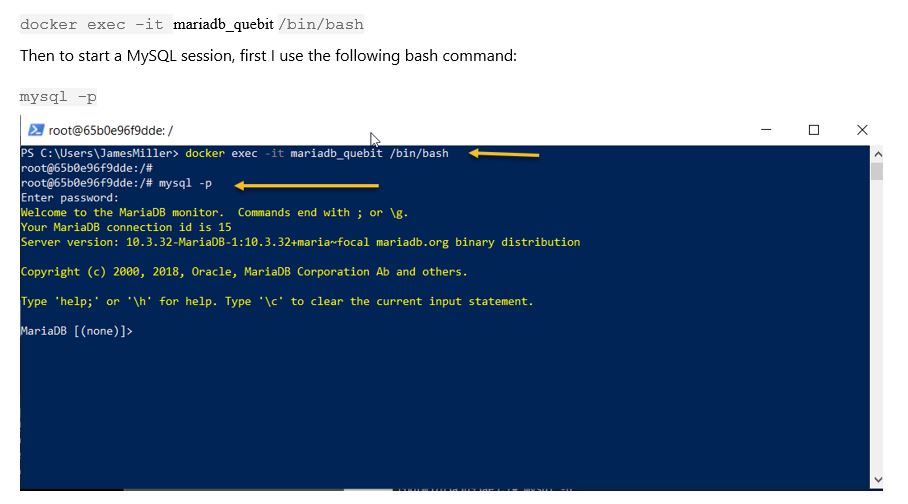
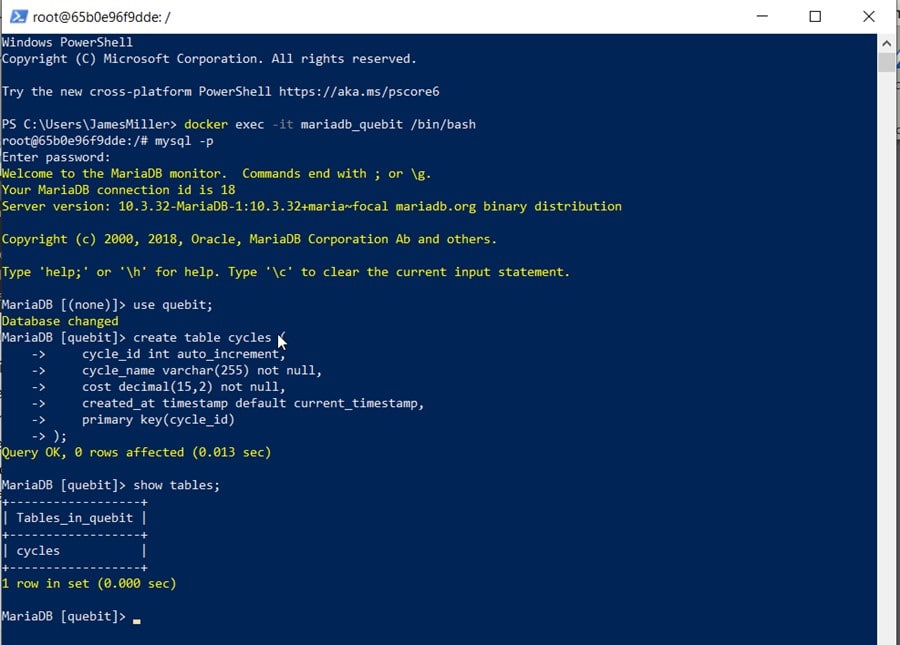
Now that my new connection has a proper name, I want to create a new database. Rather than use DBeaver for this task (although I could) I want to try out some MySQL commands. First, to start a Bash shell in my Docker container, I execute the “docker exec” command with the “-it” option and specify the container ID as well as the path to the bash shell:
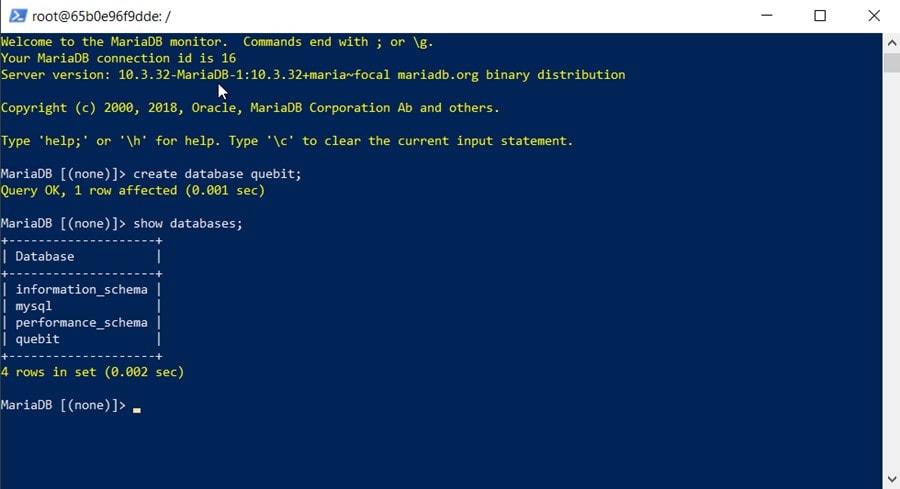
Now I am ready to do some database work on my MariaDB server. First, I want to create a new database. I can use the create database command to do that and then execute the show databases command to verify that the new database was created (note that the semi-colon is the command line delimiter):
Back in DBeaver, if I click Refresh in the database navigator panel, my new database shows up:
Now I want to add a new table and load some test data into it. The first step will be to “switch” to the quebit database (since that is where I want to build by table object), then I will use the create table command to build a new table named “cycles”. Finally, similar to the show databases command, I can use show tables to verify that my new table exists:
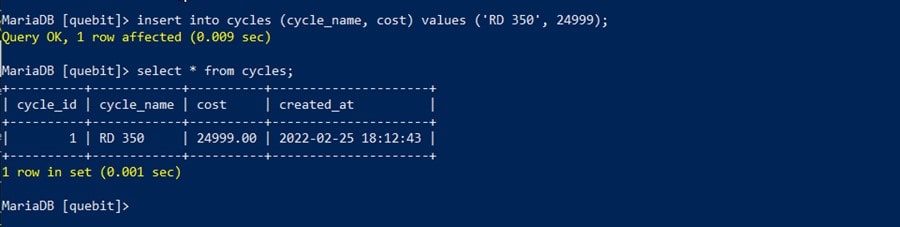
Now that I have a table I can do a single row insert and then query the table:
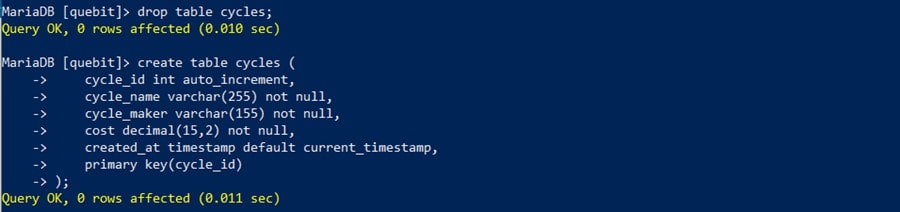
That worked but I now realize that I need an additional column in my table. Since there is only 1 row of data in my table, I will just drop the table and then recreate it with an updated create table statement:
To make sure my table is correct this time, I can use the describe command as show below:
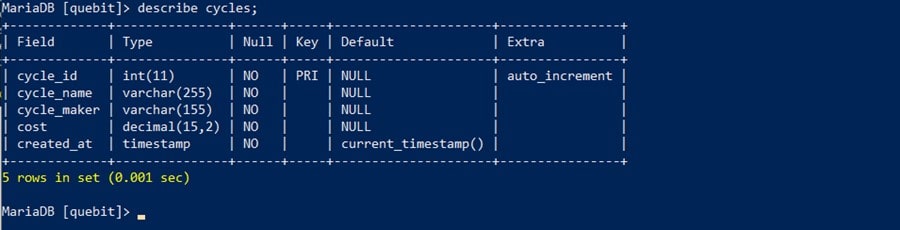
The table looks good (I added the “cycle_maker” column) so now let’s try to insert that single row again:
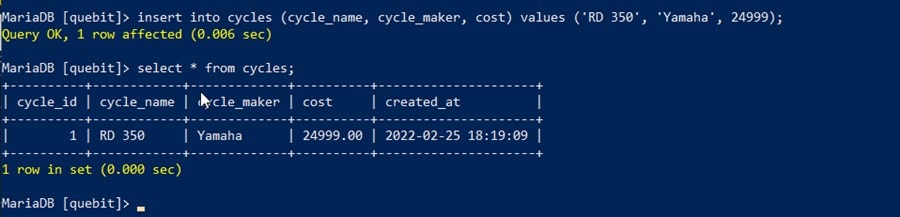
Although that worked okay, rather than insert single rows one at a time, I want to try to upload from a file which contains multiple rows. So, to do that, I used the touch command to create a CSV file then the cat command to write multiple rows to the file:

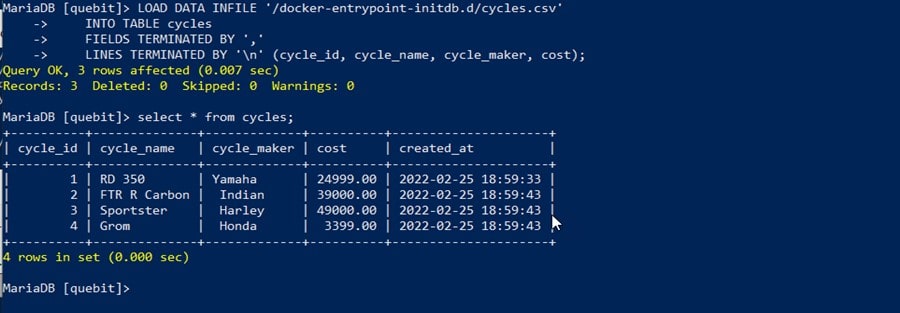
I can load the file into my table using the LOAD DATA INFILE statement. If I query my table again, I see the original single-inserted row as well as the 3 rows that are in the CSV file:
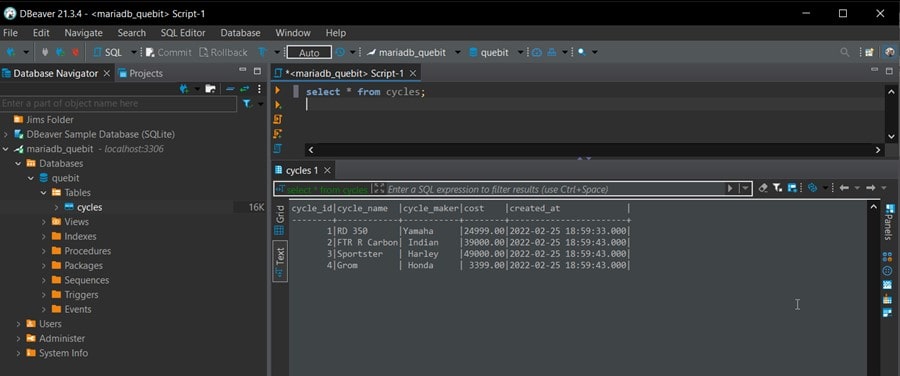
Again, if I go back to DBeaver and refresh my connection, my cycles table appears along with all of the data:
Adding Another Table
From within DBeaver I wanted to add a new table named “sales” and have it linked to the original cycles table, so I clicked on the Open SQL script icon and executed the following SQL statement:

Again, refreshing the connection, we can see the new table:
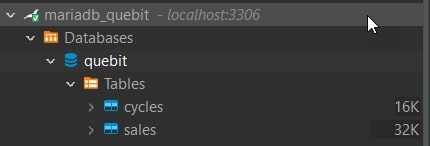
ER Diagrams
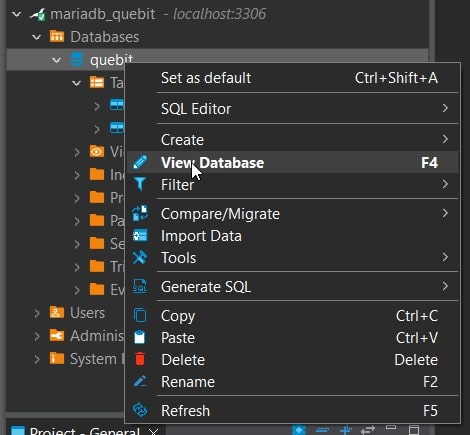
You can use DBeaver to create custom ER diagrams that can contain any tables, relations and notes in a database. To do that, you can right-click on the quebit database and then select View Databases:
You’ll see both a properties tab and a ER Diagram tab:
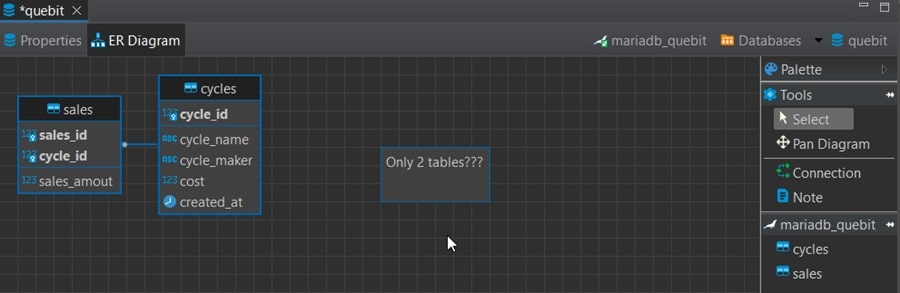
The new diagram appears in a separate editor where you can drag-n-drop tables into it. You can even add tables from different connections as well as from different database types (for example, combine Oracle and MySQL tables in one and the same diagram). You can also add notes and custom relations (associations) using the ERD palette on the left side of diagram tab!