
Enabling Drive Explorer in Planning Analytics Workspace on Cloud
IBM’s new Drive Explorer gives Admins back some of the functionality that was lost with the depreciation of the Rich Tier Desktop in 2024. It gives admins the ability to move files from one environment to another and also includes some compression/decompression features that simplify the migration process between environments. Enabling it can be a little tricky so in this article we will review that process.
Subscription Administrators needs to enable Drive Explorer in the Production environment
In order to use Drive Explorer, a Subscription Administrator will need to enable it on the new Capabilities tab in the Administration panel. Go to Administration in PAW in your Production environment and click on Users and Groups and select the user to be updated. On the Capabilities tab make sure Capabilities access is checked and then enable Drive Explorer.

One additional step for non-production environments
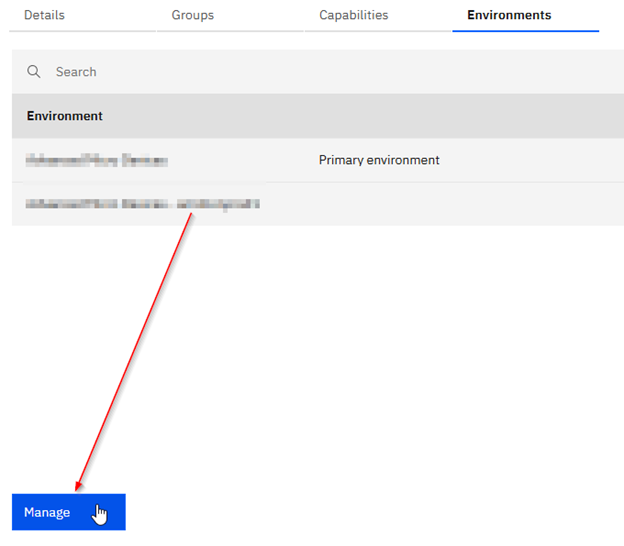
For non-production environments in the cloud, an administrator will need to enable capabilities on the user account in order to access Drive Explorer. To do this you will log into your non-prod environment and go to Users and Groups in Administration. When you click on a user you will notice that there is no Capabilities tab by default. You need to click on the Environments tab and then select the non-prod environment and then click “Manage” at the bottom.
Once here you can turn on Capabilities which will then grant access to the users Capabilities tab.
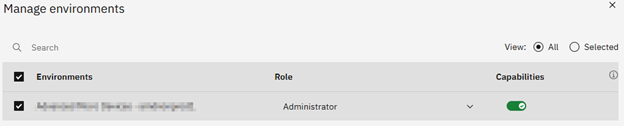
At this point you will grant access to Drive Explorer the same way that it was done in the first step.
Getting to Drive Explorer in the PAW interface
Once a user has been granted access to Drive Explorer they can open up a Modeler Workbench and see the new icon in the ribbon.
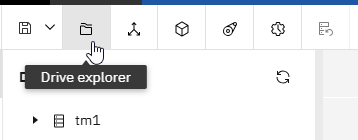
When you open Drive Explorer it will show the root S:\ directory of the server which can be used to navigate folders in the S:\ drive.
Opening up multiple environments in Drive Explorer
To see your prod and non-prod environments side by side, click on the “Open remote server” icon on the far right in Drive Explorer.
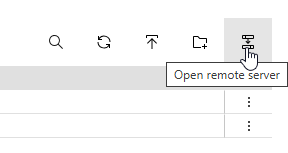
Here you can select a remote environment and enter the file sharing credentials that can be found in your IBM Welcome Kit for the server. From here you can perform multiple functions from copying and deleting to compression and expansion of known file types.
Hope this has helped with any confusion you may experience with getting access to the new Drive Explorer.