Wow, branding on my Cognos Portal!
Business Case:
When using Cognos Analytics V11, there is a default theme which is quite nice, but not very brand friendly. The goal of this article is to show you how to go from this generic IBM theme ….
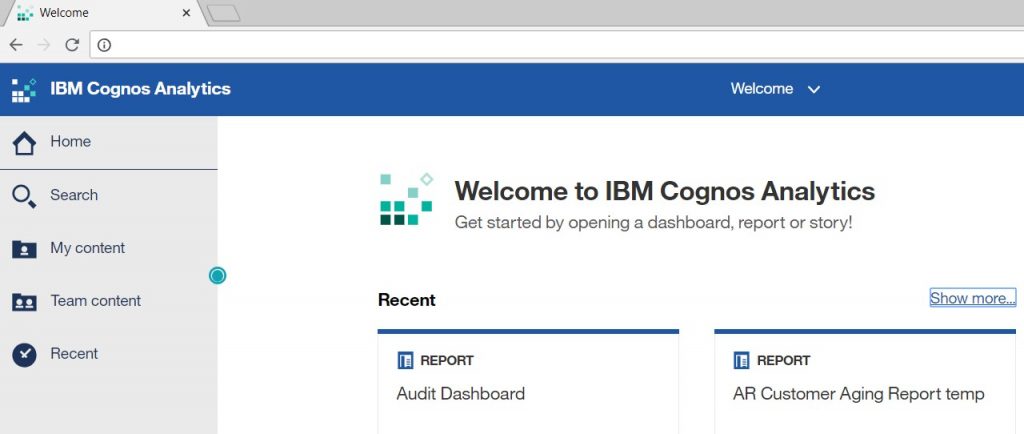
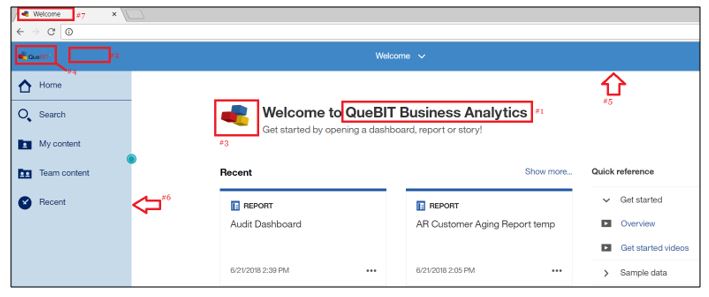
To the customized portal screen below…
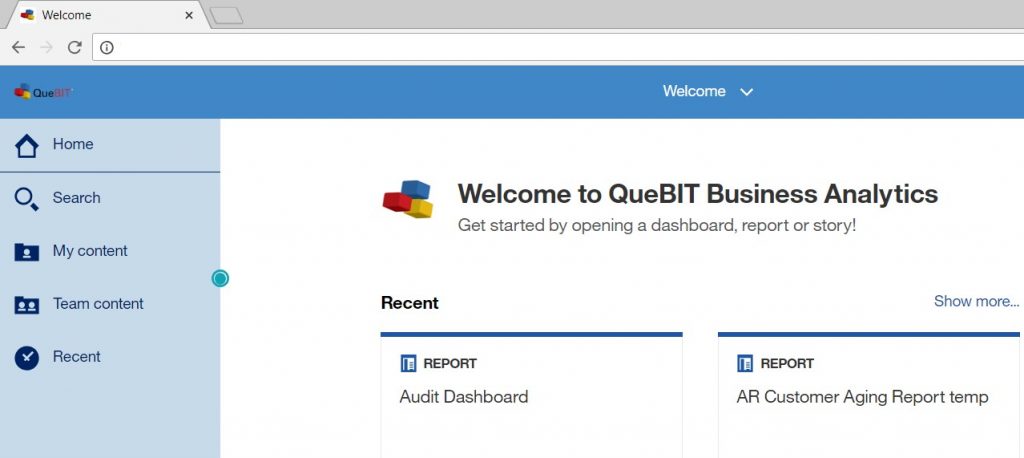
As you can see, we have changed the tab name to show our brand icon, the IBM name has been replaced with our company name, “QueBIT”, and our color schema has been changed to our branded colors. This process is very easy to do, if you follow the steps below.
Procedure:
- Create a folder to hold the theme files. We recommend the folder be named the same as the theme name you plan to upload. In this example, we named the folder “QueBITTheme”. Create a subdirectory in this folder and call it images. This is where the images will be stored. And finally, create a text file and name it spec.json. The file will hold JSON code. JSON is a very common data format used for asynchronous browser–server communication. It is a language-independent data format and was derived from JavaScript. However, as of 2017 many programming languages include code to generate and parse JSON-format data.

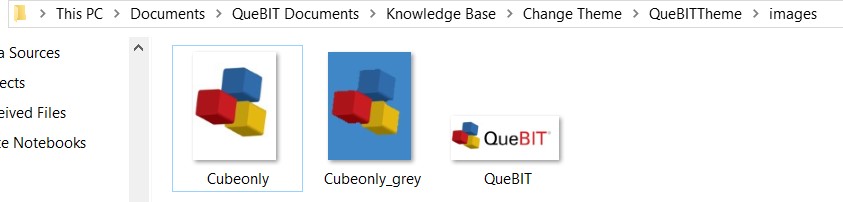
- Under the images folder, store the images you plan to use as part of your updated theme. In this example, we saved the images as png files.
- Update your spec.json file with the following JSON code:
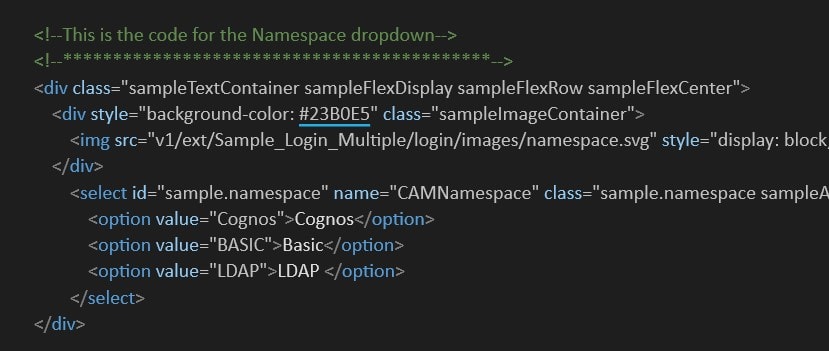
- Below shows the corresponding line item to our code from step #3.
| User interface reference | JSON description | Definition |
| 1 | brandText | Brand text. Enter an empty string to leave this entry blank. |
| 2 | brandTextSmall | Small brand text. if omitted, brandText is used. Enter an empty string to leave this entry blank. |
| 3 | brandIcon | Brand icon |
| 4 | brandIconSmall | Small brand icon |
| 5 | appbarBackground | Application bar background color |
| 5 | appbarForeground | Application bar foreground color |
| 5 | appbarSelectLine | Application bar selection line color |
| 5 | appbarPushButtonBackground | Application bar push-button background color |
| 6 | navbarBackground | Navigation bar background color |
| 6 | navbarForeground | Navigation bar foreground color |
| 6 | navbarSelectLine | Navigation bar selection line color |
| 6 | navbarPushButtonBackground | Navigation bar push-button background color |
| 7 | favicon | Icon to display in web browser tab. |
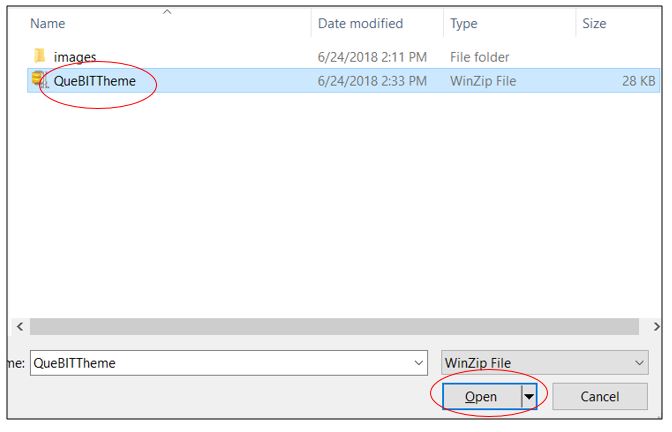
- Once the JSON code is completed, zip the image folder and spec.json file and name the file the same as the theme name, “QueBITTheme”.
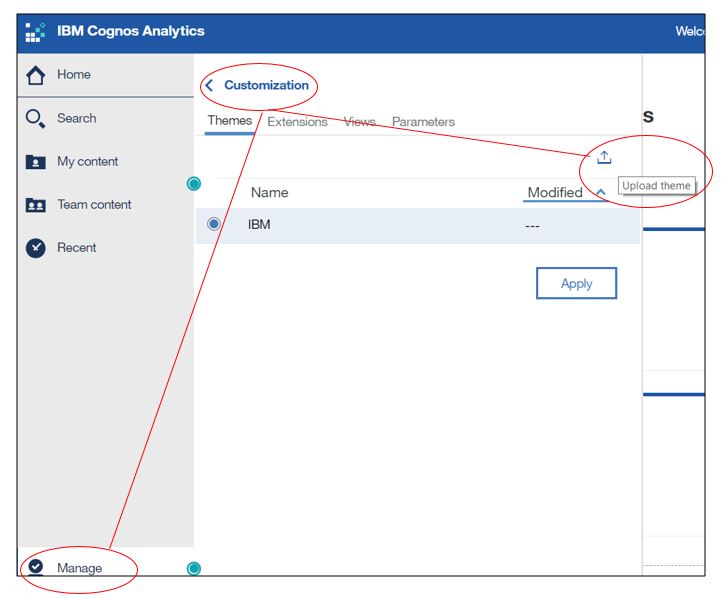
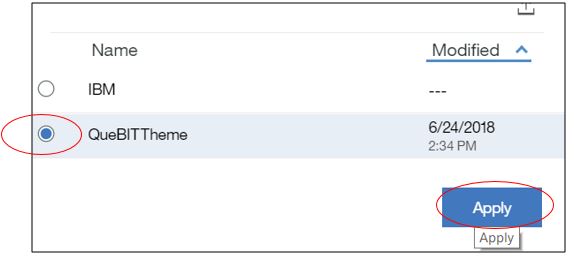
- Go into Cognos Analytics; choose Manage>Customization>Theme and press the upload icon to upload the new theme zip file.
- Choose the zip file just created and press open.
- Press the button icon to the left of the file name and choose apply.
- The following message will appear showing you have successfully uploaded the theme.

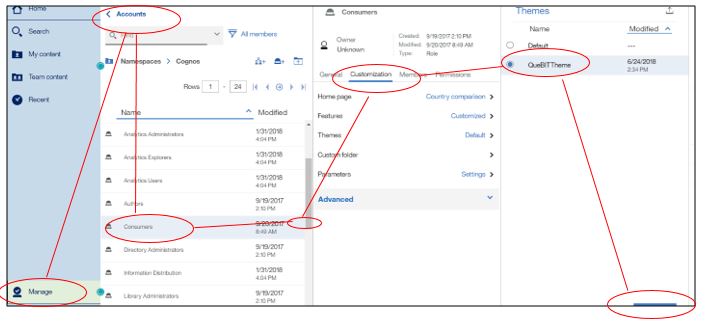
- Taking this a step further, you can now customize roles with this theme. In this example, we are customizing the consumer role. Under Manage>Accounts, find the Consumer Role. Choose the properties> customize and apply the QueBITTheme. Now all members of the consumer role will see this theme when they log on.