
Business Case:
When using Cognos Analytics V11, there is a default login which is quite nice, but not very brand friendly. The goal of this article is to show you how to go from this generic IBM login theme ….
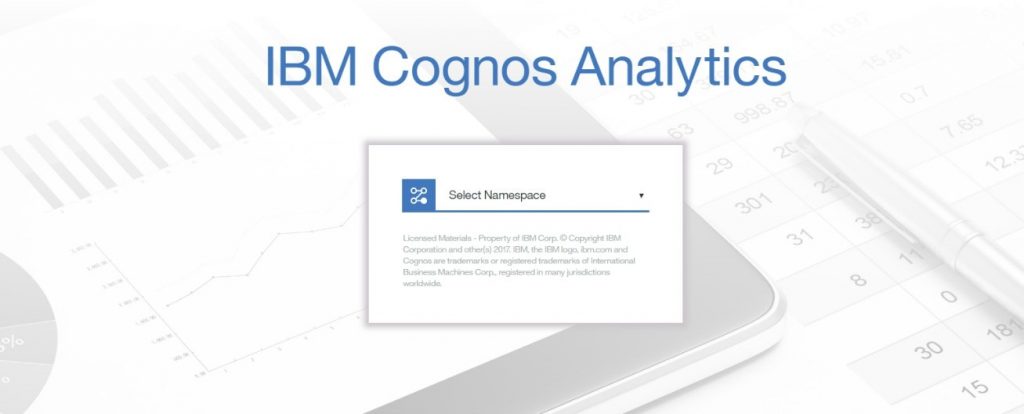
To the customized login screen below…

The IBM Cognos Analytics user interface (UI) is built on an extendible model. In this model, a perspective defines a new UI screen and capability. The JSON declaration for the perspective describes the layout of the perspective. An extension is a zip file that contains spec.json and folders for css, images and js. The customized login page will be created by uploading a modified extension and image file into Cognos Analytics.
Procedure:
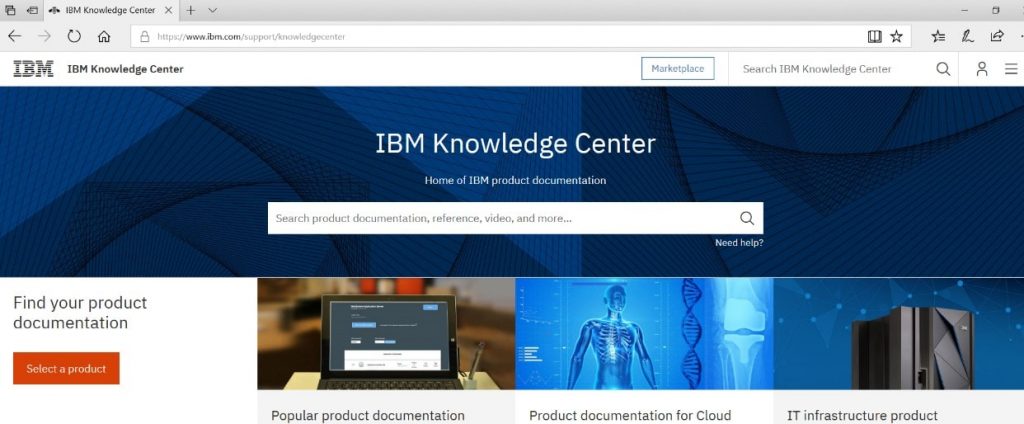
- If your Cognos Analytics server utilizes a single namespace, download the file SampleLogin.zip. If you are using multiple namespaces, download the file SampleLoginMultiple.zip. Either file can be found in the IBM Knowledge Center. For this example, we will be using an installation with multiple namespaces.
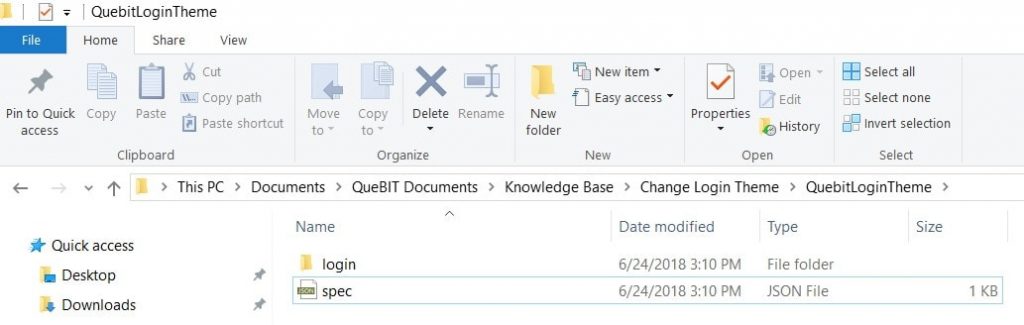
- Extract the files from the zipped file using any winzip tool available to you, and save the files to a subdirectory. For this example, we are saving to QuebitLoginTheme.
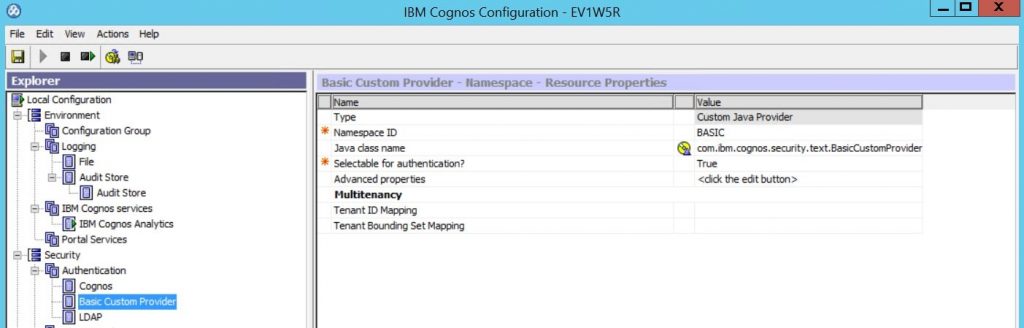
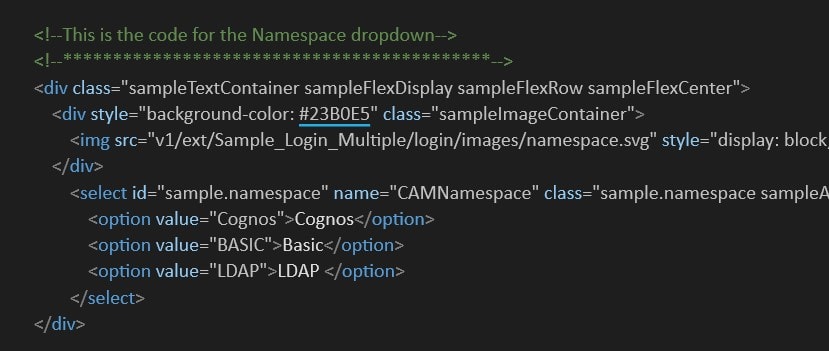
- Open IBM Cognos Configuration and navigate down to Local Configuration > Security > Authentication. Select each Namespace that you are interested in and write down the Namespace ID (e.g. BASIC) for each one. This is case sensitive.
- Update the SampleLoginView.html file to match your Cognos environment. The value=”” for each line should be the Namespace ID from Step #3 above. The label can be whatever you want to display to your users.
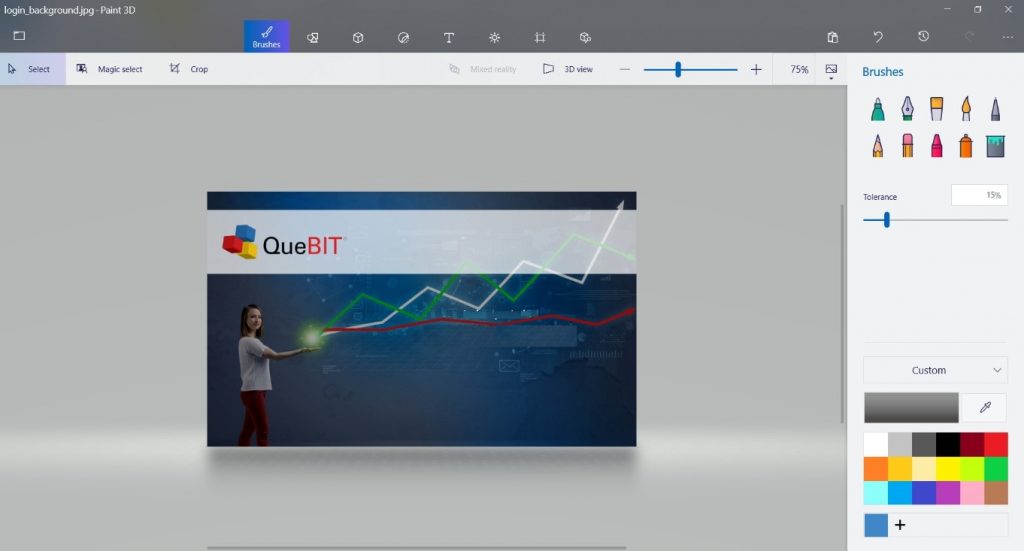
- Using a software package like Windows Paint3D, edit …loginimageslogin_background.jpg with the picture you want to appear on your customized login screen and save.
- Recreate the file SampleLoginMultiple.zip with the modified files using any winzip tool available.
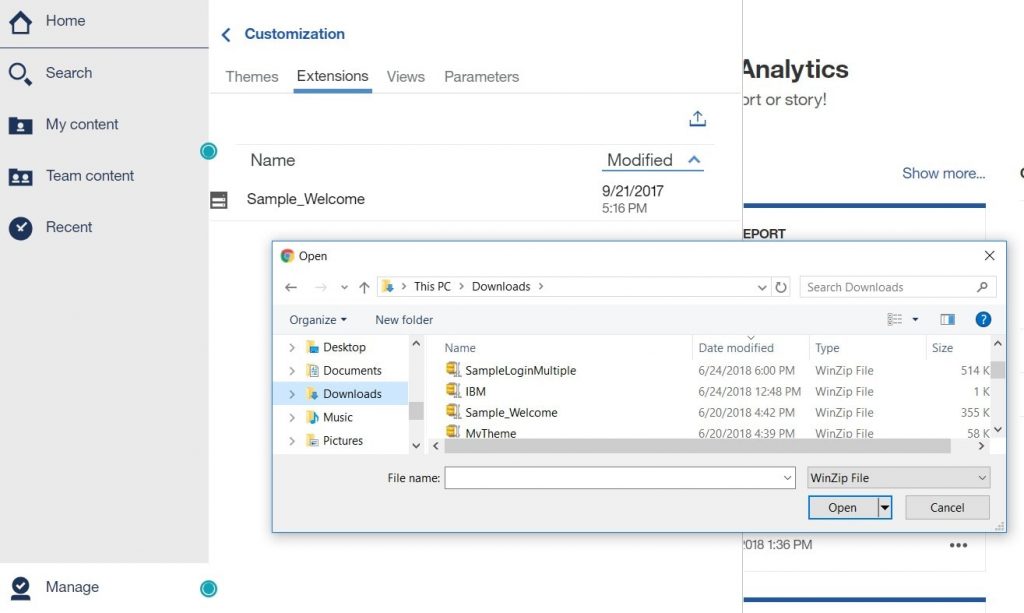
- In the Manage > Customizations slide-out panel, select the Extensions tab, click Upload extension(), browse to the folder where the zip file is located, and select SampleLoginMultiple.zip.
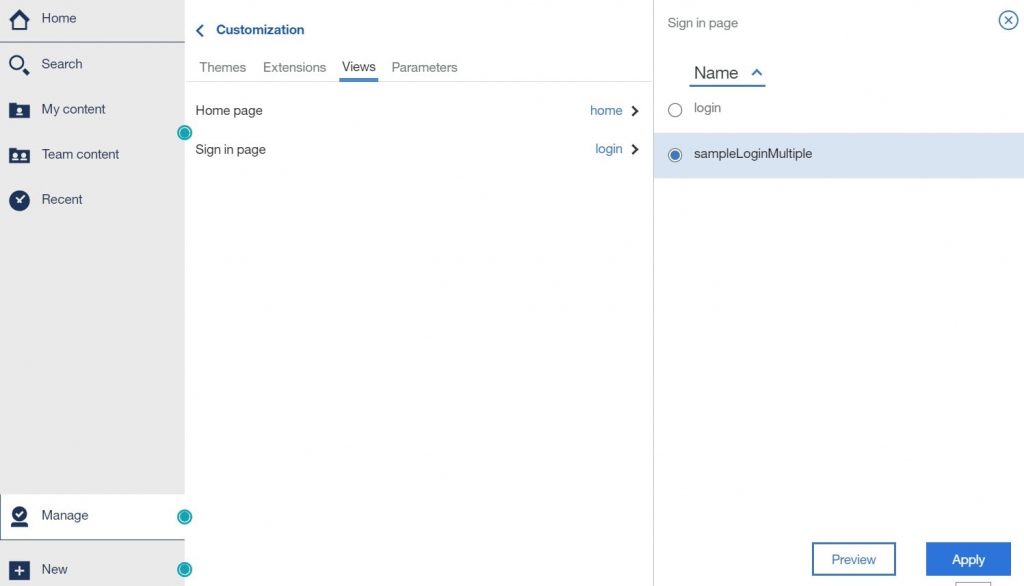
- On the Views tab, click next to the default sign-in view. Select the Sample login view as the default sign-in view and apply.
- Sign out of IBM® Cognos® Analytics, sign back in and you will see the updated login screen.