
How to Use Workflows to Automatically Send Targeted Emails
NetSuite offers multiple ways to streamline workflows, resolve operational pain points, and enhance system efficiency. One common challenge is notifying employees about transactions related to them. While NetSuite dashboards and portlets can display this information, workflow automation provides a more efficient solution by automatically sending targeted email notifications.
In this blog, we’ll walk through how to set up an automated NetSuite workflow to send emails based on specific conditions. We’ll also touch on how a NetSuite journal entry approval workflow can improve financial processes, increase accuracy, and ensure compliance with internal policies.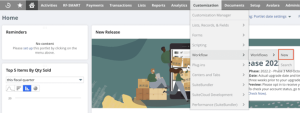
In this example, the workflow is configured to send email notifications to the Sales Representative when an Invoice transaction is created or updated. To begin, navigate to the New Workflow option from the center menu. This opens the workflow setup screen, where you will define key configuration details.
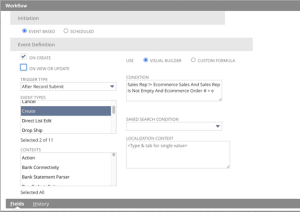
Start by entering a workflow name and selecting Transaction as the record type, then choose Invoice as the subtype. Next, focus on the Event Definition section, which controls how the workflow operates. Key components such as trigger types, event types, execution contexts, and conditions form the foundation of any effective NetSuite workflow.
Required Information:

Event Definition:
After defining the basic workflow setup, the next step is to configure an action that sends an email to the Sales Representative. Begin by selecting the State 1 box, then click New Action in the bottom right corner. On the next screen, choose Send Email as the action type.
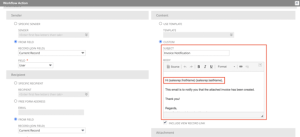
Once selected, the action configuration page will appear, allowing you to define the details of the email. You can set conditions using custom logic that must be met before the email is triggered, such as ensuring the Sales Representative field is not empty.
You can also specify an email template, which controls the subject and body of the message. Within the template, dynamic values from the invoice can be inserted using curly brackets, allowing the email content to automatically populate with relevant transaction data.
Action Type:
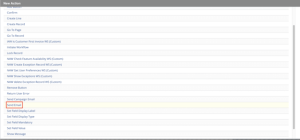
Action Characteristics:

Email Template:
With the workflow and email action configured, the next step is testing. In a NetSuite sandbox environment, emails are not actually sent, which can make validation more challenging. However, there are several ways to confirm the workflow is functioning correctly.
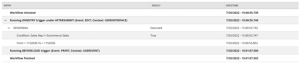
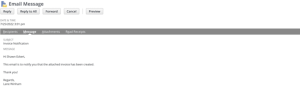
First, review the workflow execution log enabled during setup, which provides insight into whether the action was triggered successfully. Second, check the Communication tab on the transaction record to see what messages or emails would have been generated. This tab also allows you to preview the email, making it easy to verify that the content and dynamically sourced data from the invoice are displaying correctly.
Log output:
Email Preview:
This example highlights a simple yet powerful way to implement NetSuite workflow automation for automatic email notifications. Even a basic configuration can significantly improve communication, increase efficiency, and reduce manual effort.
These workflows can be easily expanded into more advanced solutions, supporting complex business logic and a wide range of transaction types across NetSuite. By leveraging workflow automation and email alerts, organizations can streamline processes and enhance operational visibility.
For more advanced configurations and customization options, refer to the NetSuite Customization Guide.