

How Do I Use NetSuite Employee Center to Access W-2/W-4 Tax Forms, View Pay Stubs, and Request PTO?
Employee self-service should make life easier, especially when you can quickly find exactly what you need. Whether you’re preparing for tax season, reviewing pay stubs and payroll history, or requesting time off, NetSuite Employee Center brings your essential HR and payroll tasks into one convenient place. From viewing and downloading W-2 and W-4 tax forms to accessing detailed paycheck history, earnings, and deductions, employees now have the information they need at their fingertips. You can also submit, review, edit, or cancel PTO and vacation requests, track approval status, and manage time off with confidence; all in a single, streamlined experience.
1) How to View and Download Your W-2
Your W-2 is usually available as a downloadable document in the Employee Center. The flow is straightforward:
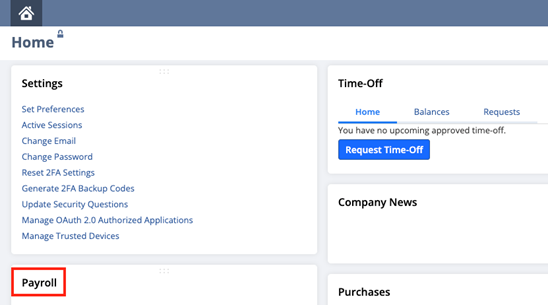
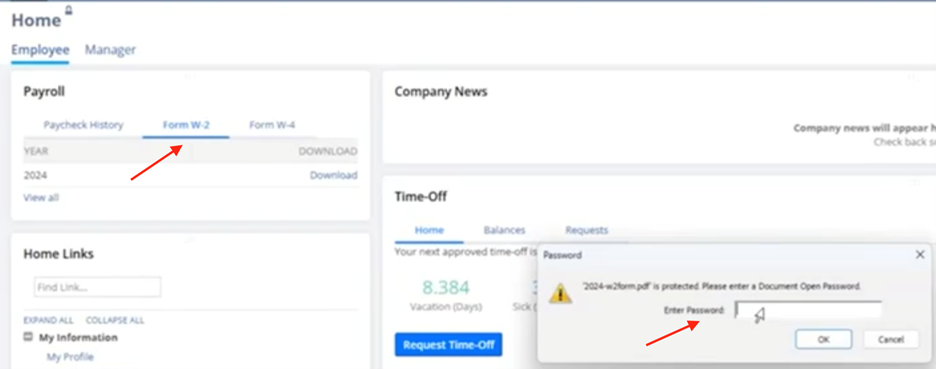
Navigate to your W-2 area in Employee Center (often under Payroll or a Tax Forms section).
Click Download.
If prompted, enter the password required to open the file.
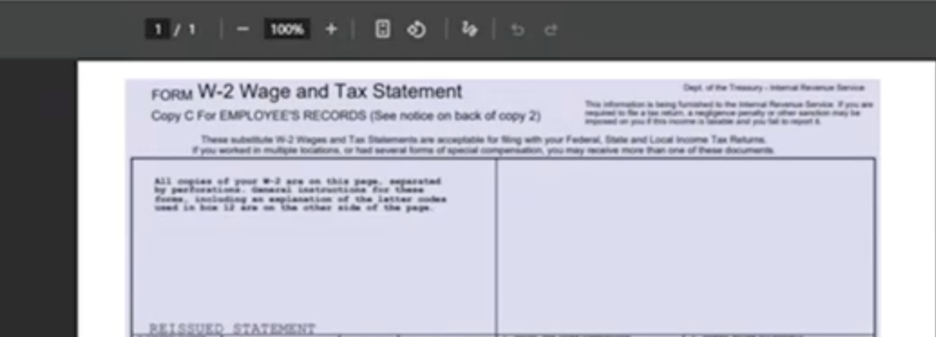
The form may open in a new tab or on another screen, so if it seems like nothing happened, check for another browser tab/window.
Once opened, use your browser/PDF viewer controls to save the PDF to your computer.
2) How to View Your Paychecks (Check History + Details)
To review your pay information, you’ll start with Check History, which is described as the first tab in the paycheck section.
A) Open Check History
Go to the paycheck/payroll area in the Employee Center.
Click Check History (the first tab).
From here you can typically:
- See your paycheck list
- View paycheck amounts
- Print a pay stub

B) Click a Paycheck Date to View More Detail
To see the full record behind a paycheck:
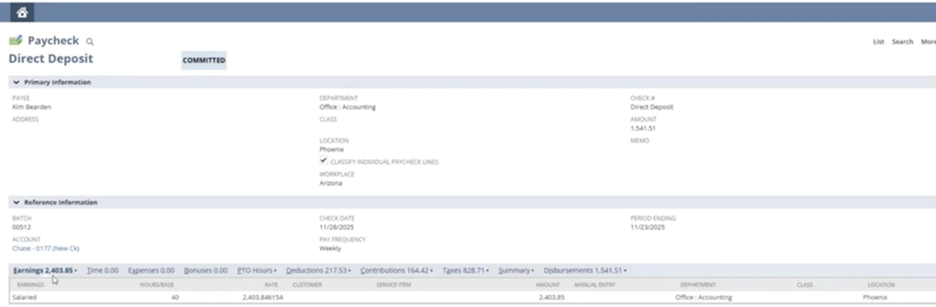
In Check History, click the paycheck date.
This opens a detailed paycheck record that can show hours and taxes and gives a more complete view than the summary list.
This is especially useful if you need to review hours, verify tax withholding, or confirm pay components like bonuses.
3) How to View and Download Your W-4
The W-4 is used when you need to update or change how taxes are withheld from your paycheck. Download the W-4 (just like the W2) to fill it out, and send it to HR.
Steps:
- Navigate to the W-4 area in Employee Center.
- Open or download the W-4 form.
- Complete the form with your updated withholding information.
- Send the completed form to HR for processing.
4) How to Submit a Time Off Request (and Manage It After)
Time off is submitted directly through Employee Center, and requests are routed to an approver.
- A) Submit a Request
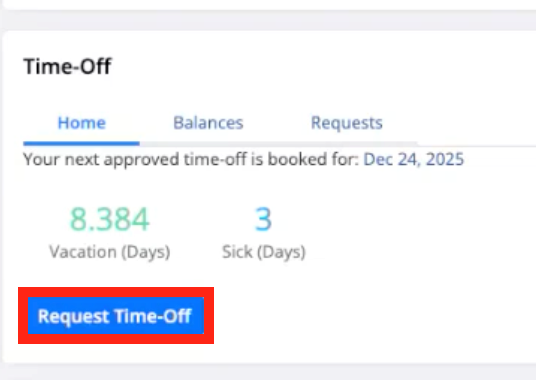
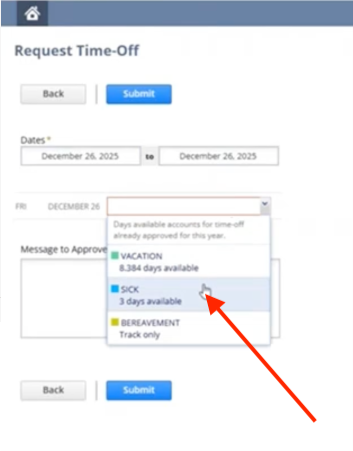
Click Request Time Off.
Choose your date(s) (single day or multiple days).
Select the type of time off (examples discussed: Vacation, Sick, Bereavement).
Submit the request; this sends it to the appropriate approver.
Note: The system may still let you submit time off even if you don’t have enough time available, potentially allowing a negative balance. So, it’s smart to verify your balance before submitting, and especially before approving requests if you’re a manager.
B) View balances and request history in “My Time Off”
After submitting, go to My Time Off.
Review your:
- Balances (vacation and sick time)
- Requests (upcoming/past requests)
C) Cancel a request (if needed)
If plans change, go to your requests list (shown as My Requests within My Time Off).
Once you know where these features live, NetSuite Employee Center becomes a fast HR/payroll self-service hub: download and print tax documents (W-2, W-4), access pay stubs, review payroll history, earnings, deductions, and withholdings, and submit, track, edit, or cancel PTO/time-off requests (including vacation, sick time, and other leave types), all in one place without bouncing between separate systems or emailing HR. If anything looks like it “didn’t work” (especially PDF downloads), check for pop-up blockers: forms often open in a new tab/window, and paycheck details typically require clicking the paycheck date (or the specific pay period) to open the full paycheck record.