
Deprecation of the Rich Tier Desktop

The IBM Planning Analytics on Cloud team has announced that, the Rich Tier Desktop is soon to be no longer accessible for Planning Analytics on Cloud Modelers and you will now use Planning Analytics Workspace (or “PAW”) for all of your administrative tasks, including restoring or “synchronizing” files or folders in one cloud environment shared folder to another cloud environment shared folder.
The “Old” or “Rich Tier” Days
In the IBM Planning Analytics Welcome Kit under the section named “Planning Analytics shared folder” you’ll find the procedure for using shared folder authentication to access the shared folder of one cloud server from an RDP connection or “desktop session” of another Planning Analytics environment shared folder. Basically, (if you are familiar with MS Windows), you can think of this as “mapping” a connection so that you can then move or copy files from one location to another (and without worries, as your content is encrypted while it is being transferred) just as you would when using Windows File Explorer on your personal machine’s desktop.
Syncing Environments without the Rich Tier
Introducing Drive Explorer – a tool that gives users access to shared folders (including remote shared folders) within cloud environments. With this tool you can upload files, create folders, select files, rename files, move files to a new location, copy files, delete files, compress files and yes, even connect to a remote shared folder – all without establishing that desktop session.
Obtaining Access to Drive Explorer
Only users with Subscription Administrator Access or those with the Drive Explorer Capability enabled can access the Drive Explorer tool. To grant access to Drive Explorer, an account subscription manager must first assign an administrator the ability to manage user capabilities in a non-primary environment.
Then, to enable Drive Explorer (assuming you have capabilities access), you log into planning analytics workspace and go to Administration, then Users and Groups. From there, select a user from the list and click on the Capabilities tab. Finally, under Modeling, toggle Drive explorer to green to enable it.

Connecting to the Shared Folder
When you connect to a shared folder using IBM Planning Analytics Workspace Drive Explorer, you are essentially “mapping” the shared folder as a “network” or “connected” drive allowing you to manage files directly through the Drive Explorer interface. You access the “Drive Explorer” within the Workspace (PAW) application by following these steps:
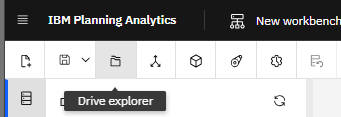
After opening a Workbench, locate and click on the Drive Explorer icon:
The Drive Explorer tab should open to the “Root” of the shared folder:

Locating and Compressing Files and Folders
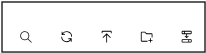
Using the Drive Explorer action icons (shown below) you can:
Search, Refresh, Upload, Create folders and Connect to a remote shared folder.
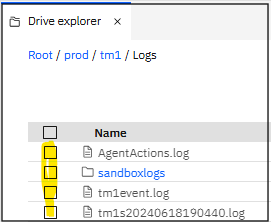
In addition, you can use the checkboxes to the left of each file or folder (shown highlighted below) to select the file or folder that you want to download, cut, copy, compress, delete, rename, preview, or copy (its) path:
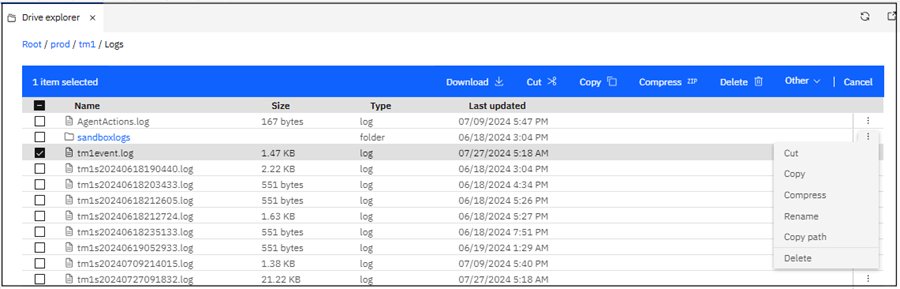
Once you click a checkbox (to select a file or folder), the Action Menu Bar appears in blue (you can also initiate certain actions from the ellipse icon):
Connecting to a Remote Shared Folder
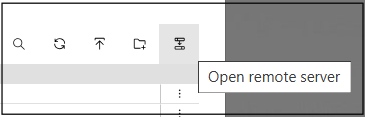
To connect to a remote shared folder in IBM Workspace Drive Explorer, you need to access the “Drive Explorer” feature within your IBM Planning Analytics Workspace, where you can then click on the “Open remote server” icon:
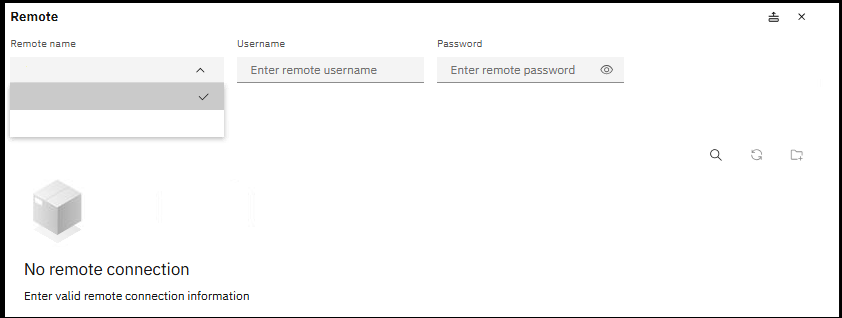
Next, select the Remote name (where your shared folder exists) to connect to and enter the provided credentials (Username and Password), typically found in your “Welcome Kit,” and then navigate through the specific shared folder (on that server) to access its files:
Copying and Pasting Files and Folders
To copy a file or folder using Drive Explorer, click the checkbox to select it and when the Action Menu Bar appears in blue, click Copy:

The Action Menu Bar will disappear, and the copied file path will show (as seen below). Paste is greyed out because you cannot paste a file to itself. If you navigate to a desired location, Paste will enable and allow you to past the file (you can always click Cancel to start over):

Compressing and Uncompressing Files and Folders
The Action Menu Bar also offers the ability to compress selected files and folders. To compress a file or folder using Drive Explorer, click the checkbox to select it and when the Action Menu Bar appears in blue, click Compress. The selected file or folder will be displayed as shown below and you will need to click Compress (again) to initiate that actual compression process (or click Cancel if you changed your mind):

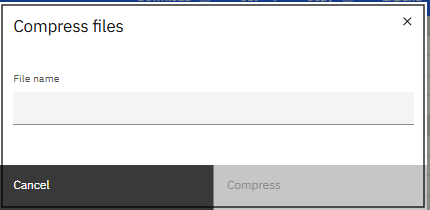
If you click Compress, the Compress files popup appears (see below) where you must enter a name for the file or folder that you want to compress, then click Compress (again):
While the compress is running, you will see the “spinning progress” icon:

Once completed, the notification message below should appear and clicking “Go to folder” will navigate to where the compressed file is located.

If you would like more information on the above or have specific questions about the use of Drive Explorer or the Deprecation of the Rich Tier Desktop, you can always contact the QueBIT team.