
Azure Containers
Just as Virtual Machines or “VMs” virtualize physical machines, Containers virtualize operating systems. Containers are designed to “bundle” what is minimally required (executables, binary code, libraries, and configuration files) to run a tiny microservice or a huge application in any environment. Containers thus provide an easy way to run applications without having to manage an environment and its dependencies. This is commonly referred to as “Containerization”.
What is Containerization?
Containerization (as IBM defines it) is: “…the packaging of software code with just the operating system (OS) libraries and dependencies required to run the code to create a single lightweight executable—called a container—that runs consistently on any infrastructure. More portable and resource-efficient than virtual machines (VMs), containers have become the de facto compute units of modern cloud-native applications…”.
In this post I will to explore just the fundamentals of how to create an Azure Container Registry using the Azure Portal, publish a (Docker) container image to it and then run the container from the registry (using Docker commands within the Azure CLI). The diagram below indicates the key components we’ll use:

Prerequisites
To complete this exercise, you’ll need to have an Azure Cloud subscription, Azure CI installed and configured and Docker running locally.
Creating and Deploying an Azure Container Registry
An Azure Container Registry is a private registry service used for building, storing, and managing container images and related artifacts. There are a number of ways to create an Azure Registry, but in this post, I used the Azure Portal:
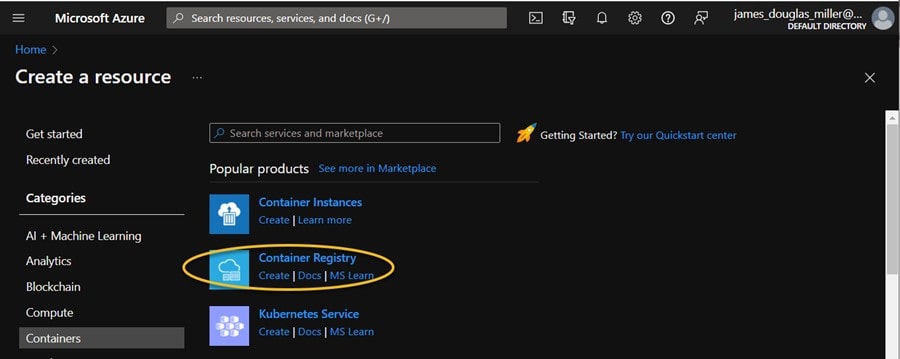
Select Create a resource > Containers > Container Registry:
In the Basics tab, enter values for Resource group and Registry name. I created a new resource group in the East US location named JimsResourceGroup, and for SKU, selected “Basic”. I accepted the default values for the remaining settings, then selected Review + create and finally, Create. Once the Deployment succeeded message appeared, I needed to select the container registry and take note of the registry name (jimsbestcontainerregistry) and the value of the Login server, (jimsbestcontainerregistry.azurecr.io ) which is the “fully qualified name” ending with azurecr.io (very important later, since you need to use these values to push and pull images).
A Container Image
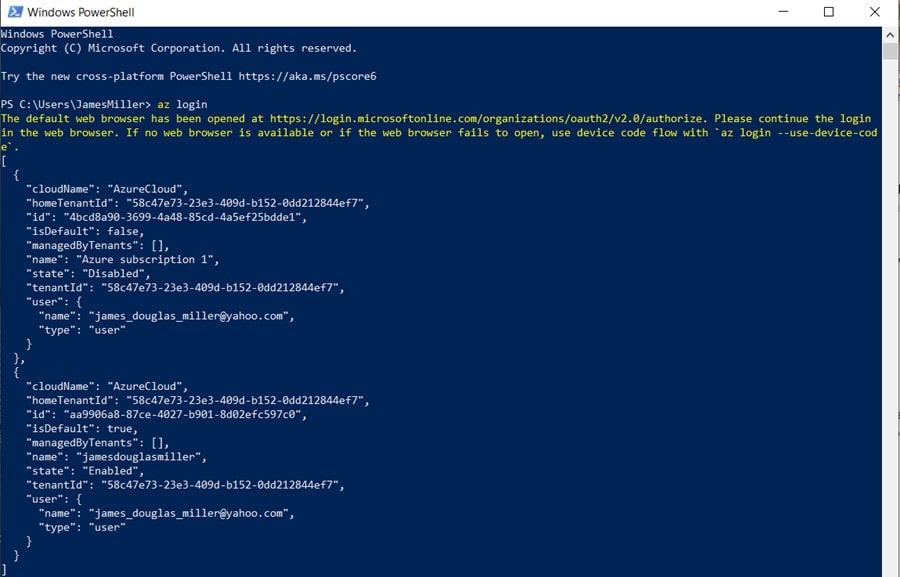
Before pushing and pulling any container images, you must log in to the Azure Container Registry. This is done using the Azure Command-Line Interface (CLI). You use the az login command log in to Azure:
Next, you need to log into the Azure Container Registry:

We see the “Login Succeed” message, so we are ready to move some container images around!
Publish/Deploy to the Azure Container Registry
To push an image to an Azure Container registry, you must first have an image. To keep this exercise simple, I used an existing public image, from the Microsoft Container Registry (MCR) by executing the docker pull command to pull (download) that public image locally.
docker pull mcr.microsoft.com/hello-world

Before you can push an image to the Azure Container Registry, you must “tag” it using the docker tag command and the fully qualified name of the Azure Registry Server: <registry-name>.azurecr.io:
docker tag mcr.microsoft.com/hello-world jimsbestcontainerregistry.azurecr.io/hello-world:v1
Finally, we can use the docker push command to push the image to the Azure Container Registry:
docker push jimsbestcontainerregistry.azurecr.io/hello-world:v1
The output generated is shown below:

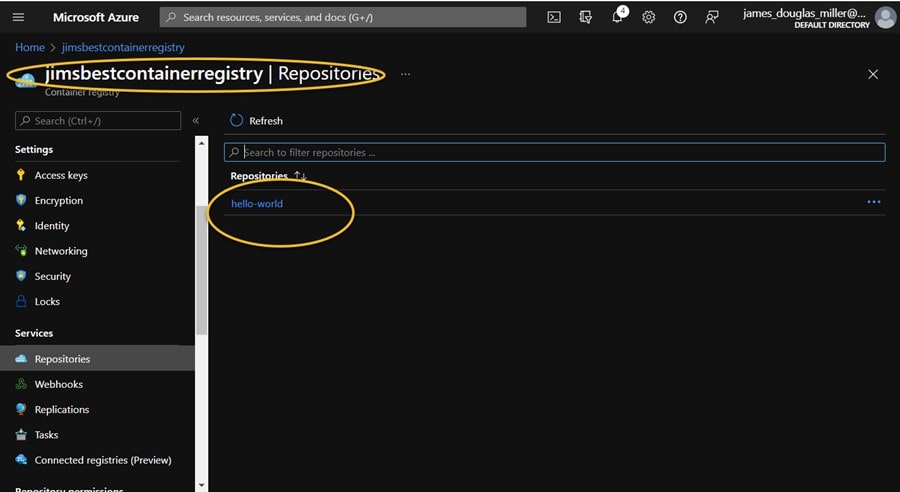
Success! Now, if I go back to the Azure Portal and navigate to our registry, you can select Repositories, then the hello-world repository we just created with docker push:
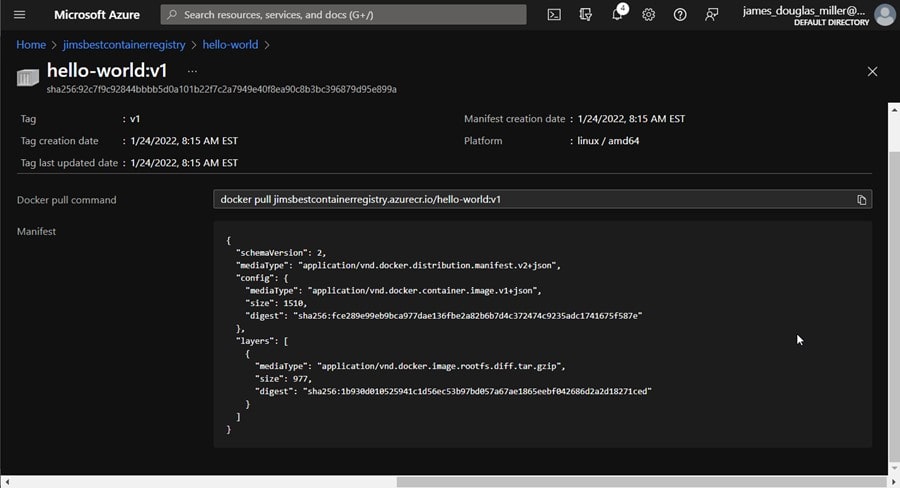
By selecting the hello-world repository, you see the v1-tagged image under Tags; and if you click the v1, you see the following:
Running the Container
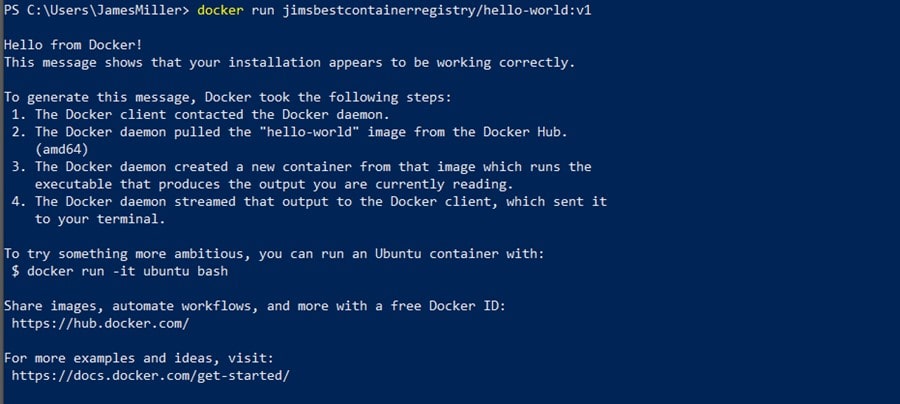
Now, you can pull and run the hello-world:v1 container image from your container registry by using docker run:
docker run jimsbestcontainerregistry.azurecr.io/hello-world:v1
Conclusion
In this post I created an Azure Container Registry with the Azure portal, pushed a container image, and pulled and ran the image from the registry using docker commands and the Azure CLI. It required some setup (specifically running Docker on my MS Windows machine) but was fun and not too challenging overall. Next step will be to build my and use my own container image.