Regardless of whether you are working with IBM Planning Analytics Workspace on cloud or Planning Analytics Workspace Local, an ODBC data source can be established so that you can use it as a process data source and therefore integrate your PA model with your organizations existing infrastructure. In this article I want to demonstrate how to easily: 1) connect to a PostgreSQL data source from IBM Planning Analytics, (2) query data and then (3) write data back to PostgreSQL.
PostgreSQL is a powerful, open-source object-relational database system with 30+ years of active development that has earned it a formidable reputation for reliability, feature robustness, and performance.
PostgreSQL Sample Database
Like many database offerings, PostgreSQL provides a sample database named “dvdrental” which can be downloaded for free here. Once you have downloaded the file, you’ll need to unpack it into its .tar format so that you can load the database into you PostgreSQL server. In an earlier post I provided instructions on how to do that, so I’ll assume that its already been done and move on to the next step.
ODBC
Open Database Connectivity (ODBC) is an open standard Application Programming Interface (API) for accessing a database and is by far the easiest method to connect Planning Analytics to a database). Like most databases, PostgreSQL offers a free ODBC driver that you can download and use to create and configure a DSN.
First you need to install the PostgreSQL drivers:
- Download the latest 64-bit driver installer (zipped msi file) from the psqlodbc download site.
- Unzip the file.
- Run the msi installer and accept the defaults.
Once you have completed the above, you need to create and configure a SYSTEM DSN by opening the ODBC Database Administrator application and clicking on Add...
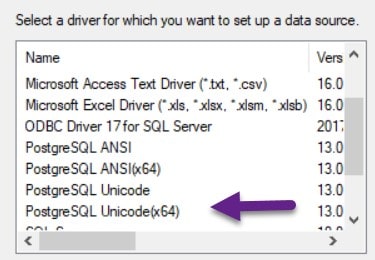
You should see the PostgreSQL drivers in the list. Select the x64 bit version:
Configuring the new DSN
On the ODBC Driver Setup dialog, you’ll need to provide the following information.
- A name for the Data Source. I used “PostgreSQL30”
- Although providing the name of Database is optional, I entered “dvdrental” because that is the name of the sample database running on my PostgreSQL server.
- I just left Server blank (“defaulting” to the localhost).
- For User Name, I entered “postgres”, which is the default username for all PostgreSQL servers (good enough for my proof of concept).
- For Port, I entered the default (5432).
- The Password is the password I set for the default user (postgres).
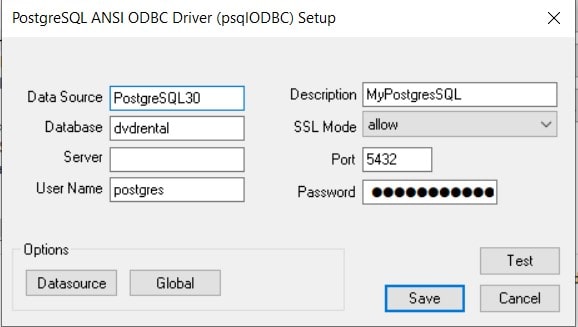
Once you’ve entered the details, click “Test” to make sure everything was entered correctly. If so, click Save (if you do not get a “Succeeded” message when you clicked Test, it most likely is due to a “typo” in one of the values you entered).
Planning Analytics
Now that we have a data source set up for our PostgreSQL database, we can try to move some data back and forth between Planning Analytics and PostgreSQL. First, I will query the dvdrental database and use the query results to update a dimension. A dimension is a list of related items, or “elements”. In this example I want to create a dimension named “Actor” which will be created from the data in the actor table, listing each actor as an element in the dimension.
TurboIntegrator
TurboIntegrator includes a series of functions that let you manipulate cubes, views, dimensions, elements, and other TM1 objects while importing data. You import data with TurboIntegrator by defining a process. A process is the TM1 object that allows you to use settings and scripting to accomplish your goals.
Set up the Data Source
When you create a new TurboIntegrator process, you start at the Data Source “Tab”. The first thing that you need to do is select “ODBC” as the Datasource Type.
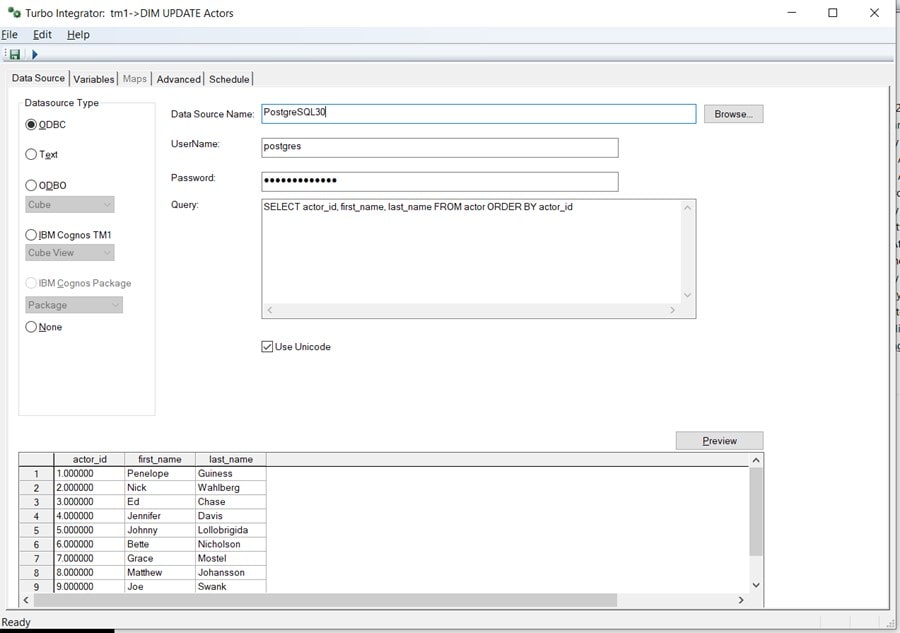
Once you select ODBC, you enter the Name of the ODBC DSN I created earlier (postgresql) and the corresponding “UserName” and “Password”. Next, in the Query textbox, I can write a simple SQL query:
SELECT actor_id, first_name, last_name FROM actor ORDER BY actor_id
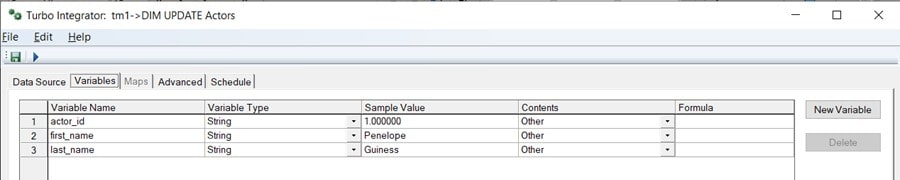
Check the Variables
If you have a successful connection, you can see a preview of the data returned by the query on the Data Source tab and if you then click on the Variables tab, you’ll see that TM1 has listed the fields returned by the query and named them using the table column names. You’ll need to change the Contents selection to “Other” for each of the fields:
Add Script
Now it’s time to write some code or “script”. To start, I add the following script to the Prolog tab of the process:
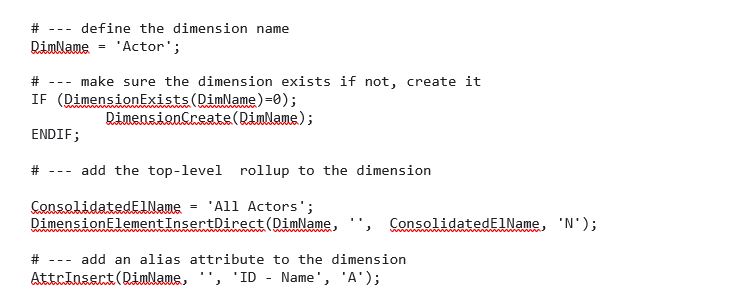
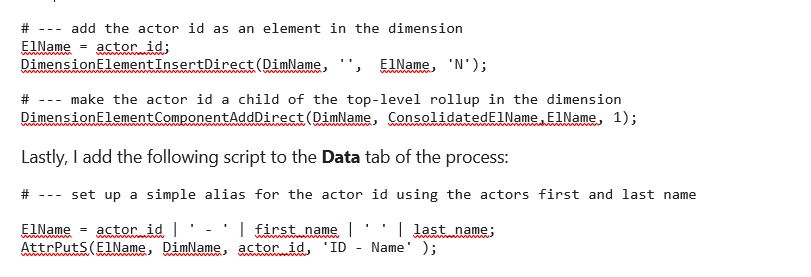
Since I selected ODBC on the Data Source tab, TM1 “enabled” the Metadata and Data tabs (under Advanced) so I can enter the following script in the Metadata tab:
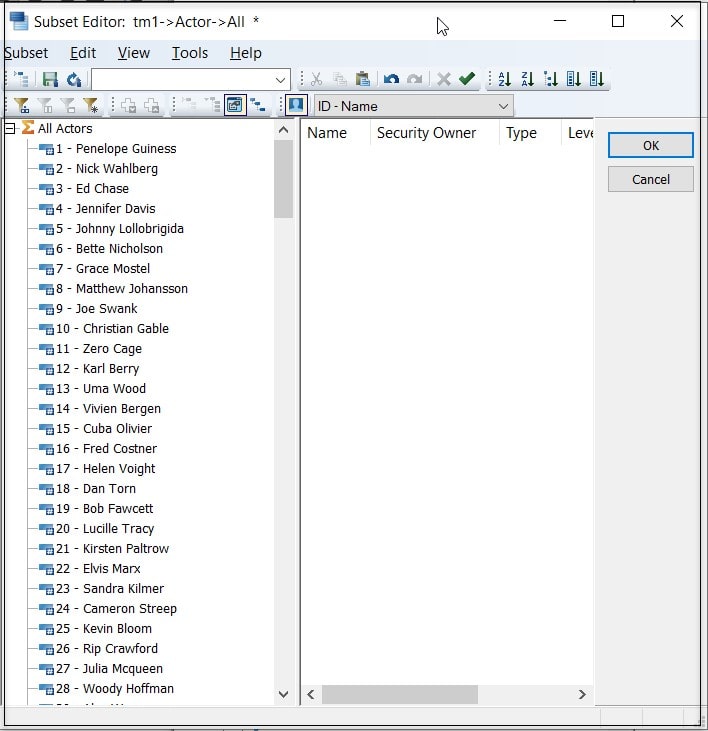
Run The Process and See the Results
Once I run the process, I can see our new “Actor” dimension:
Writing Back
To write data back to PostgreSQL (from Planning Analytics), we can create another TurboIntegrator process.
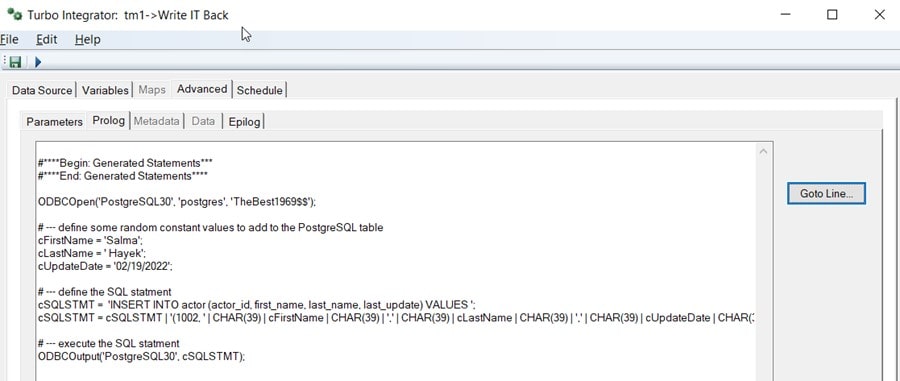
Since this is just an exercise, the new process will be “hard coded” in the Prolog tab to open the ODBC datasource and then send a SQL statement back to PostgreSQL.
To “open the connection” we’ll use the TM1 ODBCOpen function:
ODBCOpen(‘PostgreSQL30’, ‘postgres’, ‘ItsASecrect’);
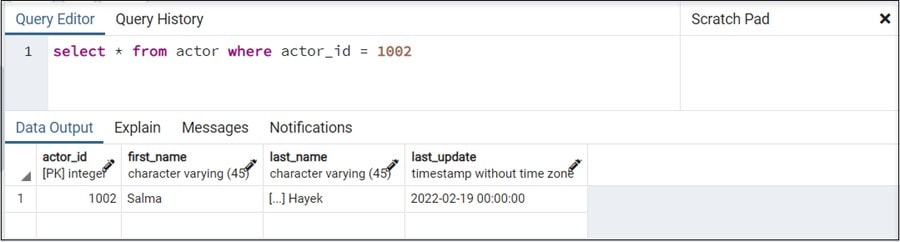
Then, I can use the TM1 ODBCOutput function to execute a SQL statement that will insert a new actor into the actor table:
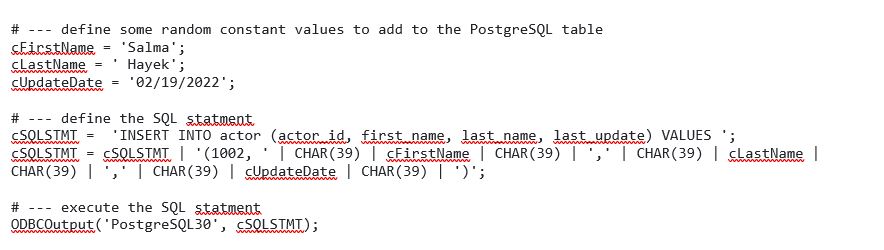
The complete Prolog looks like this:
Now if I run the process and then query the actor table, we should see our new actor: