
When creating a flow in Euclid Studio, you may want to run a single node to perform a single operation or run an entire flow of nodes. This article will review the options you have to run processes within the context of the Euclid Studio application.
Before we get into the how, it’s important to make a distinction between three run options:
Run – the simple Run command will run the specified process synchronously, prompting a load screen to appear until the process has completed. This is ideal for operations that do not take long to run, or when you want to immediately see when it has completed.
Run as Job – this command runs the process asynchronously, kicking off a process in the background. There will be no loading screen, and you’ll need to open the Jobs window to see the run status. This can be found by clicking the ‘Jobs’ button at the top of the screen. This is ideal when a process will take a long time to complete, if you want to continue working on a flow a the process runs, or you’re going to be closing the connection from the client machine to the Euclid Studio server while the process is still running.
Run as Job and Notify – this runs the process the same as Run as Job described above but will send out an email notification if an SMTP server has been configured.
Running a Node
Execution Nodes are the only Nodes which can be run in Euclid Studio. These are always square nodes, either output or export.
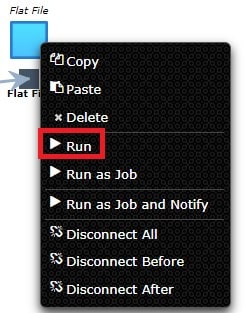
To run an Execution Node:
Select the node by left clicking on it
Right click on it
Select Run, Run as Job, or Run as Job and Notify
Running a Run Profile
Run profiles are used to run multiple steps in a flow in a specific order. If you’ve got a flow with many nodes you’d like to run, you can use a run profile to choose what nodes will run in what order automatically, rather than running each node individually.
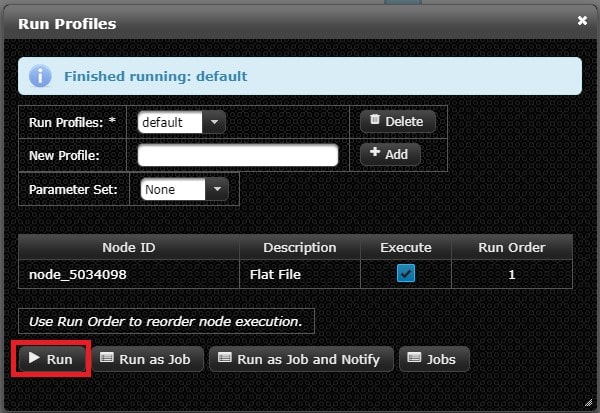
To configure a run profile, click the ‘Run Profiles’ button:
By default, you’ll begin on the ‘default’ run profile. You can edit this, or type in a new profile name and click Add to create a new profile. (these can be switched between by using the Run Profiles dropdown)
Select/unselect any nodes you’d like to be run using the Execute checkboxes.
Set the Run Order – the flow will run from 1 to n. If nodes have the same number, they will be run in parallel.
Click one of the three run options at the bottom of the screen
Closing the window will save the profile.
To configure SMTP email notifications:
Open the SMTP settings menu by going to the Server menu -> SMTP Settings…
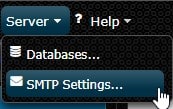
Update the SMTP settings and click “Test Settings” option to ensure they work:

Close the SMTP settings