
In this post I want to demonstrate how to create and start a Docker container using a Postgres image to run a PostgreSQL database server in a Docker container so that I can do some development in my local environment.
Docker
Assuming Docker is running, the first step is to create a container running PostgreSQL. To do that, I open a MS Windows PowerShell window and type the following command:
— Create the PostgreSQL Docker Container
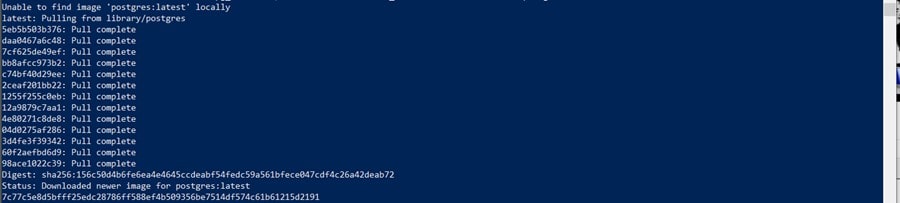
docker run –name pg_dbeavers -p 5439:5432 -e POSTGRES_PASSWORD=TheBest1969 -d postgres:latest
I am naming my container “pg_dbeavers” and will be using port 5439 to communicate with it (5432 is the default port that PostgreSQL uses). I’ve also set a password (TheBest1969) and requested the latest postgres image. Since Docker didn’t find a PostgreSQL image in my local environment, the latest image is downloaded and used to create the new container. Once this is done, any other containers I create using this image the download will not be necessary.
Once the container is created, you can use the following command to see the running containers:
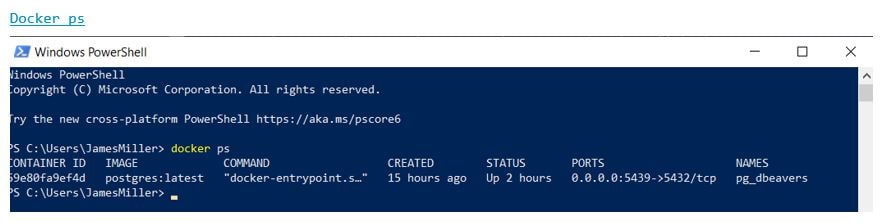
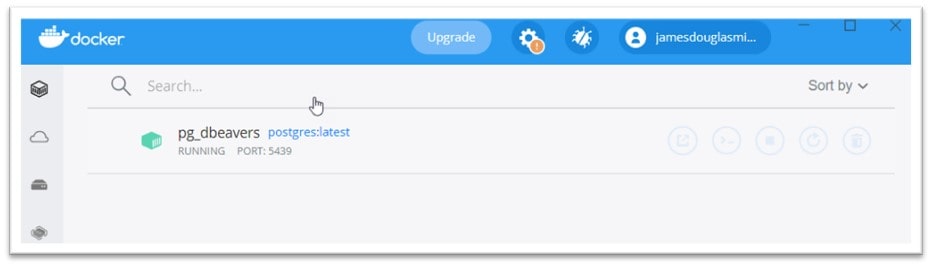
Once its up, you’ll see it in Docker:
To “get things started” in the PostgreSQL server I will create a new database and schema using psql, which is a terminal-based front-end to PostgreSQL. To accomplish this, I need to execute the following command in my PowerShell session:

Now I am ready to use psql within my PostgreSQL server. First, I execute a Docker command to see what databases and schemas may already exist in my PostgreSQL server. To see what databases are currently running, I can type l:
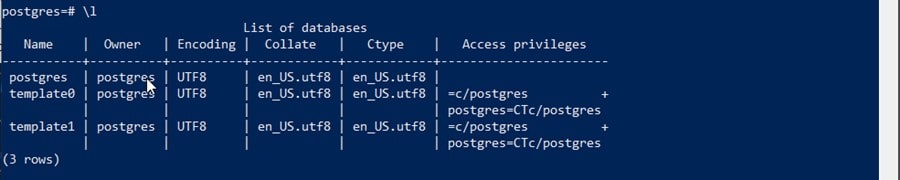
I see that the default database “postgres” is running along with some template databases. I want to create a new database called “motorcycles” so I use the following command:
create database motorcycles;
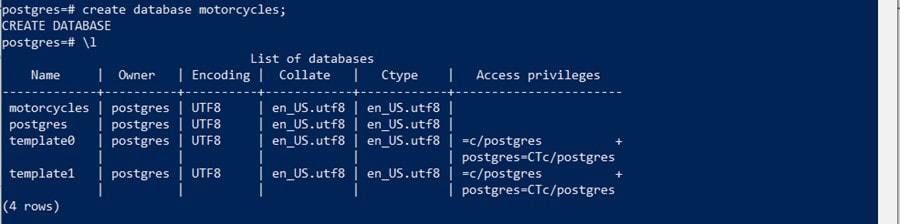
After running that command, I will again use l and now see my new PostgreSQL database.
Schema
In PostgreSQL, a schema is a namespace that contains named database objects such as tables, views, indexes, data types, functions, stored procedures and operators. I want to create a new schema, named “jamesmillers” within my motorcycles database, so first I use c to connect to that database and then the CREATE SCHEMA command to create my schema.

Now that I have created my schema, I want to create a new table to hold some data so I can run this CREATE TABLE command:
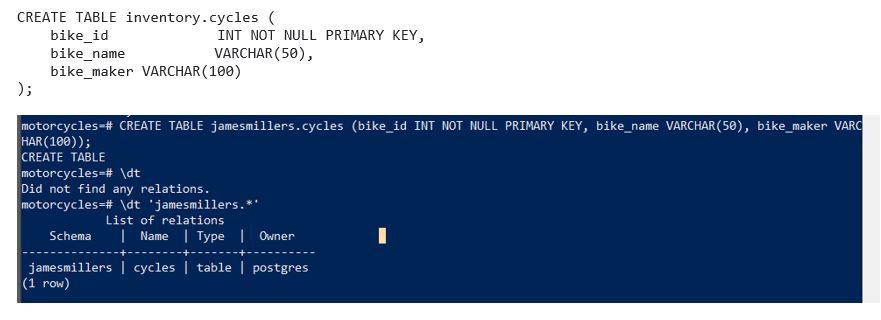
After the new table “cycles” (within the jamesmillers schema) is created, I tried using the dt command to list all of the tables, but I found that dt ‘jamesmillers.*’ is needed to show what tables exist within my specific schema. I can see that my tables “cycles” does in fact exist so next, I want to load some data so I can use the following command:

You can see that the insert successfully inserted 1 row into the table and just to be sure, I executed a query on the table and the result is shown. Success!
DBeaver
PLSQL is fine, but now I want to explore my PostgreSQL database with the graphical user interface named DBeaver. DBeaver is a free multi-platform database tool for developers, database administrators, analysts and all people who need to work with databases. Since I have already downloaded and configured the tool, I can go ahead and create a connection to my server.
Creating the Connection
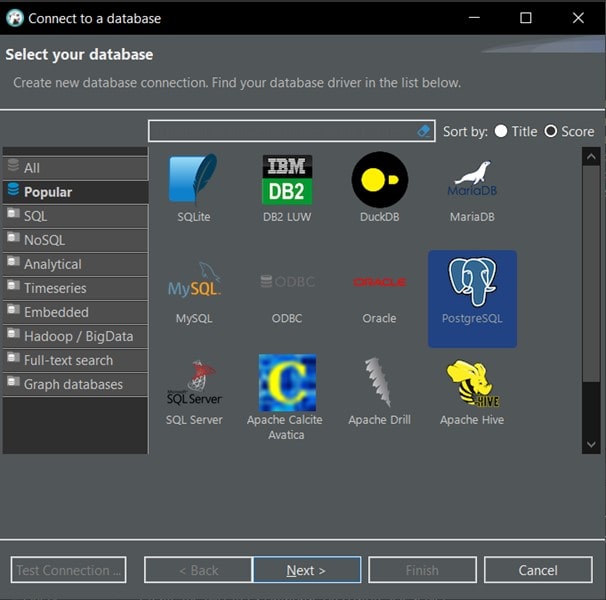
To connect to the PostgreSQL server from DBeaver I clicked in the “New Database Connection” icon and was presented with the “Connect to a database” dialog (shown below) where I selected the PostgreSQL icon and then clicked Next:
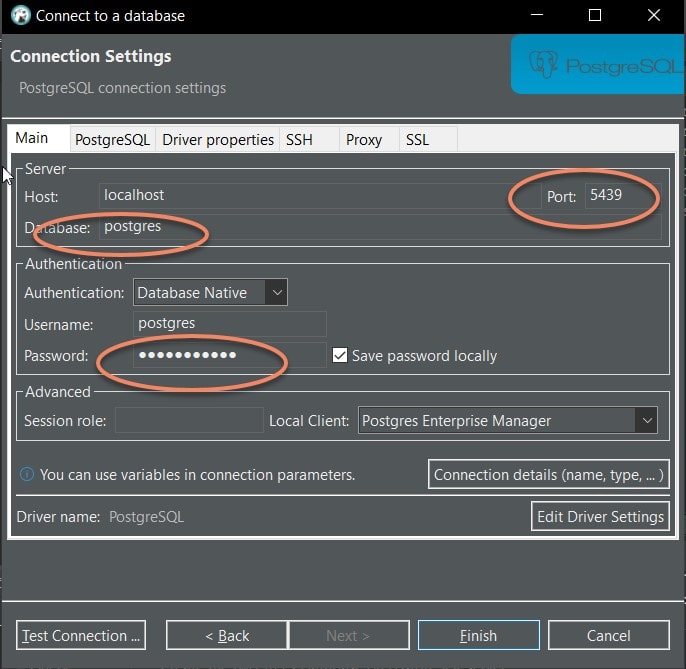
On the next dialog I need to set some specific connection settings. Notice the Host is set to “localhost” since my Docker container is running locally. Next, I set the Port to 5439 (that is the port ID I set when I created and started my Docker image. I left the Database as “postgres” which is the default database and lastly, entered the password (again from the Docker command I executed to start my image):
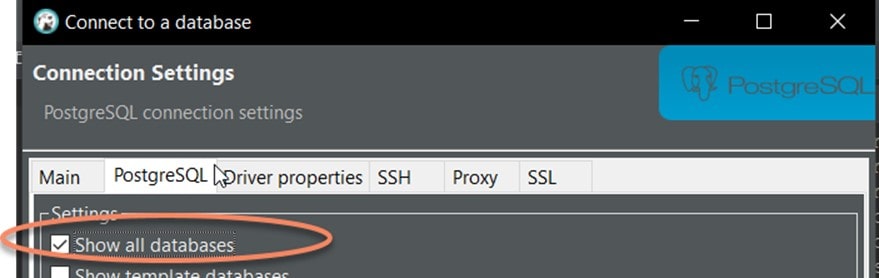
One other step that is required is to click on the tabbed panel, select PostgreSQL , and then check the box Show all databases. This is done so that I will be able to access all database that are running within this server rather than just the database I named on the Main connection dialog.
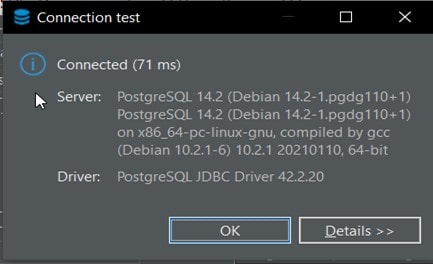
Next, I can test the connection (click Test Connection) and verify that it connects successfully:
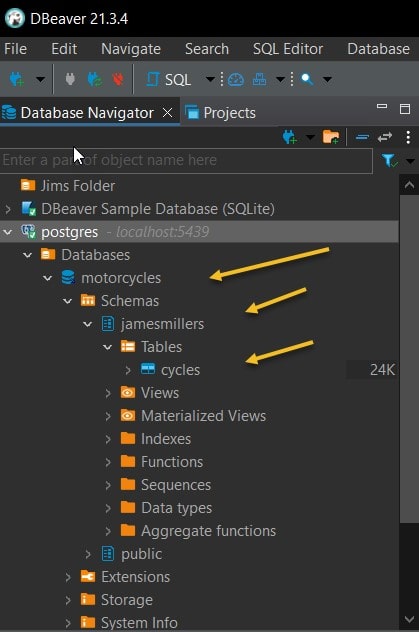
Click OK and then Save to save the new connection and then if we go to the Database Navigator panel in DBeaver, I see my “motorcycles” database, the “jamesmillers” schema and the “cycles” table!
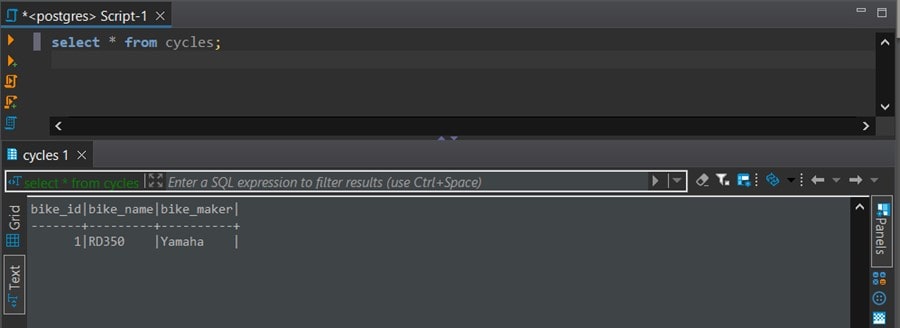
As a last step, I can run a query on the cycles table, and I indeed do see my 1 row of data. Everything worked!
Conclusion
In this post I created and started a Docker container using a Postgres image to run a PostgreSQL database server in the Docker container in my local environment. Then I used plsql to create a new database in the server, a table and loaded some data. Finally, I created a connection to the server in DBeaver and was able to access the new database and table.