
Use an overall footer to add a high-level summary data set to the end of your report.
Unlike a “List Page Header and Footer” which appears at the top or bottom of every page respectively in which list data appears, an “Overall Header and Footer” only appears once at the top or bottom of the list. This type of header and footer is very handy when formatting a report when you only want to show a data set, text item or visualization once on the report.
Business Case:
The City of Boston currently utilizes a “311 System”, which enables city residents or city workers to easily report non-emergency issues. Items such as broken streetlights or graffiti can be reported to the proper city services department via mobile phone applications, online, social media or a phone call.
Earlier, I created a list report which shows the total count of issues and the average days to resolution by neighborhood. For this report, I utilized a List Page Header to show summaries above the detail information. You can reference the Knowledge Base Article “What Can a List Header and Footer Do for you in Cognos Analytics 11+”.
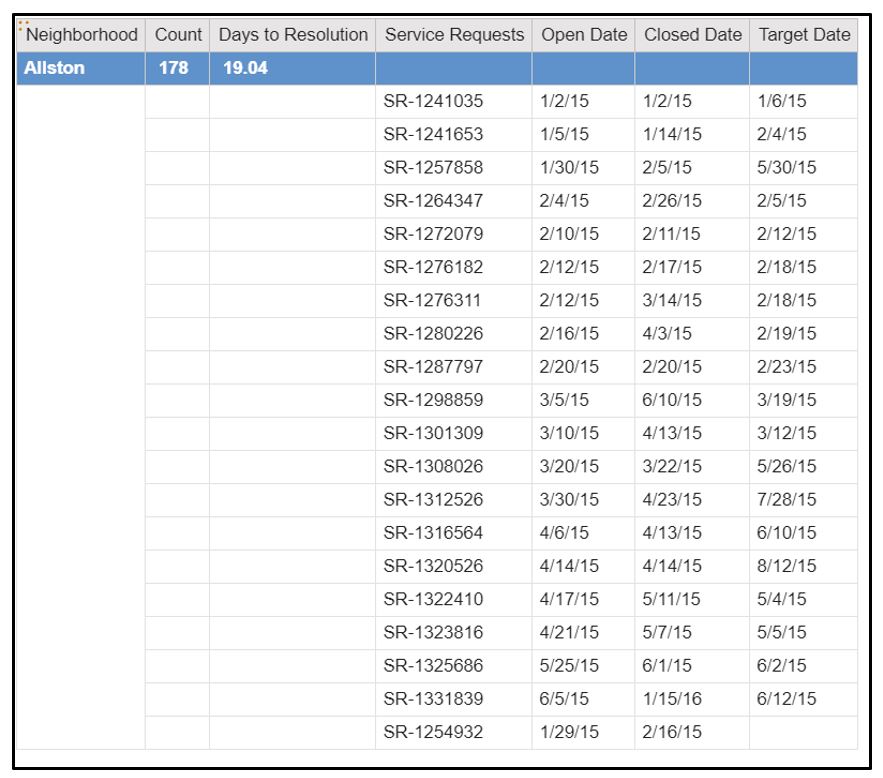
I now want to add an Overall Footer to show a high-level summary at the bottom of the report.
Procedure:
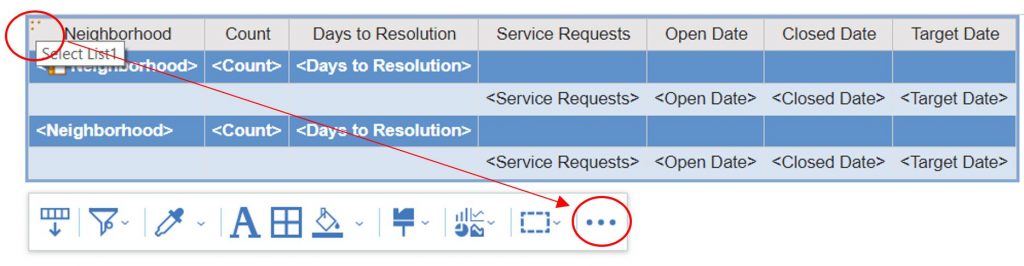
1. On the existing report, click the list report icon above the neighborhood column title and then press the more icon on the report object toolbar.
2. Choose Header & Footer, List headers and footers.
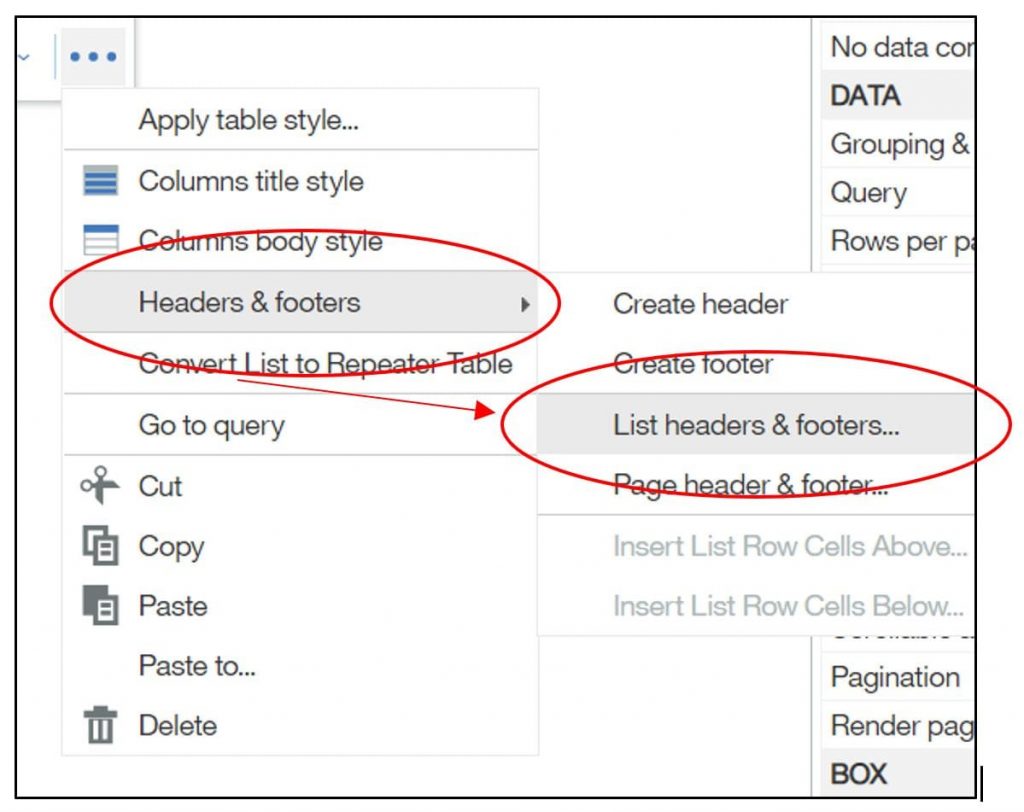
3. Choose Overall Footer.
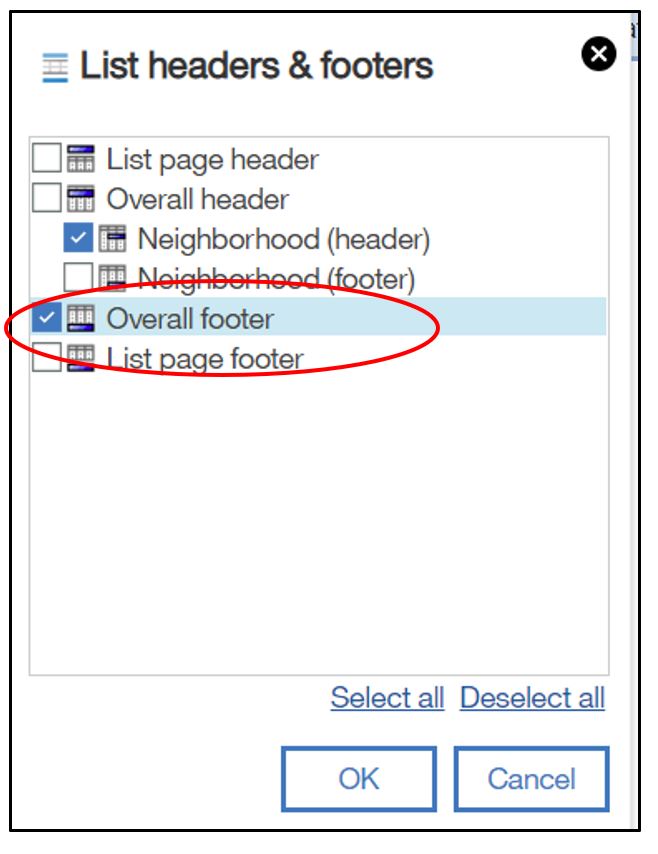
4. You will now see there is an overall header on the report.
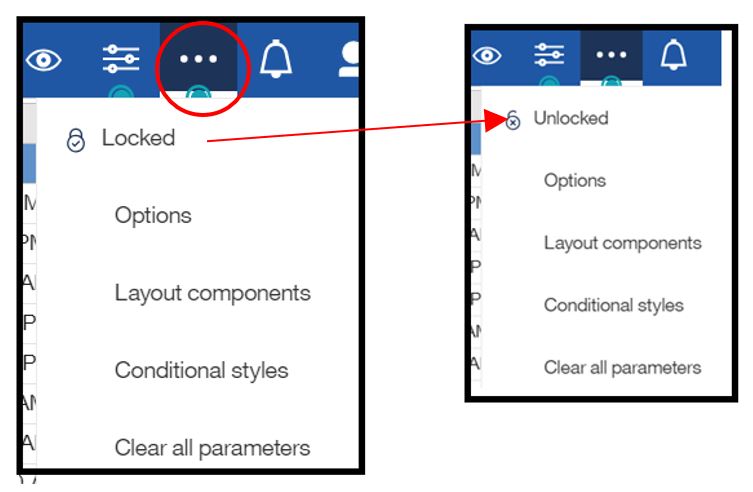
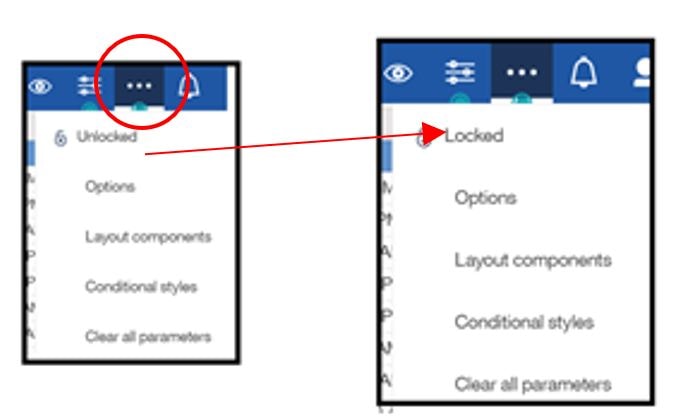
5. Unlock the cells in the report by going to the upper righthand corner of the page and pressing the more icon (*** ). Then click on “Locked” and you will see the option will now show unlocked.
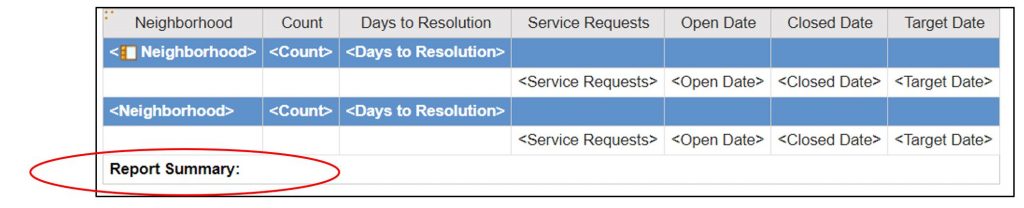
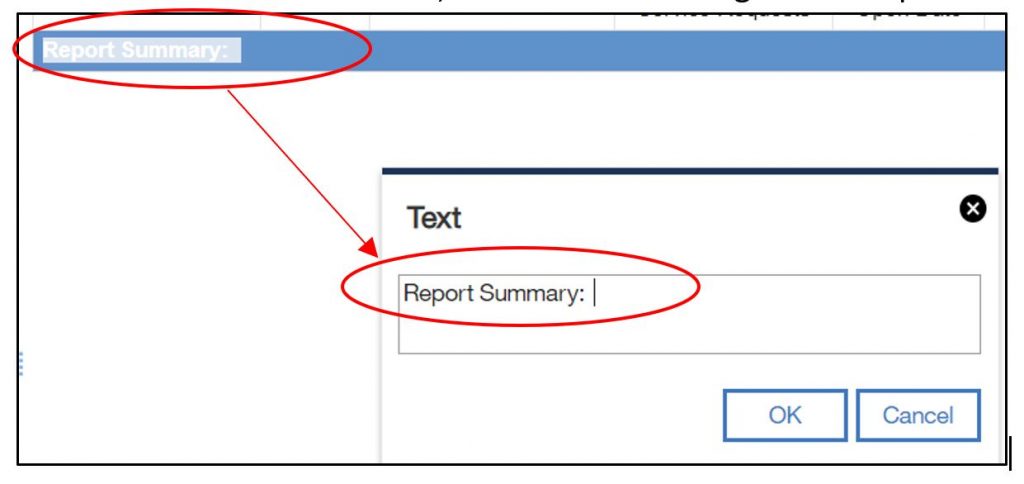
6. Double click on the text item, “Overall” and change it to “Report Summary:”.
7. For formatting purposes, change the background color of the footer to white using the![]() icon and the foreground color of the text item to black by choosing the
icon and the foreground color of the text item to black by choosing the![]() icon on the report object toolbar
icon on the report object toolbar
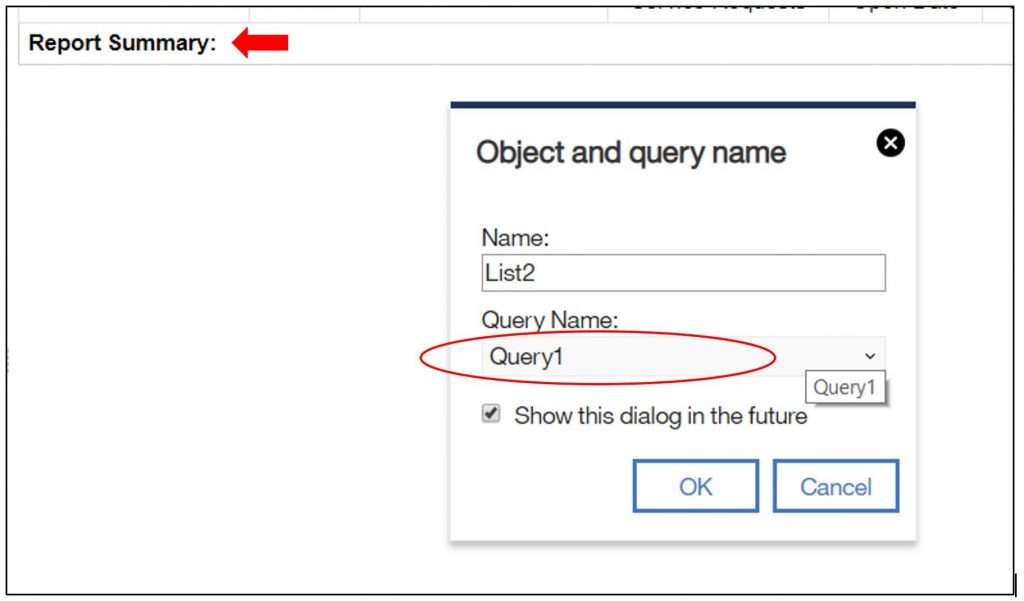
8. From your toolbox options ![]() , drag and drop a List into the footer cell to the right of the Report Summary text item. Important: Ensure you choose Query1 under Query Name, and not the default Query2. You want to ensure you reuse the existing query for this new list as we will be displaying the same data.
, drag and drop a List into the footer cell to the right of the Report Summary text item. Important: Ensure you choose Query1 under Query Name, and not the default Query2. You want to ensure you reuse the existing query for this new list as we will be displaying the same data.
9. To finish the report, make sure you relock the report by going to the upper righthand corner of the page and pressing the more icon (***). Then click on “Unlocked” and you will see the option will now show Locked.
10. Now drag and drop Neighborhood and Count to the new list. Again, ensure you are using the data items from Query 1.
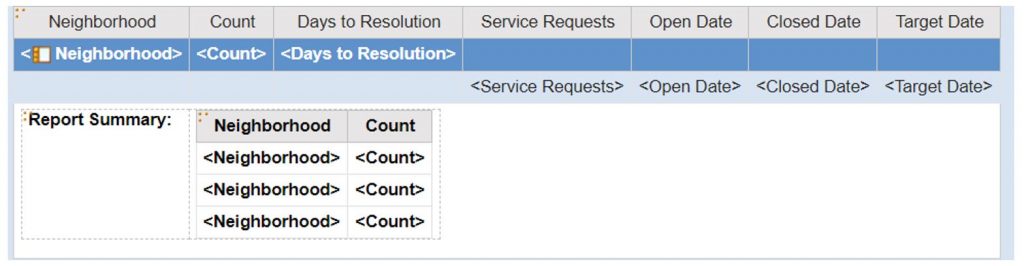
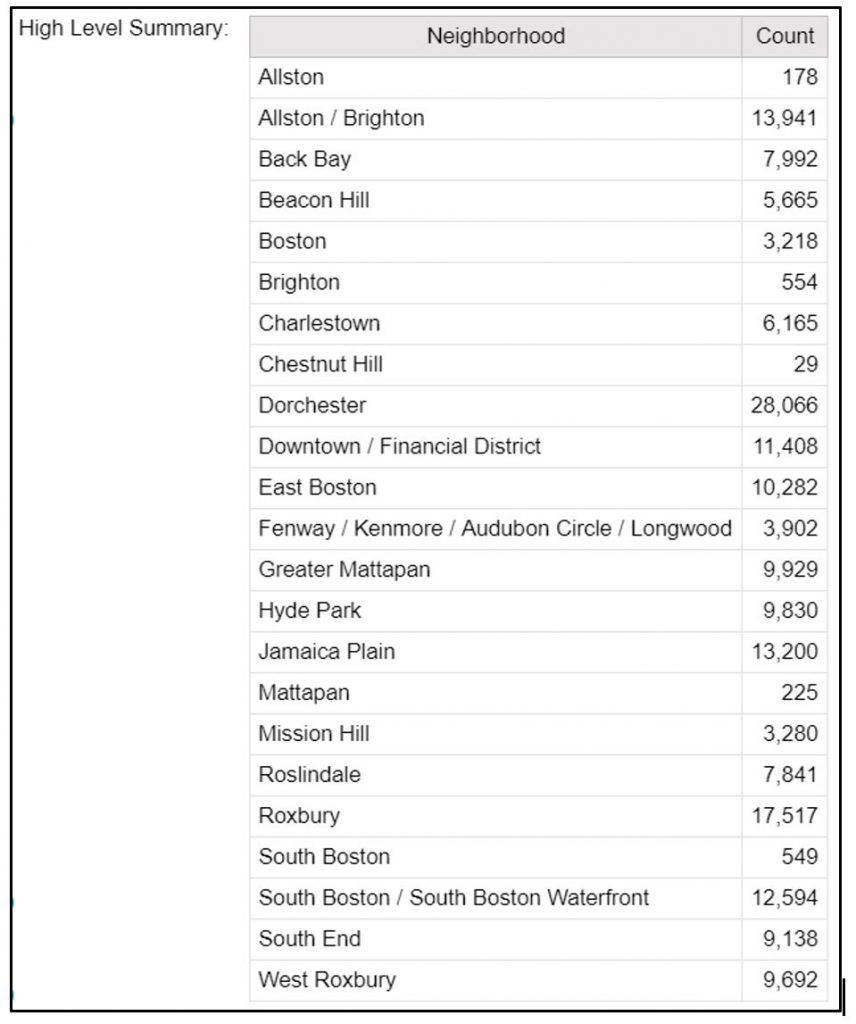
11. When you run the report, you now have a high-level summary by neighborhood at the foot of the report.